Realistic Drawing Guide
Updated: 01 May 2025
Pencil drawing is monochromatic. It has a single hue (gray), but with different brightness values (from very light gray, to very dark gray).
To get realistic results when drawing with pencils, start by drawing the form accurately. Then, brightness values are the key. Meaning, how dark or light each area is. In addition, pay attention to edges and transitions.
While there are many factors when it comes to drawing realism, here I focus on the most important ones.
The 4 key factors for realistic drawing are:
Note:
At the end of this tutorial, I've added some practical drawing tips.
Precision Drawing
Each object or figure has distinct characteristics and a unique form. Therefore, in order to produce a realistic result, the craft of drawing must be precise.
To draw in an accurate way, you need to understand what you are looking at and to draw what you see and NOT what you know.
Foreshortening:
When drawing in perspective (a set of guidelines for drawing realistically), objects are subject to foreshortening.
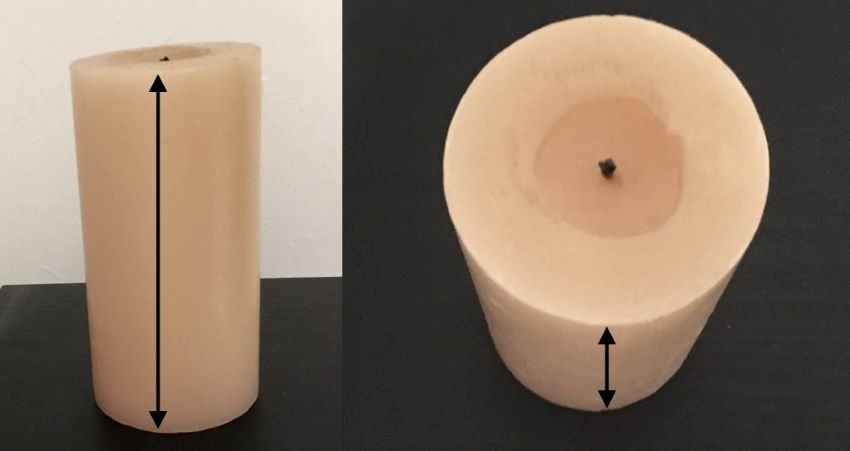
In the following example, you know that the top part of a candle is round (circle), but when you draw what you see (when drawing a side view), the top part of the candle is actually elliptical.
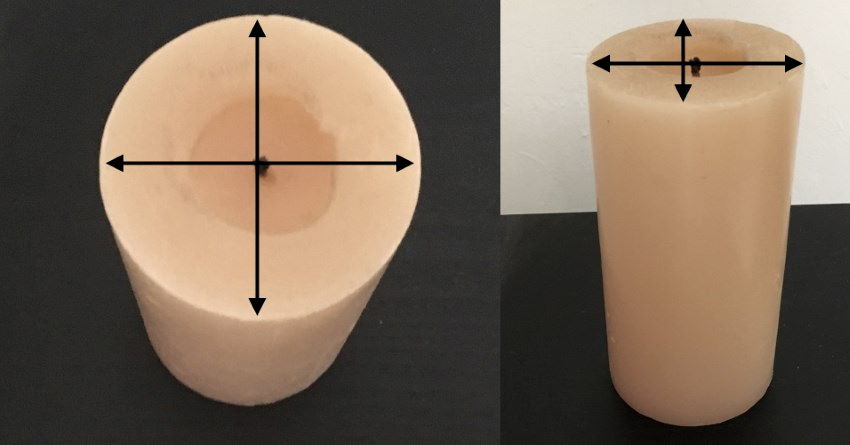
Opposite phenomenon occurs when looking from above. The candle's long cylindrical body becomes shorter due to foreshortening.
Explanation:
In perspective, objects that are in front of the observer look smaller as they are farther away.
Because they are in front of the observer, they keep the ratio between width and height, meaning there is no distortion; the object looks the same, only smaller.
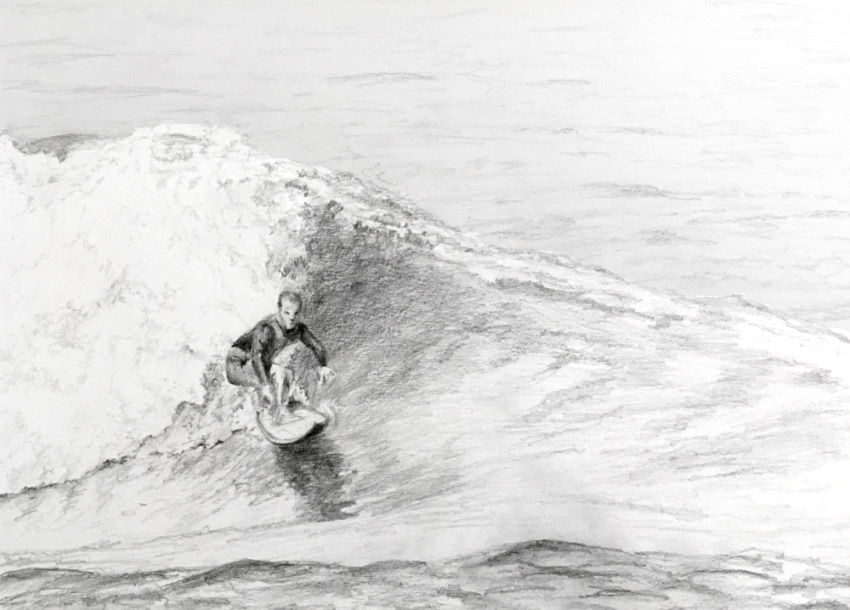
On the other hand, objects or surfaces along the line of sight are distorted (meaning, foreshortened).
The reason is the observer's angle of sight. The more a surface is in the direction of your sight, the shorter it is.
In the next example, see how the surfboard is foreshortened when facing you.
To get a deeper understanding of foreshortening, read my guide on how to draw objects from imagination; there you can learn how to draw basic shapes, such as a cylinder, correctly, as in the following examples.
How to draw accurately:
Drawing is done in a two-dimensional way on flat paper. Disregard the third dimension, which is depth, and look at objects in a 2D way: width, height, and angles.
Use your pencil to see the angle of any line you choose to draw.
Pay attention:
Your drawing paper is flat, so when measuring angles, turn the pencil left or right only! Never forward or backward.
Do the same for complex drawings, like portraits.
In the next example, I paid attention to the angle of the eyes.

If you struggle drawing accurately, read my guide on how to draw accurately from observation.
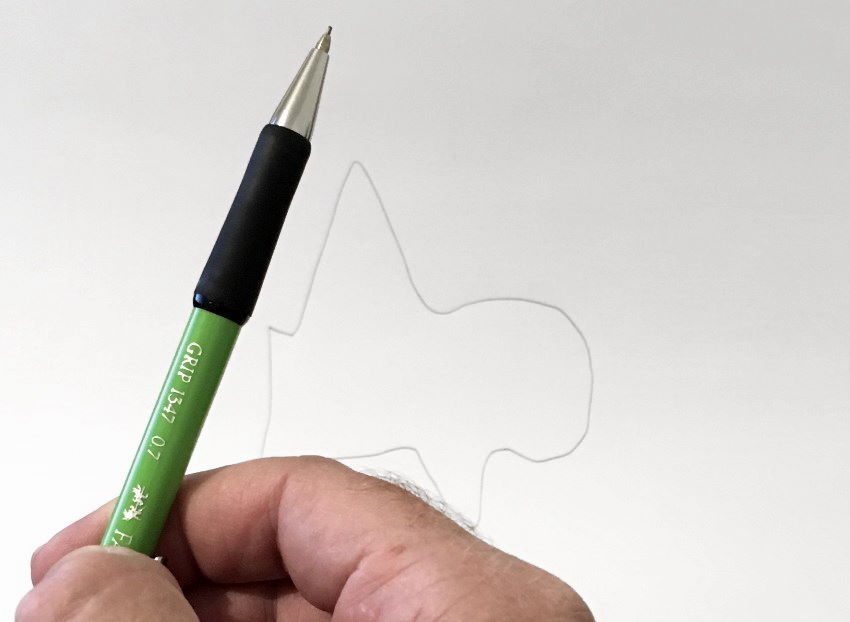
Tip:
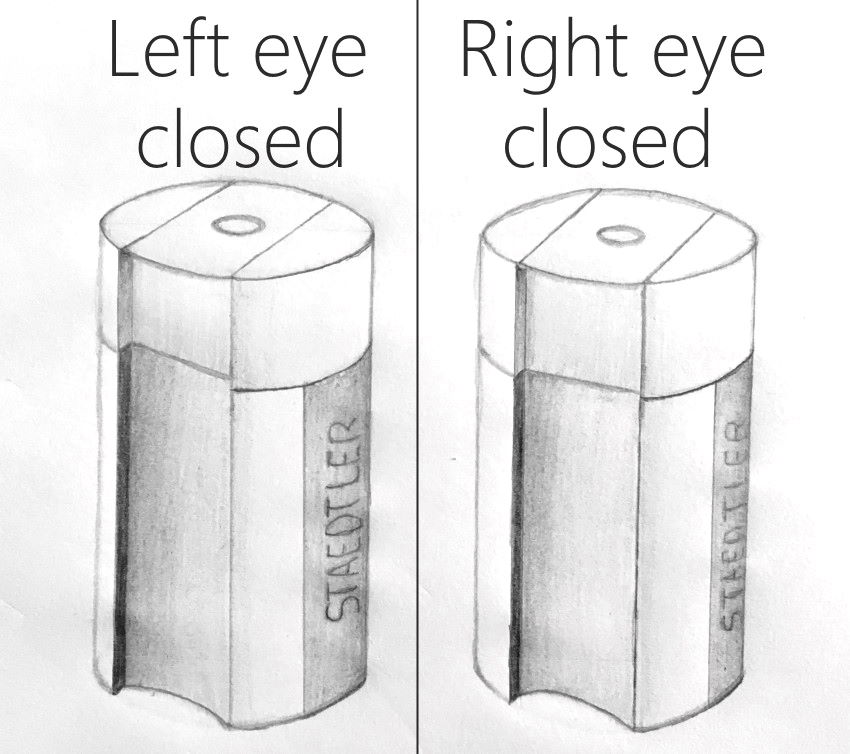
When two people look at an object from a different angle, they draw it differently.
The same happens with your eyes. Each eye looks at an object from a different angle.
To draw accurately, close one eye when you are using a pencil to measure dimensions and angles.
Look at some coloring pages on your screen and try to reproduce them.
Drawing the form (structure) accurately is the most important part of realistic drawing.
Remember:
Learning to draw accurately from observation is crucial for drawing realism.
After you master drawing anything in proportion, you can deal with the other factors of drawing realism.
Understanding brightness values is essential, and I will cover it next.
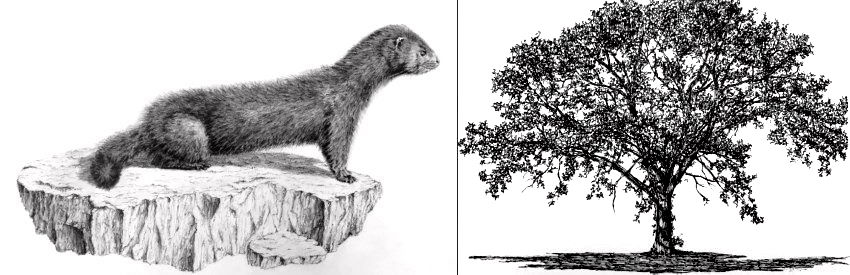
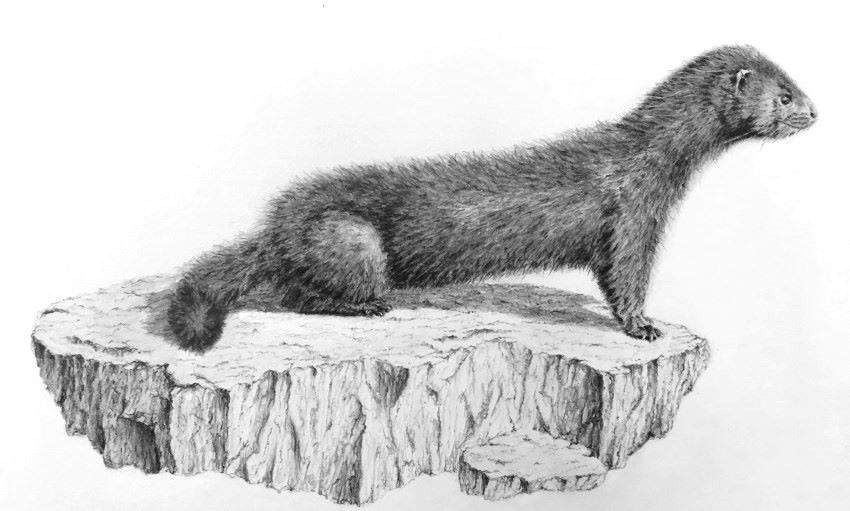 Realistic pencil drawing of a mink
Brightness Values
What are brightness values?
Brightness values or values are how light or dark any area of the drawing is.
Brightness values play a crucial role in creating the illusion of depth and three-dimensional forms on a two-dimensional surface.
What is pencil drawing?
Pencil drawing, at its most basic form, is putting graphite particles on paper.
To do that, we use pencils.
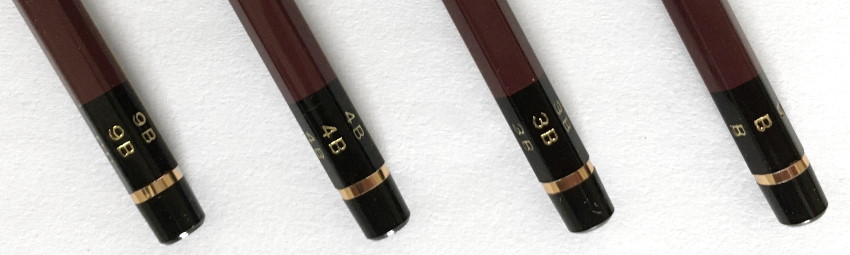
Pencils come in different hardness levels. Hard pencils only put a little amount of graphite particles on a paper, resulting in a lighter/brighter value (H levels for hardness).

On the other hand, soft pencils put a big amount of graphite on a paper, which results in a darker value (B levels for blackness).
How to use a pencil?
For any type of pencil, the amount of pressure applied while drawing determines the brightness value. More pressure creates a darker value, and less pressure creates a lighter value.
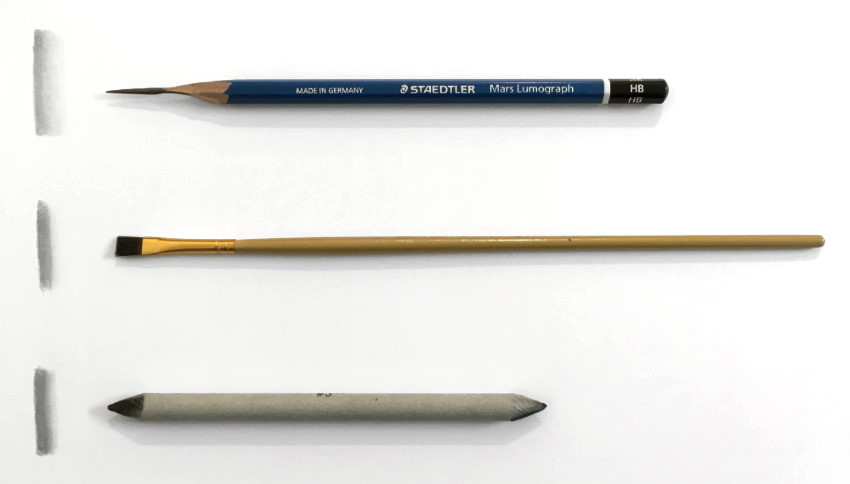
I recommend using a number of drawing pencils with different darkness levels for different brightness values.
Sharp pencils are suitable for small details. For smooth transitions, sometimes it is useful to use non-sharp pencils.
How to practice?
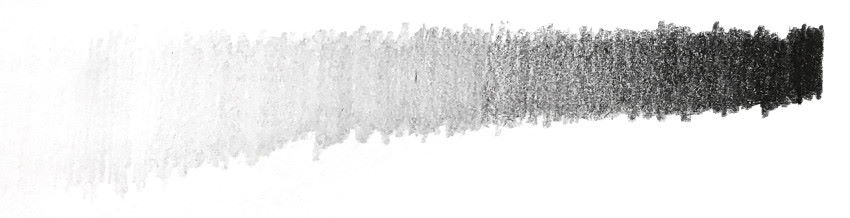
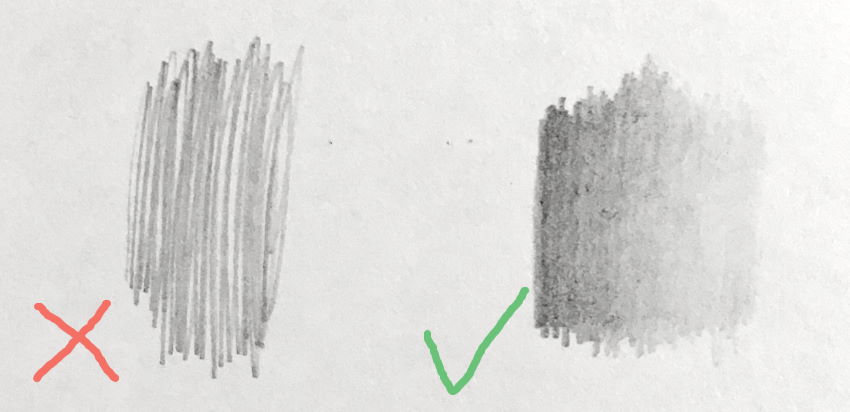
Know your tools! Practice drawing gradual transitions in brightness values for each pencil grade you use.
That will help you determine how much pressure to use for each different brightness value and how dark or light you can go with each pencil grade.

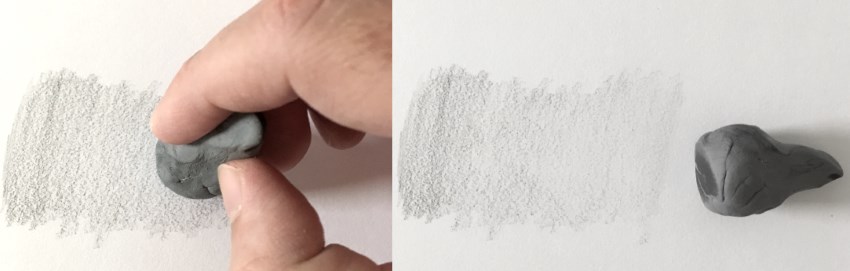
You can alter brightness values by using a kneaded eraser.
By gently tapping on a drawing surface, the kneaded eraser collects graphite particles, thus creating a lighter value.
How to determine brightness values?
Observation is the key to identifying the brightness values of any object or image.
Examine each part of the drawing to see if it is darker or lighter than the object you are trying to draw, and then correct it accordingly.
In addition, it is important to pay attention to the range and variety between the darkest areas and the brightest:
- If the range or difference between dark and light areas is small, the drawing may appear flat.
- When the range between dark and bright areas is large, the drawing is noticeable and has volume and depth.
In other words, there should be enough contrast between dark and bright parts of the drawing in order for it to look rich and intense.
Tip:
Sometimes when looking at a complex object, especially with colors (or texture), it is hard to see how dark or light each area is.
To solve this problem, squint while observing in order to lose focus.
When both eyes are partly closed, you can focus on brightness values and disregard other distractions.
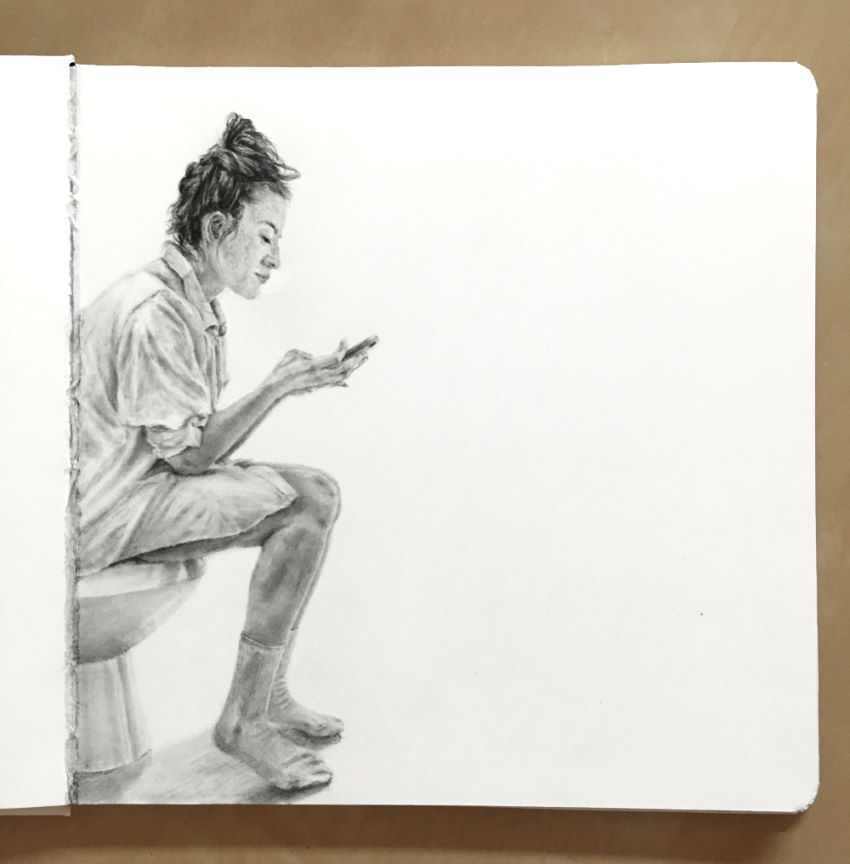
Arguably, the hardest form of drawing is portraiture.
It is critical to be accurate both in drawing the form and in brightness values.
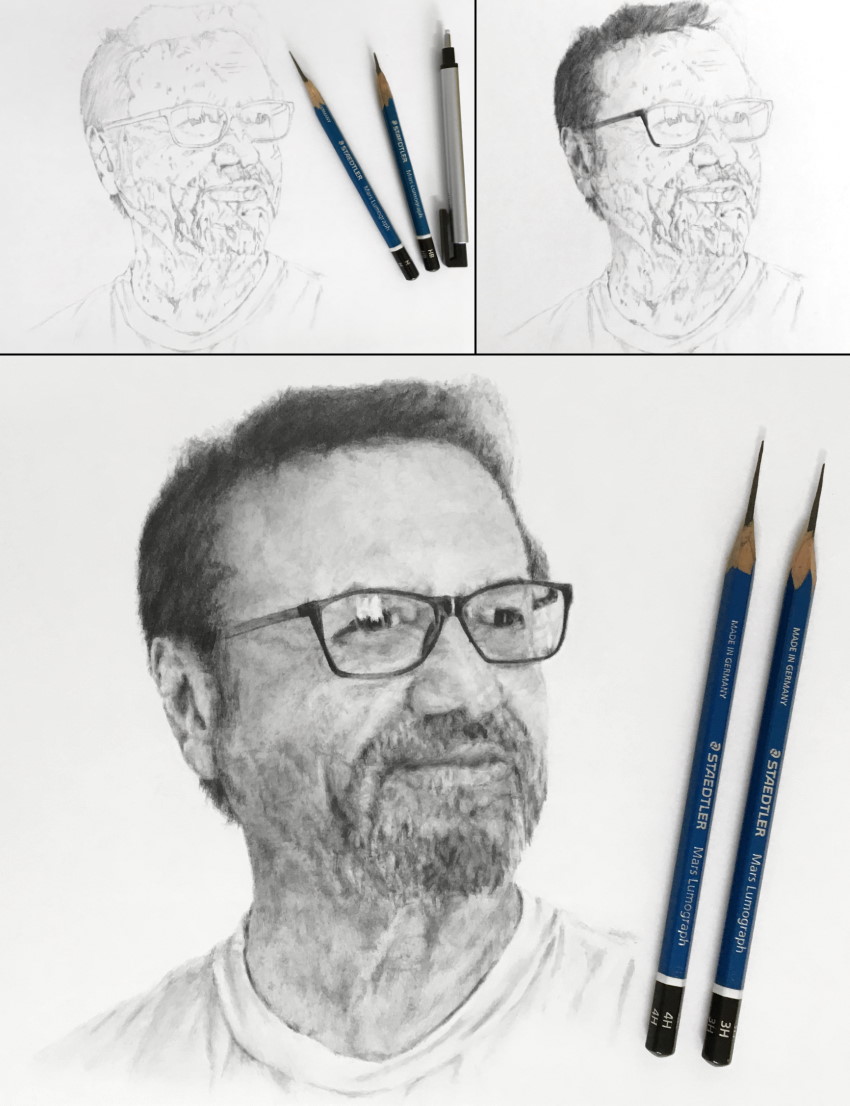
 Portrait pencil drawing, Alin
For a list of materials that I use for drawing, visit my essential pencil-drawing supply review.
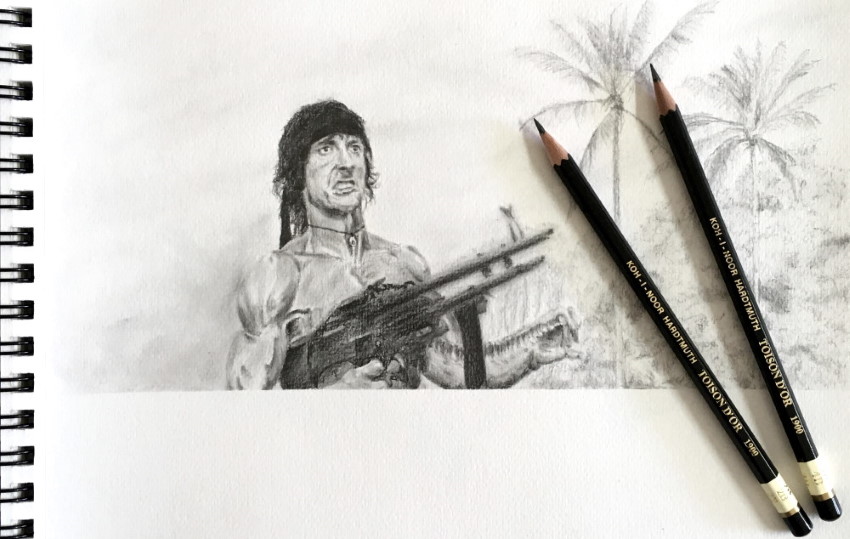
 Sylvester Stallone, Cobra, 1986
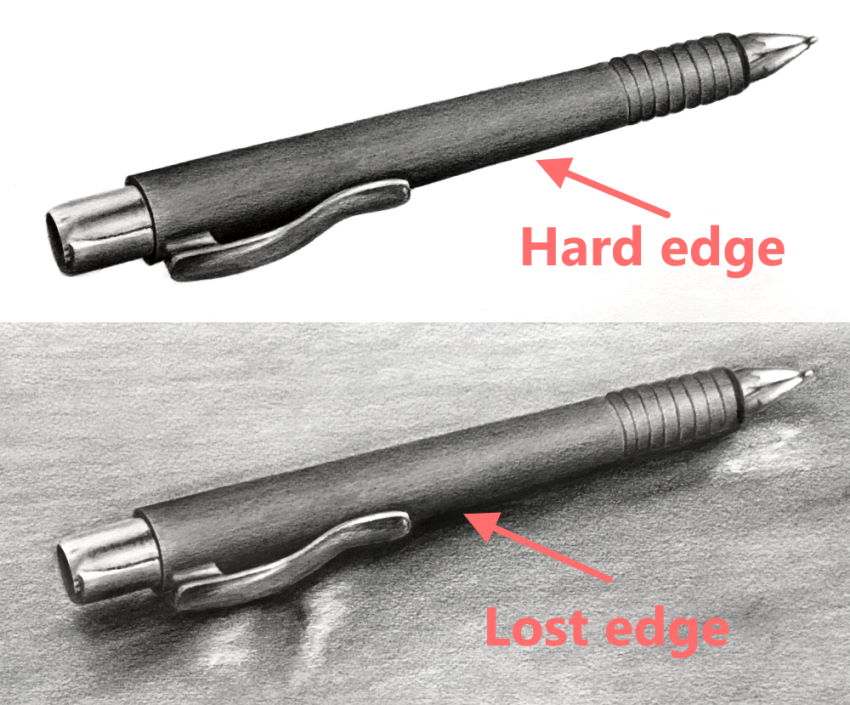
Edges
As opposed to comics drawing that is characterized by contour lines, which surround the figure, in realistic drawing with a pencil (or in any other way), there are no lines at all.
The edge of an object is where its shape or surface ends. It can end in a sharp way or in a soft way, but it is not a line!
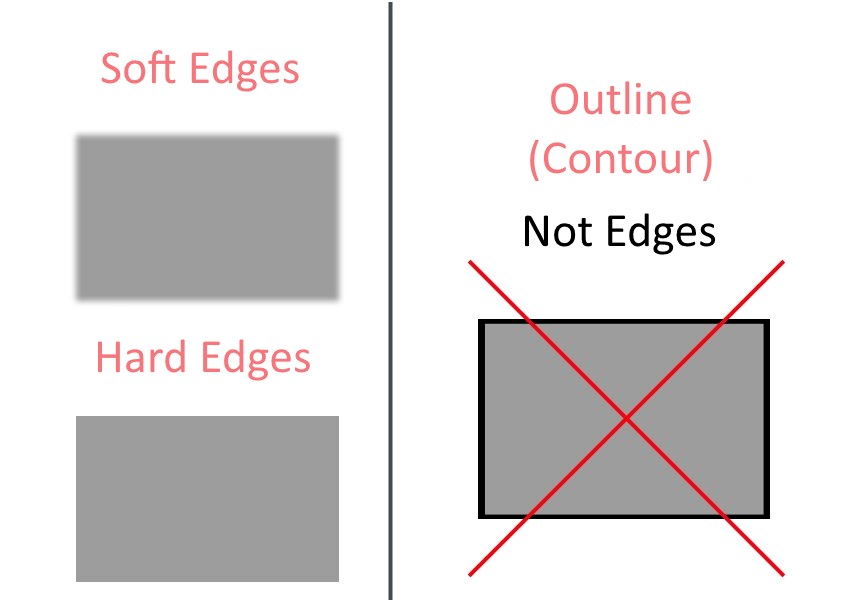 Edges vs. outlines
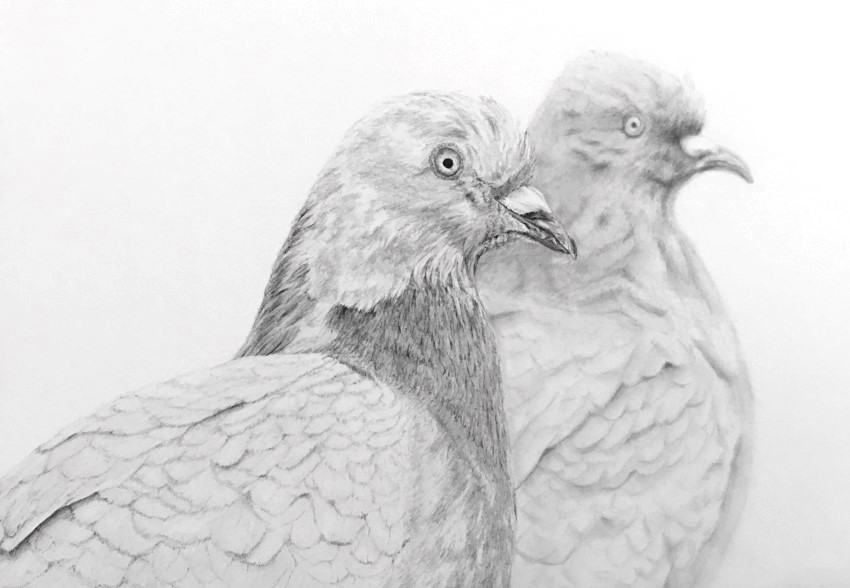
Some objects (like fur, hair, or cloth) have soft edges, while other objects (like rocks, cars, or furniture) have hard edges.
In the next example, examine how the folds in fabric are soft and blurry.
To draw a soft edge is to create a gradual transition (gradient) in brightness values, from dark to light.
Depending on climate conditions and distance, far away objects might have soft edges.
Remember:
Use lines only as guidelines to draw an accurate form. Draw them lightly, so they are easy to erase if needed.
How to draw soft edges:
There are many ways to soften edges (gradient from dark to light), depending on the effect you want to achieve.
Hereby, three recommended ways:
 Methods to draw soft edges
If you are not around your drawing equipment, you can use dry paper (like a paper towel) or cloth to smooth edges.
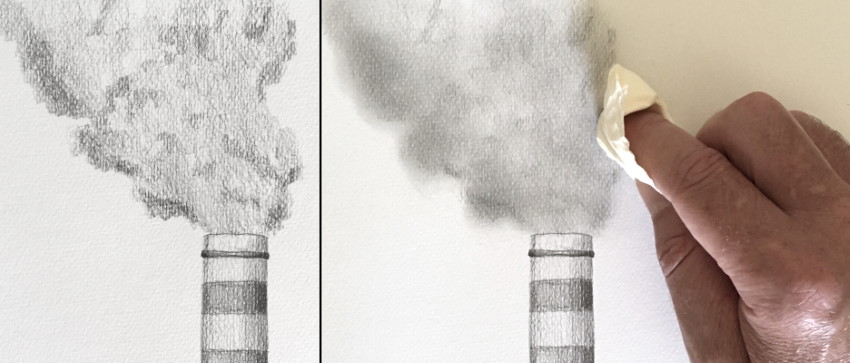 Soft edges with toilet paper
Note:
Try to avoid smudging a pencil drawing using your finger. It can transfer body oils or sweat to the paper sheet.
Using soft edges for far away objects creates a sense of depth.
Pencil drawing example:
 Soft edges for a far object to add depth
Shadows and reflections:
In many cases, shadows and reflections have soft (or less defined) edges.
 Less defined edges for reflections
Lost edges:
Sometimes, the value of two areas is the same.
In most cases, it is safe to draw these areas with the same value without an edge between them.
Cylinder bodies are built from ellipses (foreshortened circles).
To learn how to draw these structures, visit my ellipse drawing guide.
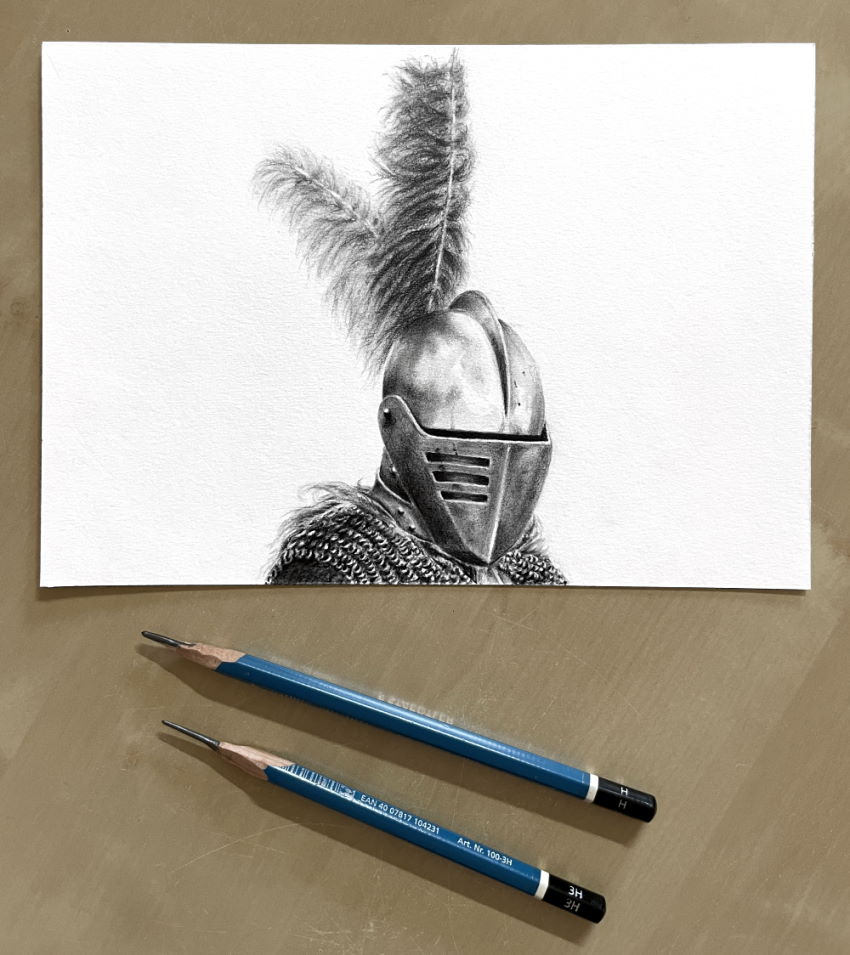
Keep in mind:
Contrast in values (between dark and light) is important for a drawing (or painting) to stand out.
Additionally, contrast between hard and soft edges makes the drawing interesting and with presence.
In the next example, there is contrast between the hard edges of the helmet and the soft edges of the feathers.
Transitions
When drawing with a pencil, it is important to pay attention to brightness values (how dark or light each area is) and edges (how each area or surface ends, either with a soft edge or a hard edge).
In addition, pay attention to transitions.
On a certain surface, areas that are closer to a light source are lighter, and areas farther away from the light source are darker, meaning the surface has a gradual transition in values.
Therefore, look for the brightness values of a particular surface compared to other surfaces, but also the transitions of values within the surface itself.
Pencil drawing example:
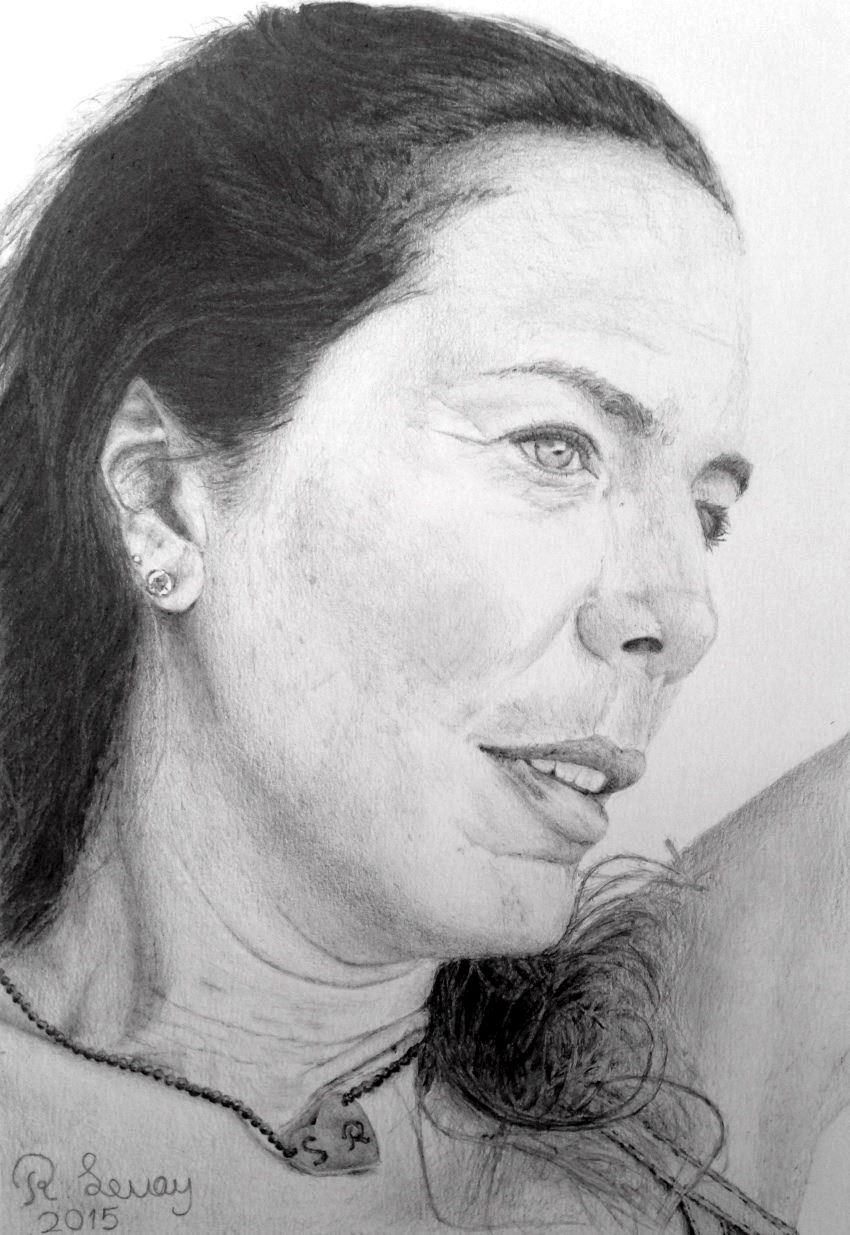 Portrait pencil drawing, Sharon
In the next example, I used transitions in brightness values to draw the folds in the neck area.
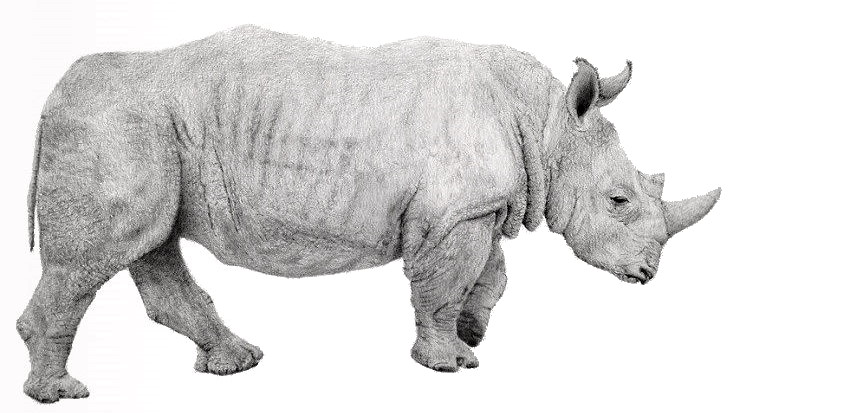 Rhinoceros pencil drawing
Remember:
Every part of each drawing has transitions. An area with no transitions looks flat and unnatural.
How do I draw smooth transitions?
After you draw the form accurately, it has no depth without brightness values.
You can draw smooth transitions with smudging tools, like a blending stump or a synthetic brush.
To get natural results using pencils only, think of your pencil as if it were a brush.
Draw gently, in a continuous way, with no spaces between marks, so not to create lines.
Use light pencils for transitions in light areas (H levels) and dark pencils for transitions in dark areas (B levels).
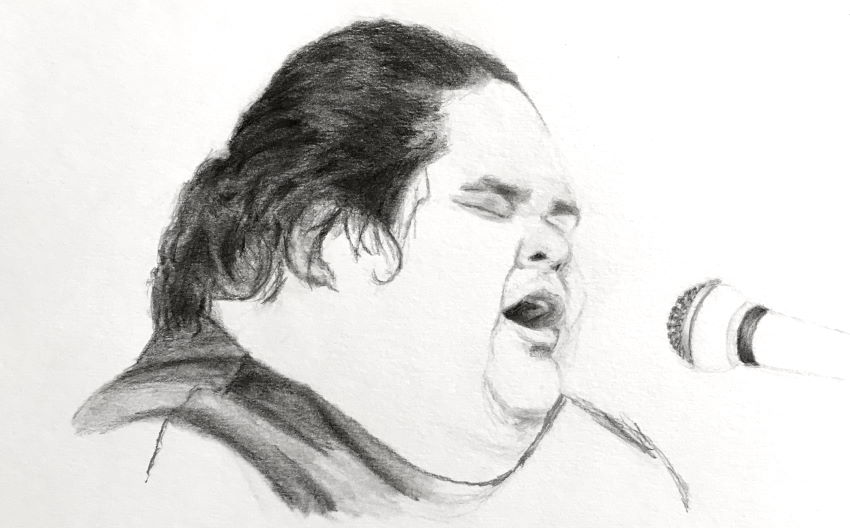
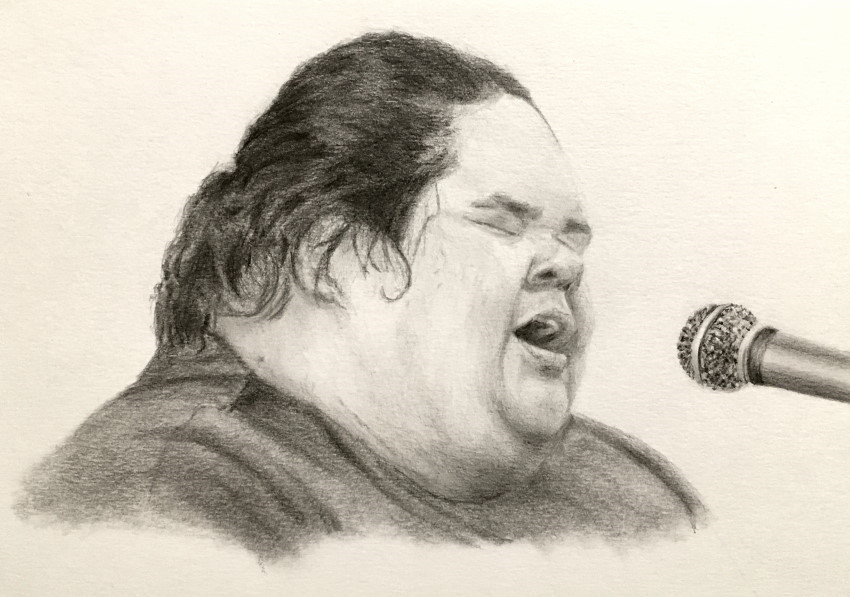 Israel Kamakawiwoʻole (1959-1997)
Drawing Tips
Where to start drawing?
If you are right-handed, start drawing from the upper and gradually move to the lower right.
For left-handed artists, start at the upper right.
In this way, the palm can rest on the blank surface of the drawing paper and not smudge what has already been drawn.
 Drawing from left to right
Where to place the light source?
If you are right-handed, place the lighting (table lamp) on the left side, so your palm does not block the light source.
If you are left-handed, place the lighting on the right side.
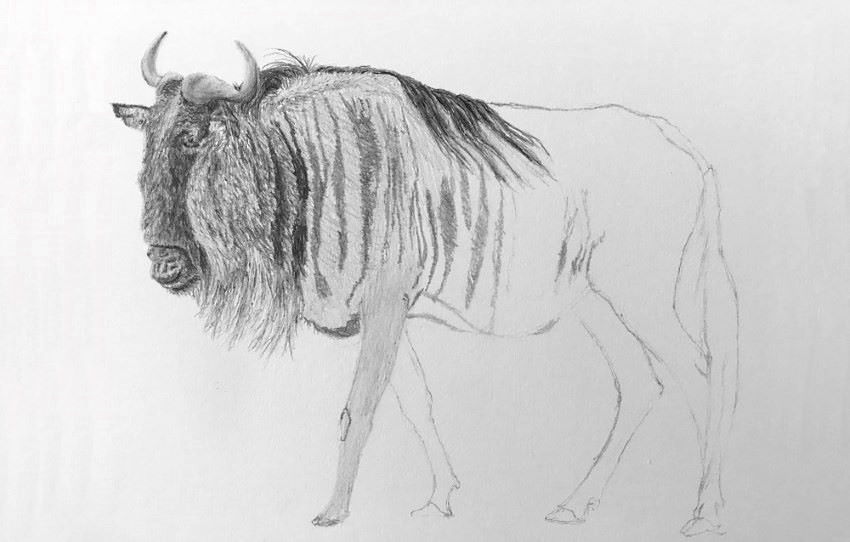
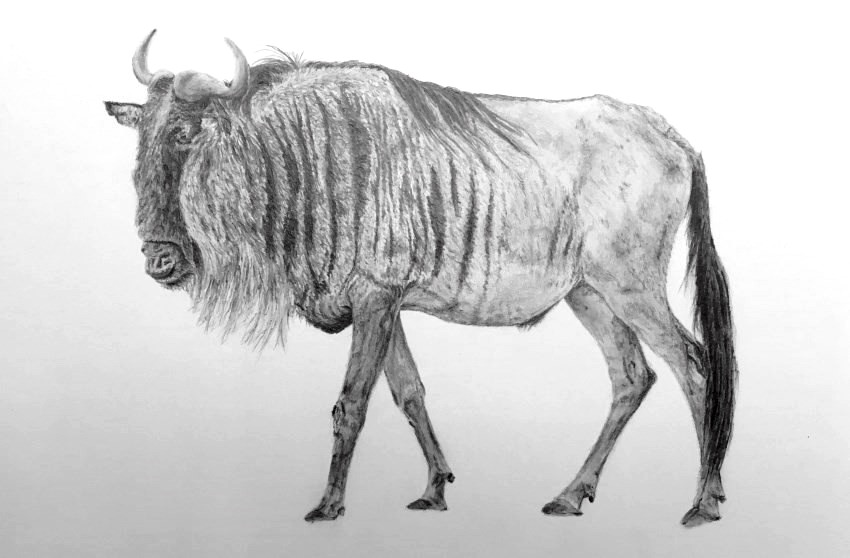 Wildebeest pencil drawing
How to avoid smearing?
Place a blank sheet of paper under the drawing hand to avoid smearing, transfer of body oils, or sweat.
How do I use drawing supplies?
Try not to press hard when drawing, so you do not damage the paper sheet you are drawing on.
Draw as if you are using a paintbrush, softly and gently, to get smooth results without using smoothing tools.
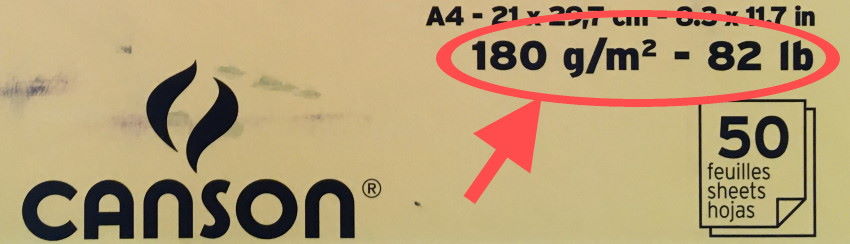
Use thick paper for your artworks; it is more durable. Thin paper sheets are great for practice.
I prefer paper with at least 150 g/m thickness, ideally 180 g/m or more.
Do not lean hard on paper (with any hand) when drawing to avoid dents.
Here is my review for drawing paper brands and types.
Commission drawing process:
I start by drawing the form accurately.
Then I pay attention to the other 3 factors (brightness values, edges, and transitions).
I am right-handed, so I draw from left to right and from top to bottom.
Anatomy Tip:
Eyes are located at the center of the face (between the chin and the top of the hair).
For more tips, check out my fine art painters gallery for exclusive painting tips by professional painters.
Which paper size to use?
Realistic drawing is time-consuming.
Therefore, I do not recommend drawing on a large paper sheet.
Depending on the project, I use these paper sizes: A5 (small), A4 (medium), and A3 (large).
How to draw straight borders?
When only part of the paper is used for drawing, you can border it with masking tape.

When the drawing is ready, remove the masking tape, and you will have a straight border.
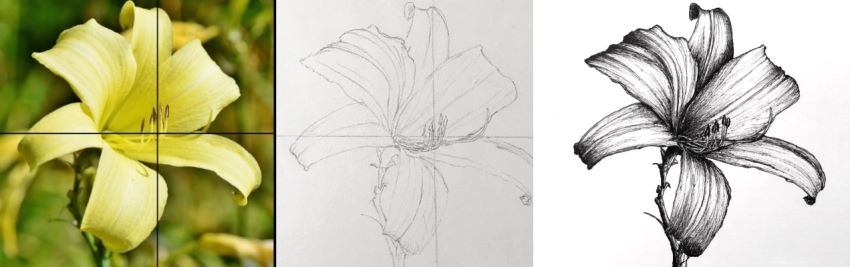
Reference images:
Draw from reference photos with color (not monochromatic photos).
Get used to seeing the correct brightness values while ignoring the color or texture.
Draw from big and quality images. Do not use your phone screen; it is too small.
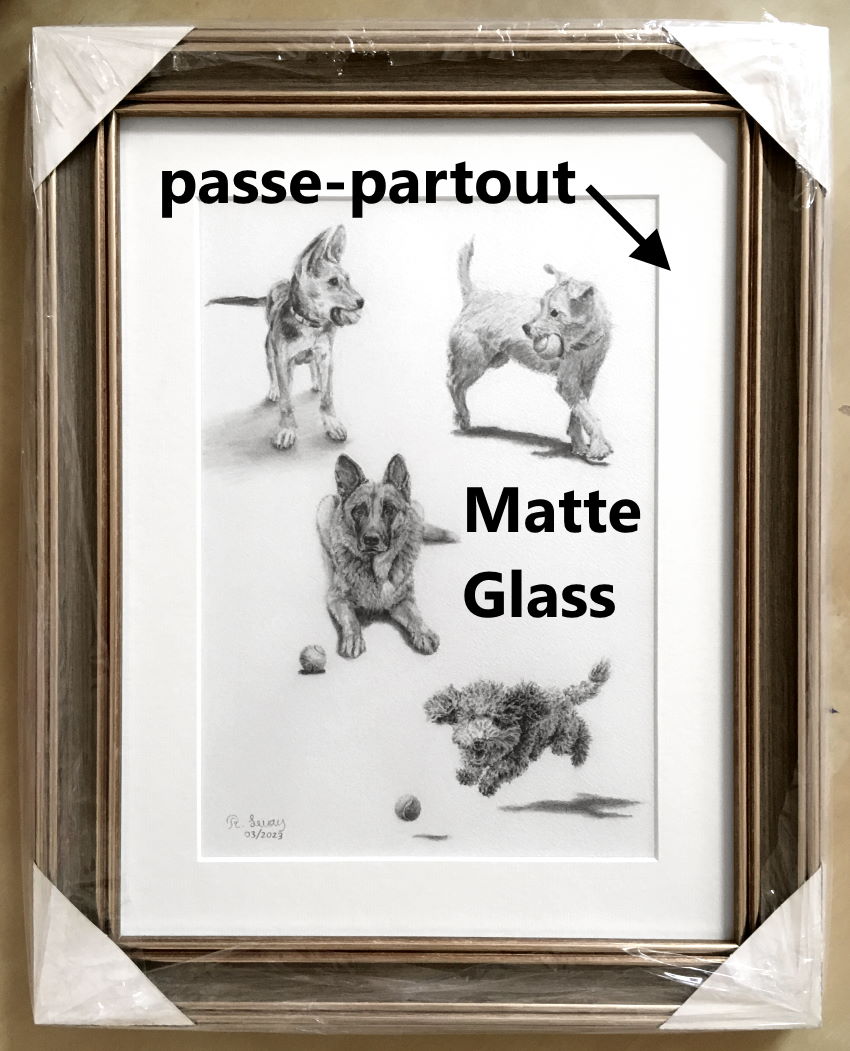
Frame:
To protect your finished drawing, use a quality picture frame.
Glass can be smooth yet reflective, or matte, which has no reflection but adds texture.
In addition, use a passe-partout (mat) to prevent your drawing from touching the glass.
Pen Drawing
While there are no lines in nature or in realistic pencil drawing, pen drawing is characterized by drawing lines.
 Drawing using lines
I use a technical pen (fine liner) for drawing.
For recommended pen brands to use, visit my review on drawing pens for artists.
A pen has a fixed brightness value!
The way to create the illusion of different brightness values when using a pen is to draw more lines in the same area for a darker value and fewer lines for a lighter value.
 Brightness values using lines
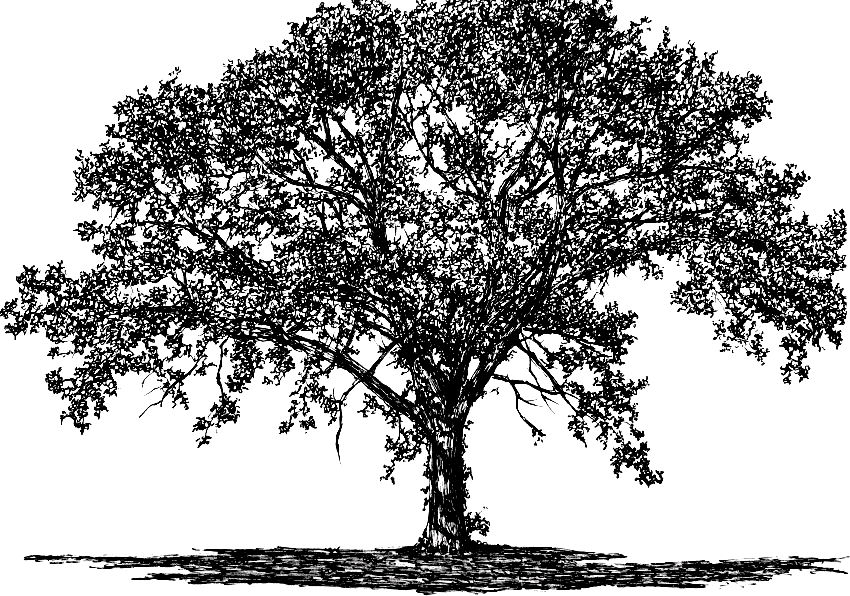
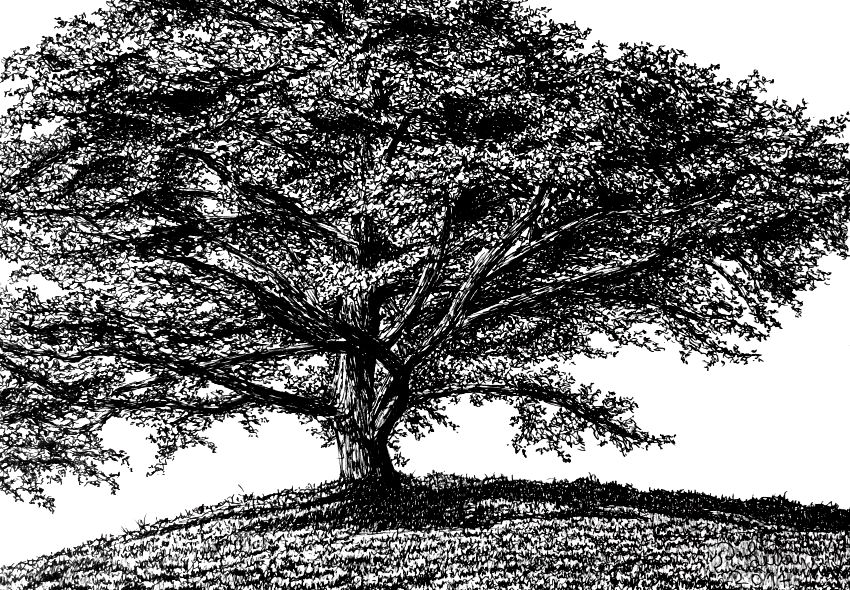
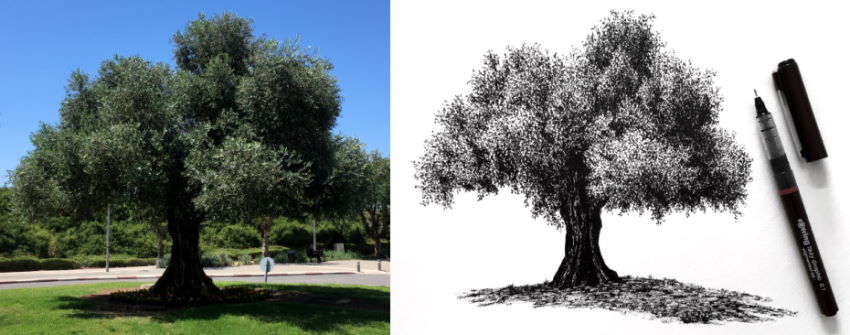
If you like drawing with pens, you might like my guide for flower drawing.
And my guide for drawing trees.
Summary
Realistic drawing is all about transitions in brightness values and different types of edges.
For realistic painting, check out my realistic painting guide.
To understand depth, read the article on how to draw with a sense of depth, which includes 15 ways to draw depth with many examples.
While it is convenient to draw from images, I recommend practicing drawing from direct observation. Read my still-life composition-drawing tutorial to see how to plan your composition.
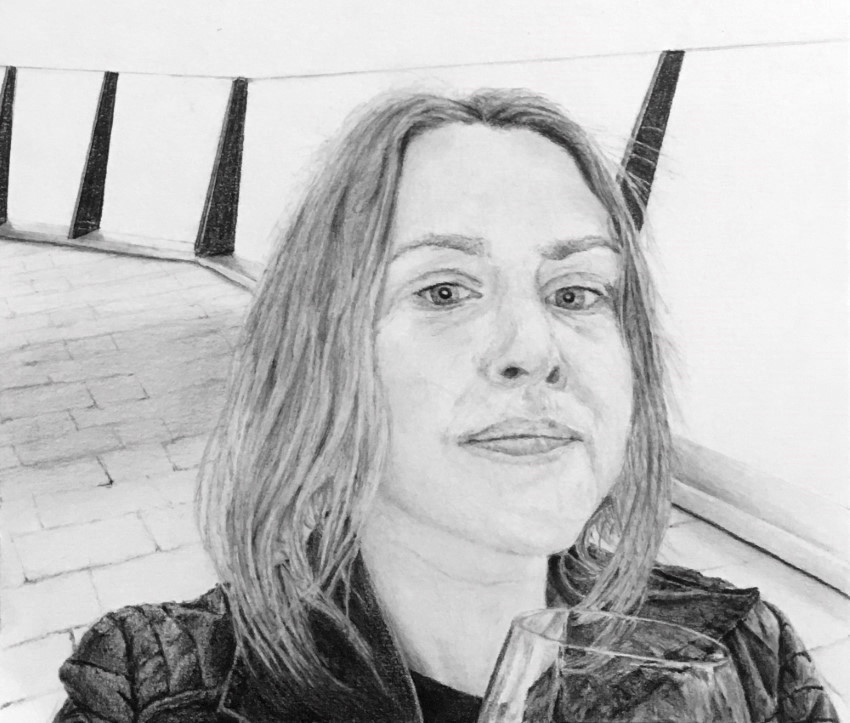
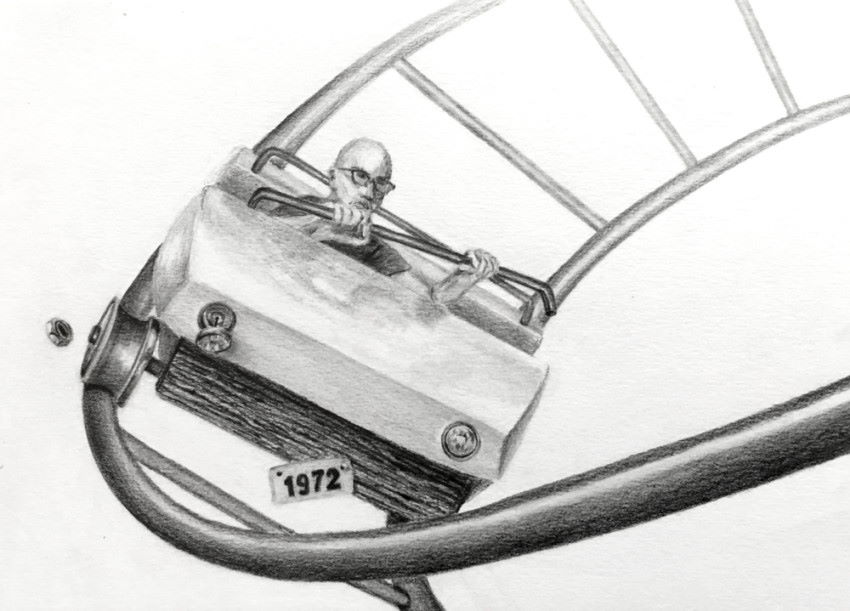
In addition, you can compose anything, including a combination of drawing from imagination and observation, like the following self-portrait.
After mastering accurate drawing (structure and values), you can take your drawings to the next level by learning how to draw textures.