Pencil Drawing Supply Review
Updated: 22 Jun 2026

When starting out, the different types and brands of drawing materials can be confusing.
In this guide, I explore known (and recommended) types and brands to consider.
Disclosure: some links in this article are affiliate links, meaning, at no additional cost to you, I will earn a commission if you choose to make a purchase.
Supply & equipment categories:
- Drawing pencil types & brands
- Eraser types & brands
- Sharpener types
- Blending stumps & tools
- Fixative for a finished drawing or sketch
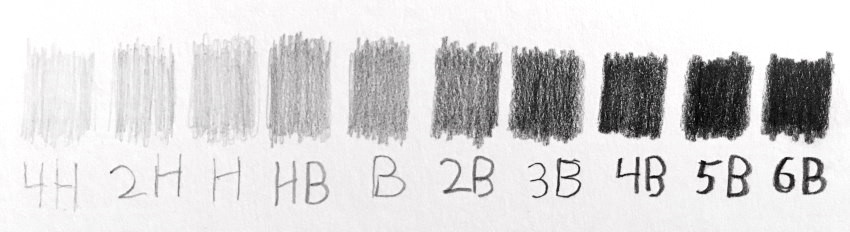
Brightness Values
Drawing pencils come in varying brightness values; HB is the standard value.
- The H levels stand for hardness and indicate how hard and light a pencil is.
- The B levels stand for blackness and indicate how soft and dark a pencil is.
For example, a 3B pencil is darker and softer than a 2B pencil.
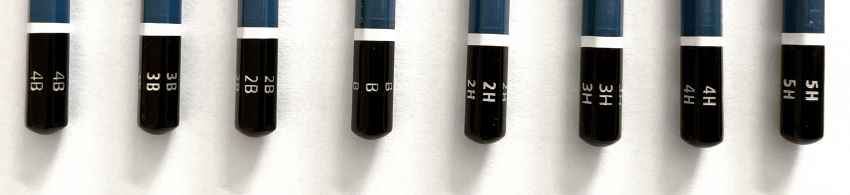 Pencil grades
The H group is for light values. HB is between light and dark. The B group is for dark values.
Recommended Drawing Pencil Brands
MY TOP 3 CHOICES:
*My top choices are pencils that I use for ANY type of drawing or sketching.
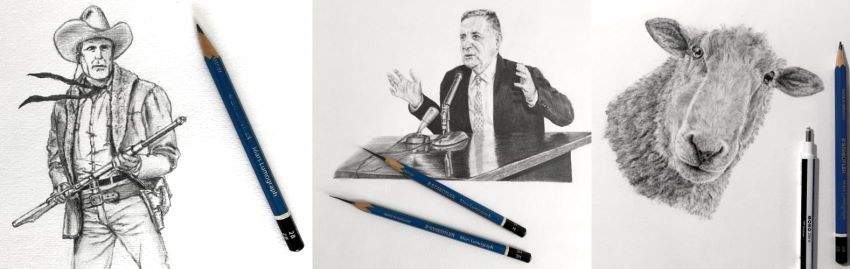
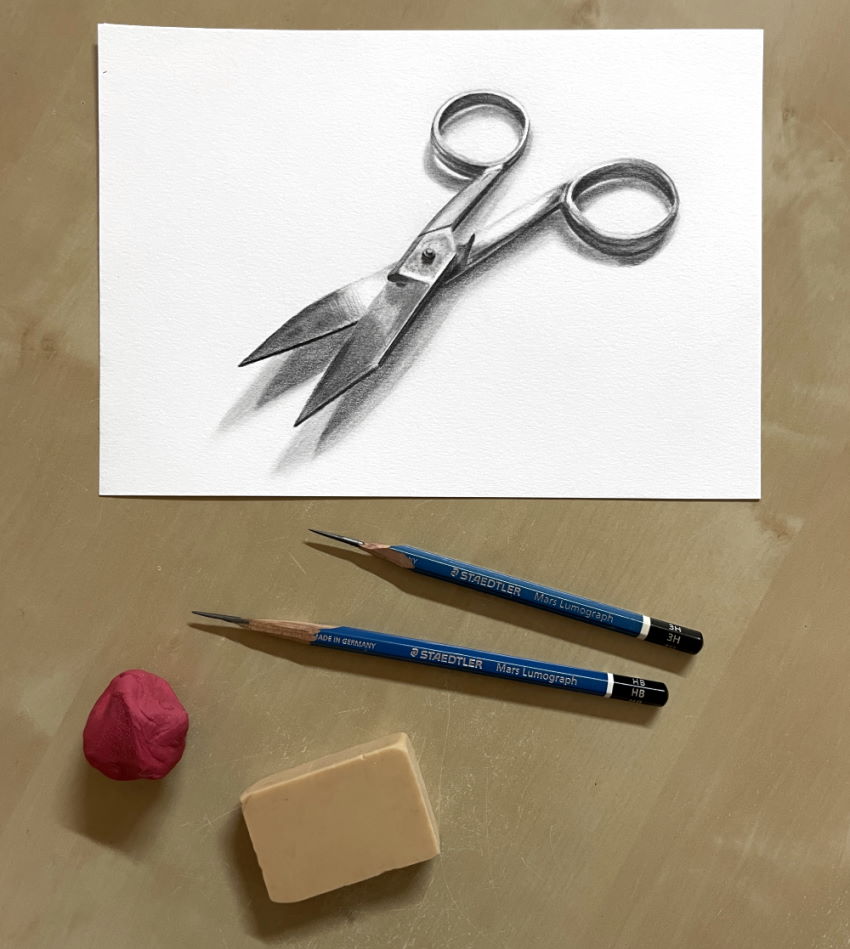
1. Staedtler Mars Lumograph
Highly recommended, durable, high-quality pencils, suitable for ANY task.
The pencil grade is clearly written on ALL sides.
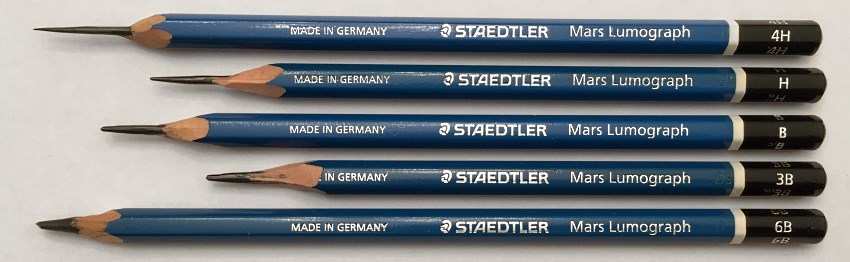 Staedtler Mars Lumograph
I use the Staedtler for my commission work. They always deliver!
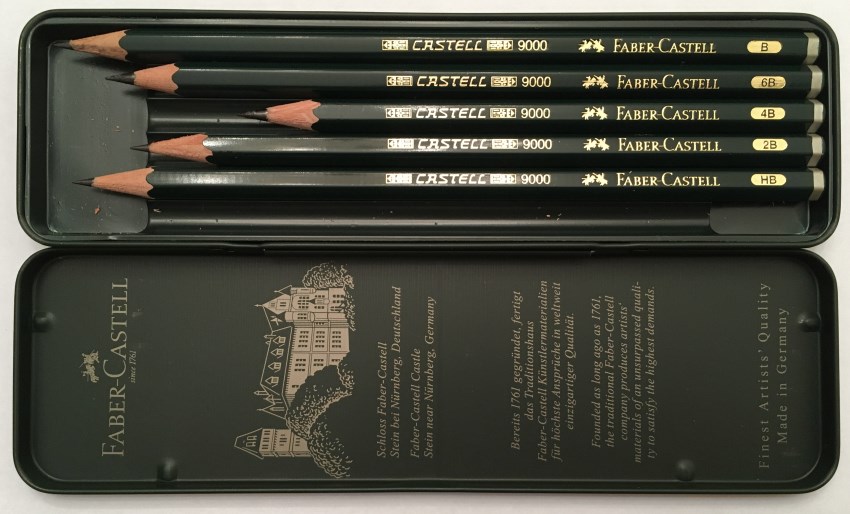
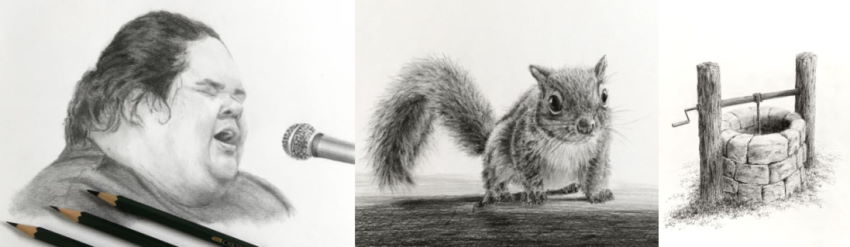
2. Castell 9000
Another top-quality choice. Faber-Castell is the largest pencil manufacturer and one of the oldest.
 Faber-Castell 9000
The Castell 9000 is super strong and can be sharpened easily, yet soft enough to be enjoyable and forgiving. Perfect!
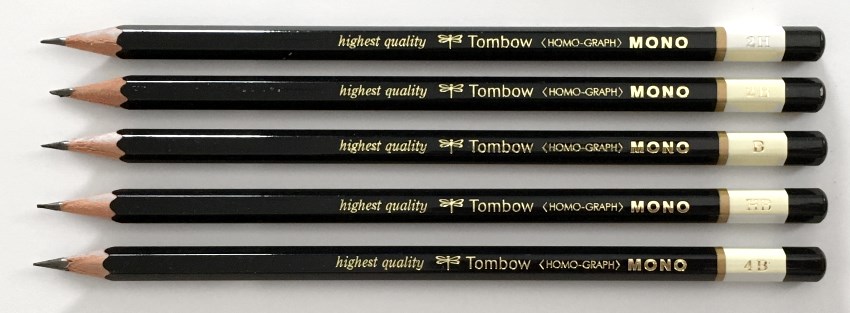
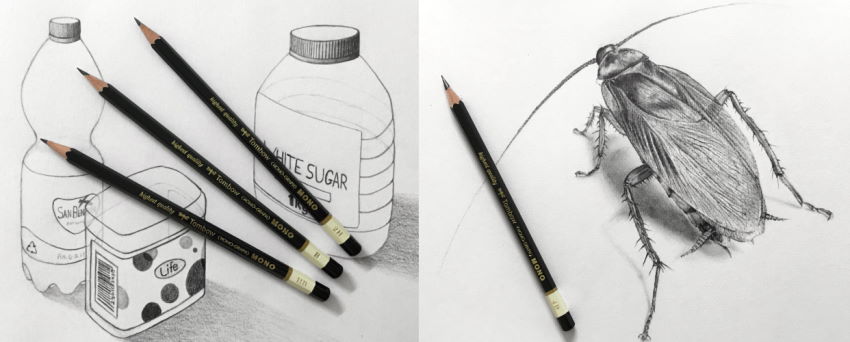
3. Tombow MONO Drawing Pencils
Tombow pencils have a nice balance between precision and softness.
They arrive unsharpened.
They also exist as a set, including the excellent MONO Zero eraser.
 Tombow MONO Drawing Pencils
They are quite dark, and their precision requires a gentle touch. Experienced artists may enjoy these pencils as their main drawing pencils.
Other Options
*These next pencil brands are all recommended. I use them for specific tasks.
Mitsu-Bishi Hi-Uni
The Mitsu-Bishi pencils are smooth and easy to work with. Great for shading.
Being smooth, they require frequent sharpening in order to draw fine details.
They arrive unsharpened.
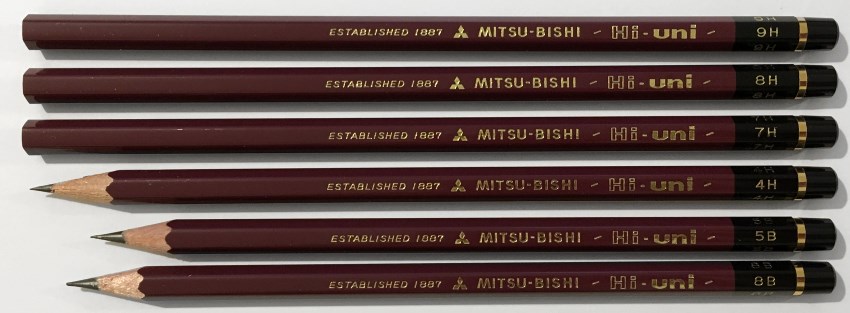 Mitsu-Bishi Hi-Uni
Because they are soft and forgiving, I like them for sketching. Sometimes I use them for realism.
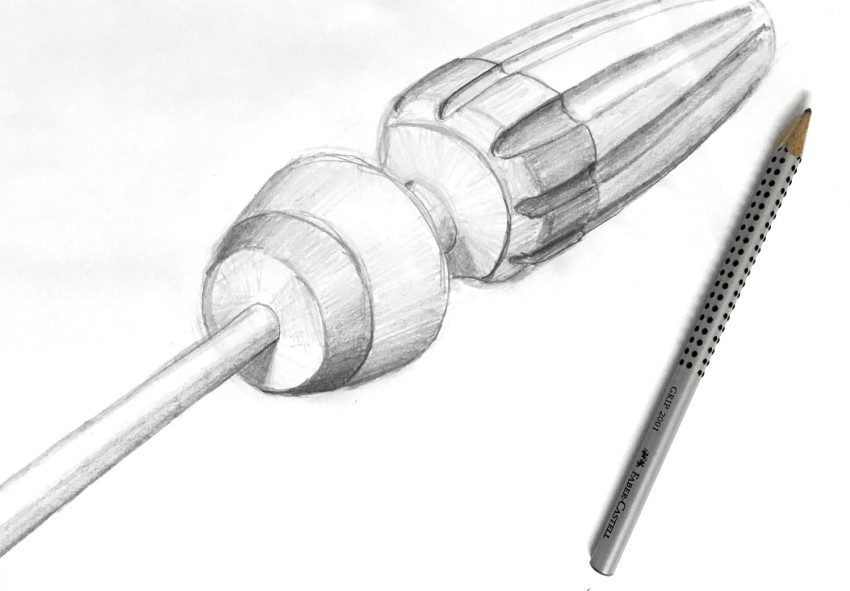
Faber-Castell Grip 2001
These are amazing pencils for sketching. They come with only 5 brightness values (2H, H, HB, B, 2B). Therefore, less ideal for realistic drawing.
They are lightweight, with an ergonomic structure and non-slip points. All of these make them great for sketching (and writing) for long periods.
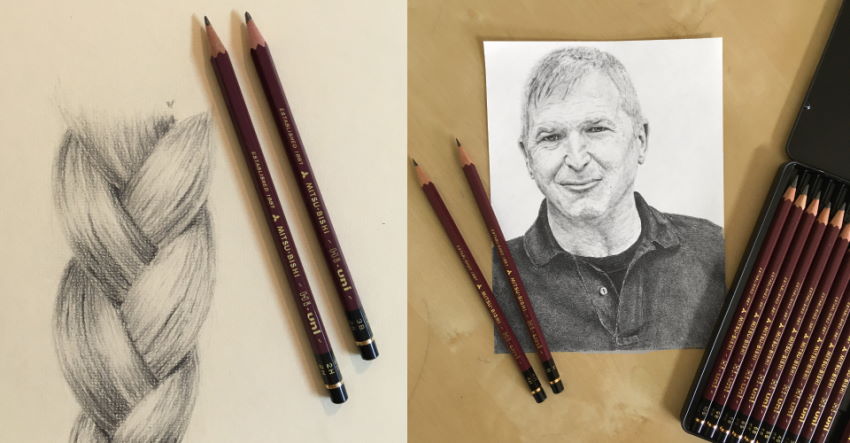
Because they are super comfortable, I use them when I teach for quick demonstrations.
 Sketch demo from direct observation
In addition, when drawing from imagination (like concept art or product design), they are great for initial sketches.
Koh-I-Noor 1900
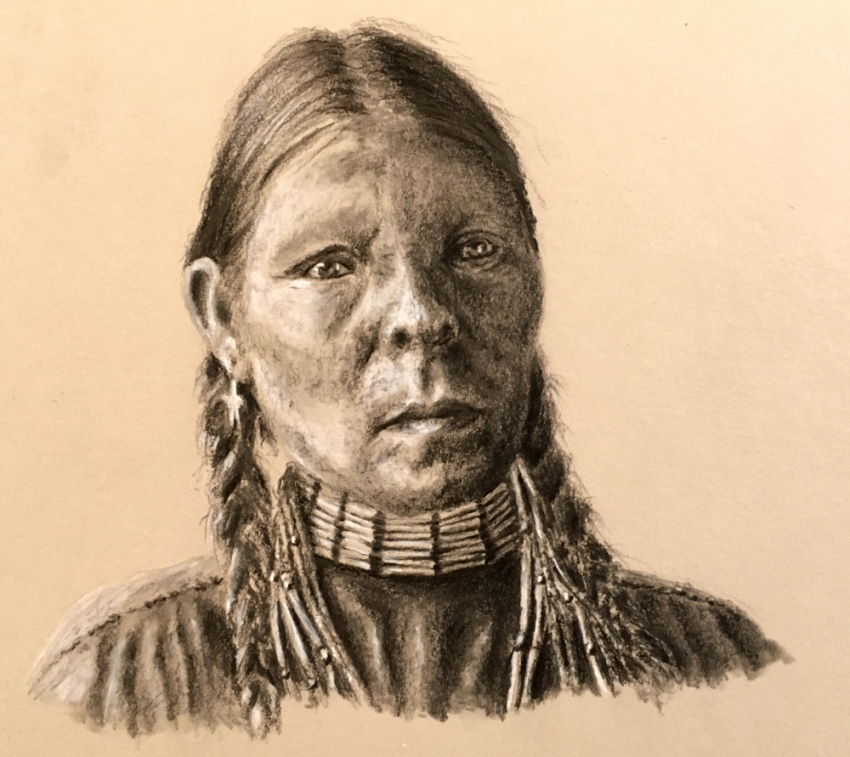
The "1900" pencils are a fine option for sketching. Their "forgiving" marks will appeal to beginners.
They are smooth and quite on the bright side. I do not like them for photorealism, only for sketching, though I use any pencil for realism.
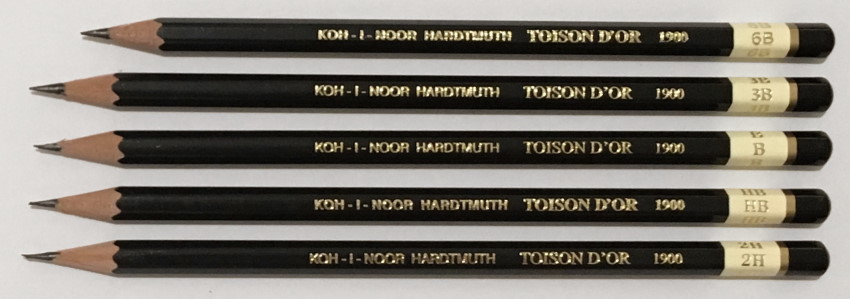 Koh-I-Noor 1900
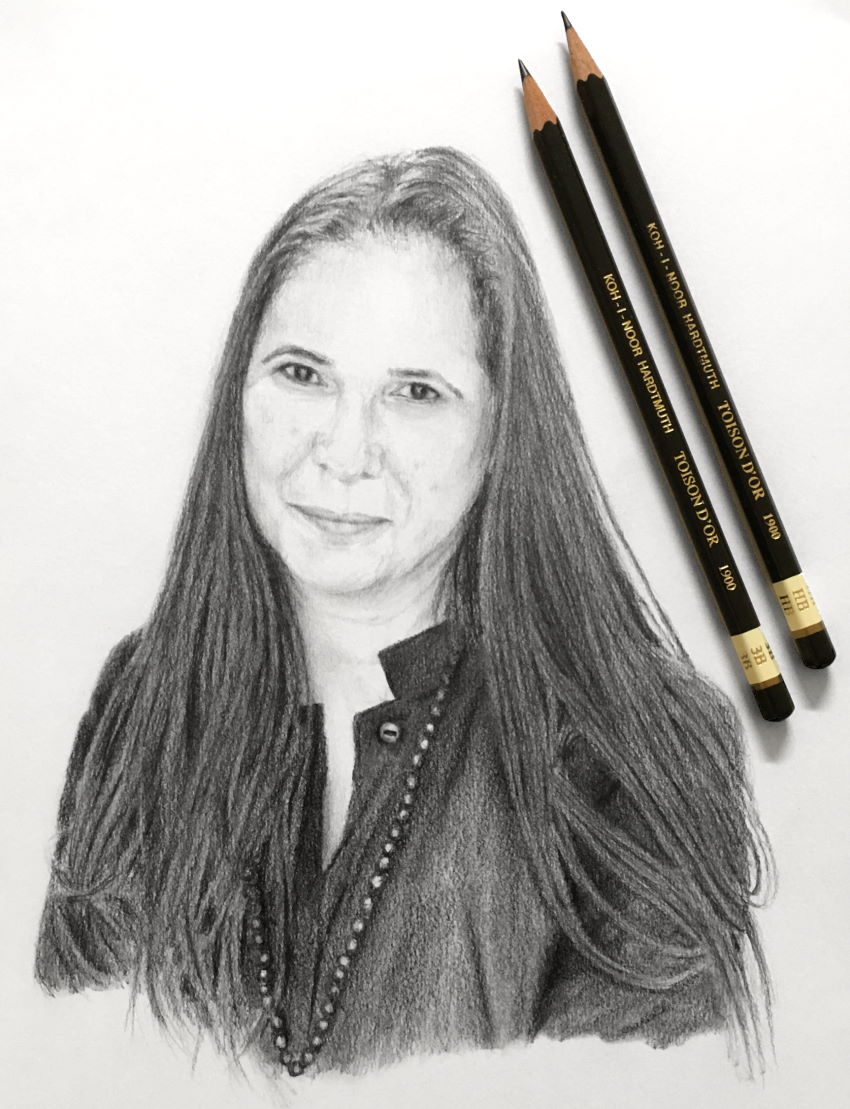 Female portrait with Koh-I-Noor
Goldfaber
Goldfaber, by Faber-Castell, are smooth and affordable pencils.
They are great for beginners, for both drawing and sketching.
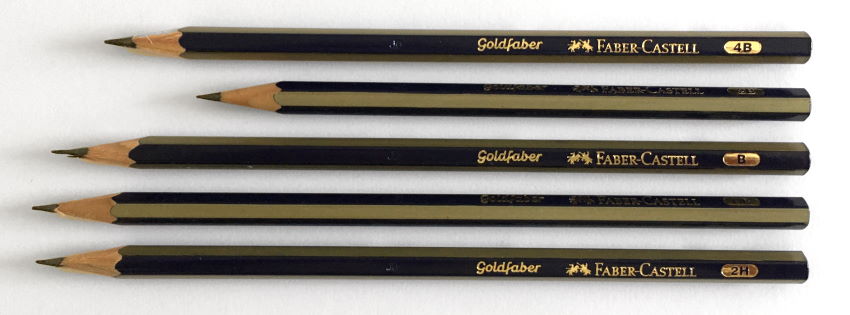 Goldfaber
Because they are smooth, dark (soft) levels may break while sharpening.
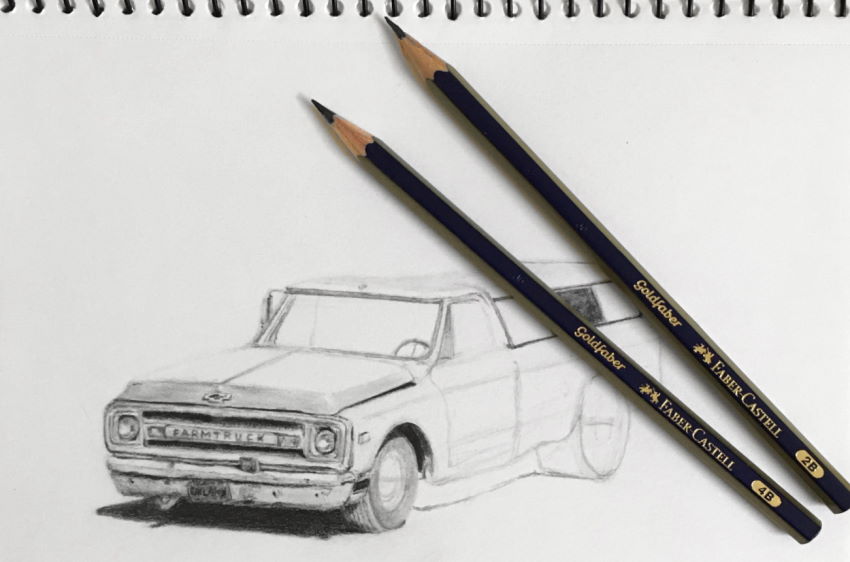
They are fun to draw with.
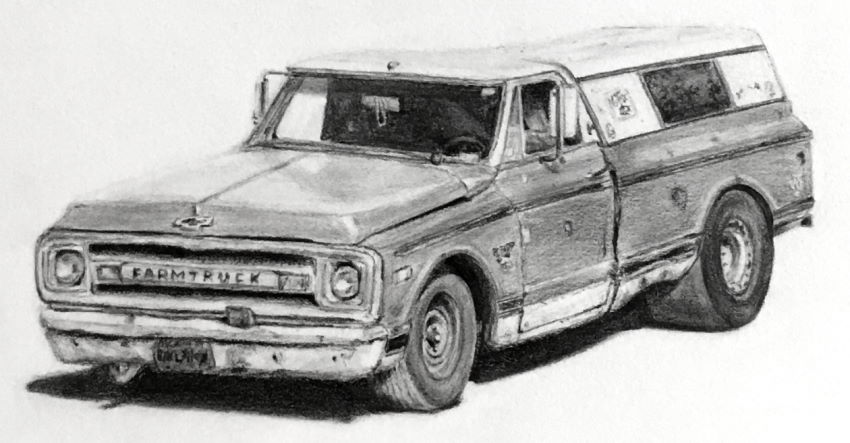 Farmtruck from the "Street Outlaws" TV show
Caran d'Ache Grafwood
Quality pencils yet pricey. Unique barrel color in accordance with the graphite grade.
Their barrel is a bit thicker than regular pencils and might not fit in some sharpeners.
These pencils are VERY soft and therefore very gentle and in need of constant sharpening.
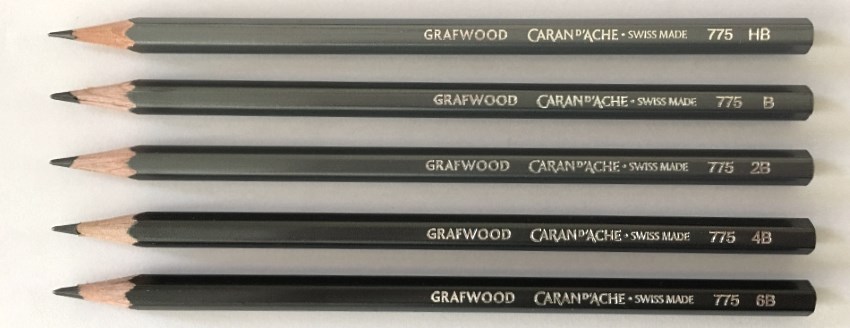 Caran d'Ache Grafwood
I use these pencils for sketching. Not for super accurate, realistic drawing.

Prismacolor Turquoise
Professional graphite pencils, though they are a bit darker and harder than other brands.
I use them in a gentle way since they leave noticeable marks.
They arrive unsharpened, and the pencil grade is written lightly, which is hard to see.
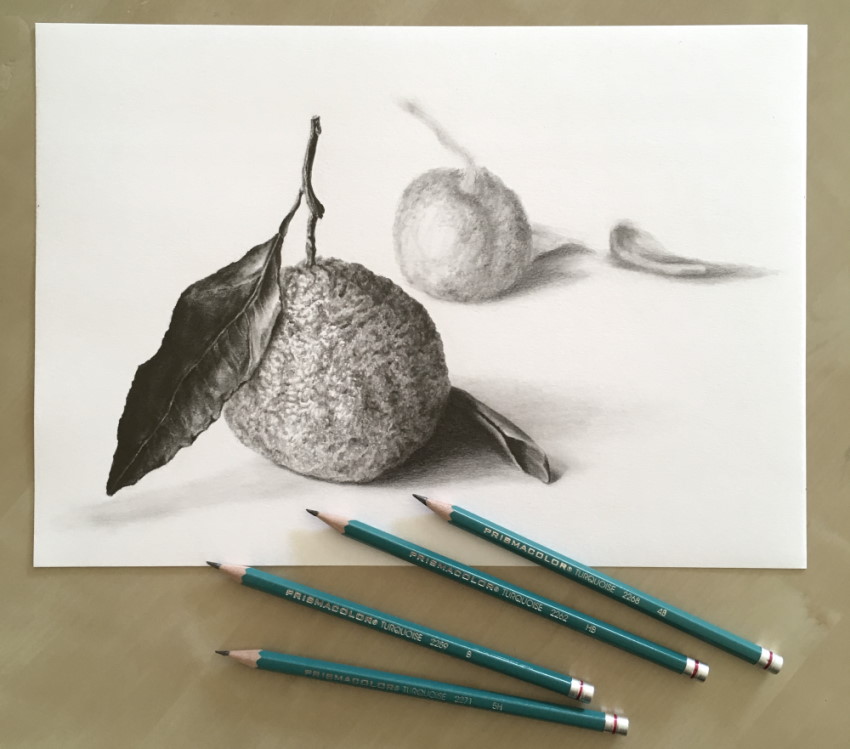
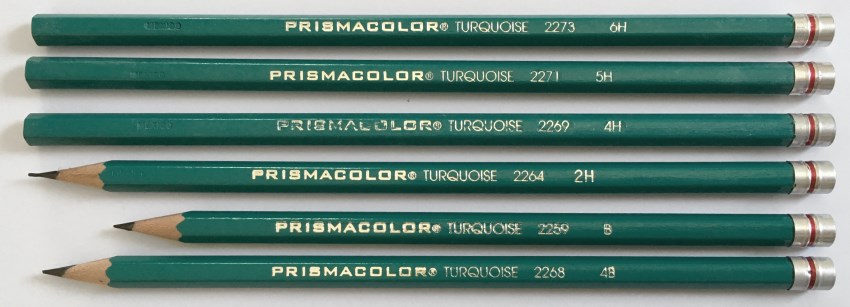 Prismacolor Turquoise
I do not recommend them for beginners.
For experienced artists that can control the pressure while drawing, they can be the main drawing pencils.
Staedtler tradition
These pencils are great for drawing and sketching.
Unlike the Staedtler Mars Lumograph, the size is not written on all sides of the pencil, and they are not as smooth.
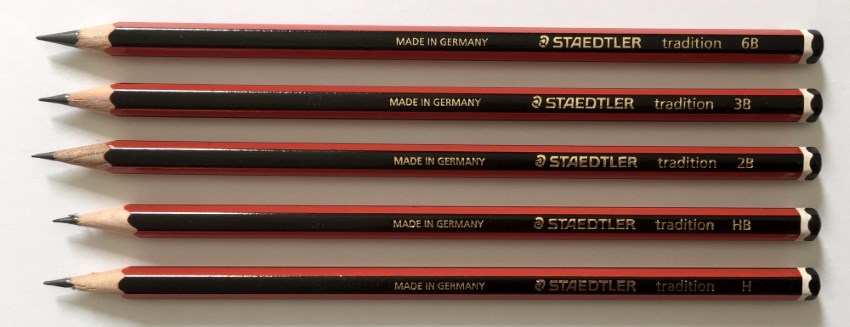 Staedtler tradition
Derwent Graphic
Good sketching pencils, but quite soft and in need of constant sharpening.
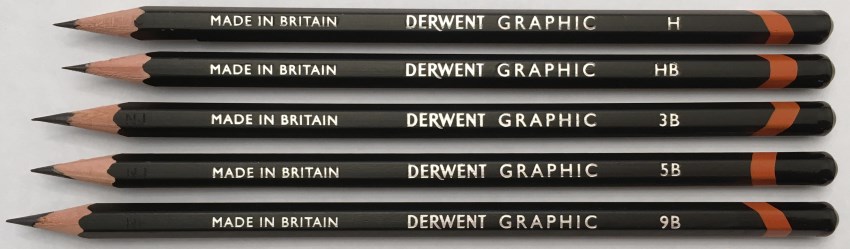 Derwent Graphic
I use these pencils mainly for sketching, less for realistic drawing (though my sketches are usually in a realistic style).
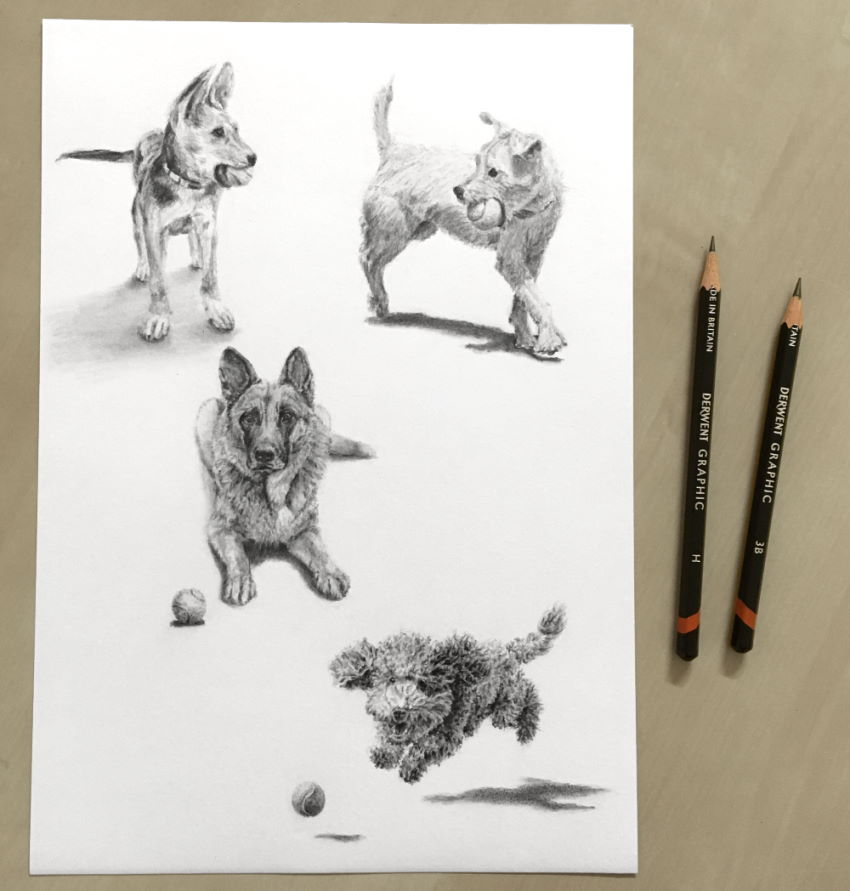
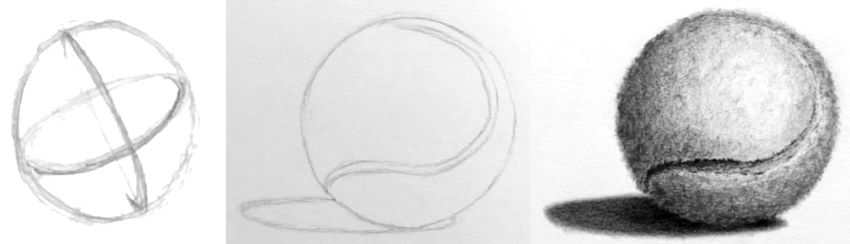
To learn how I draw spheres, visit my ball drawing guide.
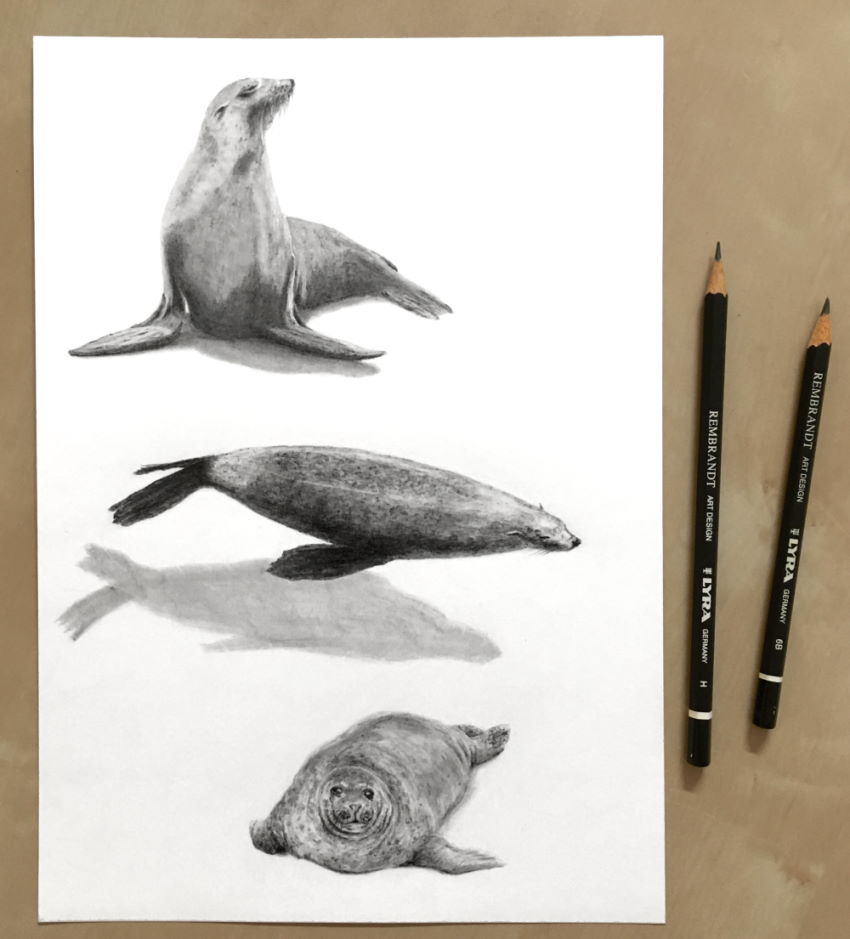
Lyra Rembrandt Art Design
Good pencils. Dark grades are not as dark as some other brands.
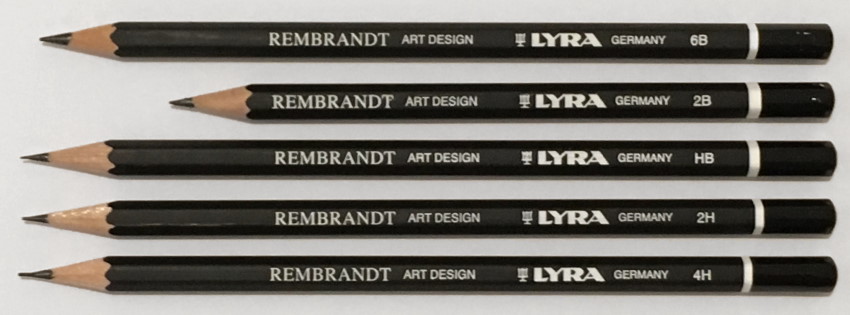 Lyra Rembrandt Art Design
I use Lyra Rembrandt for sketches, less for super realistic drawing.
Matt Pencils
Unlike charcoal, graphite pencils produce shiny results under a certain angle from the light.
Some brands offer matt solutions. It is good in some cases, though I prefer regular graphite pencils.
Staedtler Mars Lumograph Black
These are artist pencils, which are intended for drawing dark brightness values.
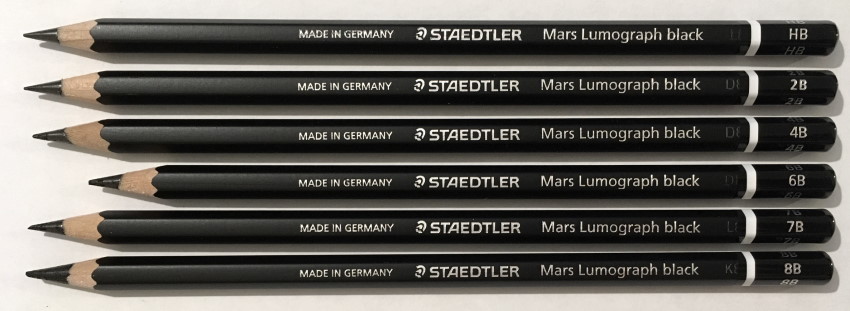 Staedtler Mars Lumograph Black
Mars Black has a high proportion of carbon and therefore produces a matt result, especially in darker grades.
 Mars Black matt results
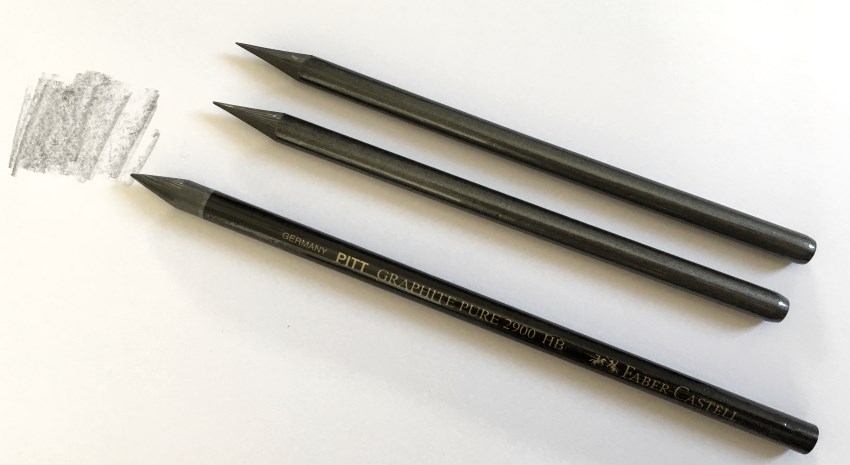
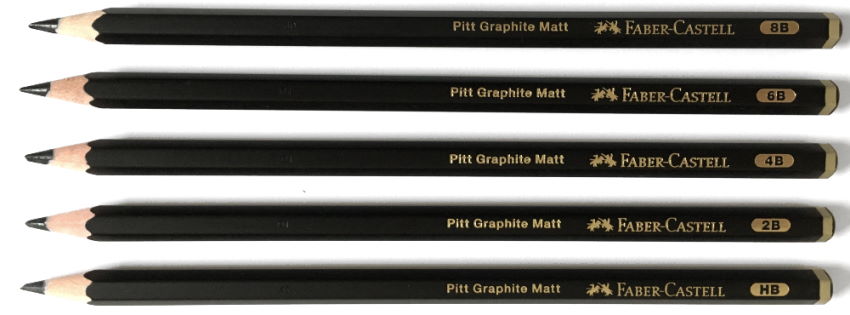 Pitt Graphite Matt
Unlike other matt solutions, these pencils can produce light values too.
They come in 8 degrees (HB, 2B, 4B, 6B, 8B, 10B, 12B, 14B).
I find them a bit lighter than other brands, especially the HB degree (when used gently), which is perfect for light values.
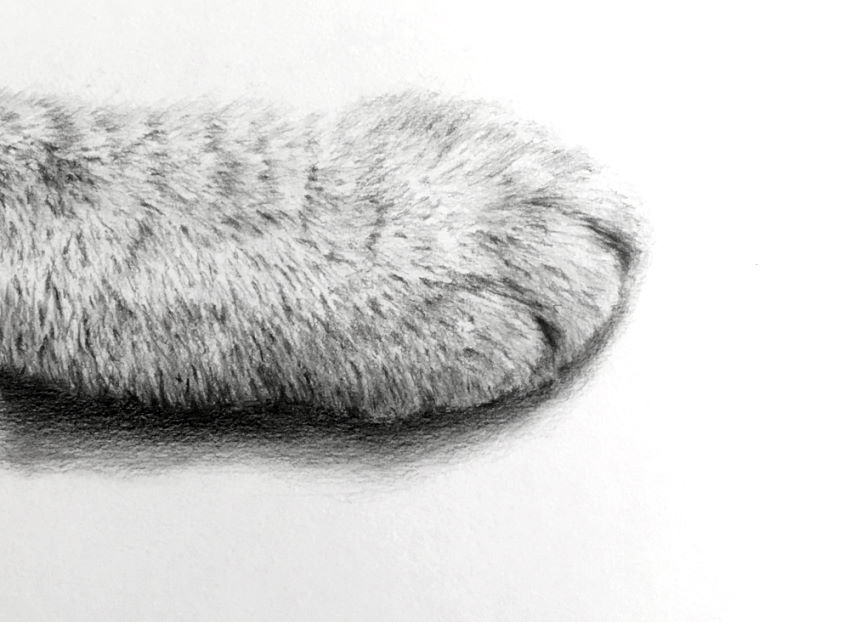 Cat Paw with Pitt Graphite Matt
Keep in mind:
For me, matt pencils are not as easy to erase or to smudge smoothly.
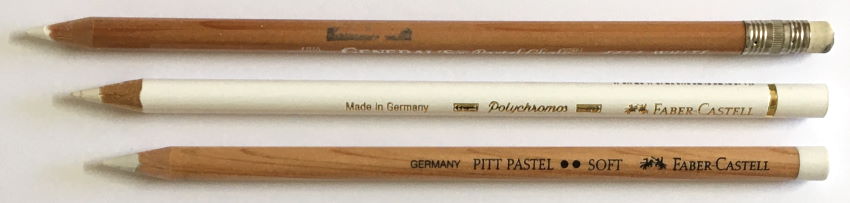
White and Colored Pencils
When drawing on a toned paper sheet, white pencils are great for highlights.
My favorite pencils are:
Faber-Castell Pitt Pastel soft.
General's Pastel Chalk 4414 White.
Faber-Castell Polychromos White 101.
In addition, you can use a white pencil for drawing on black (or very dark) paper.
The key is to press and draw more for highlights and less for shadow areas.
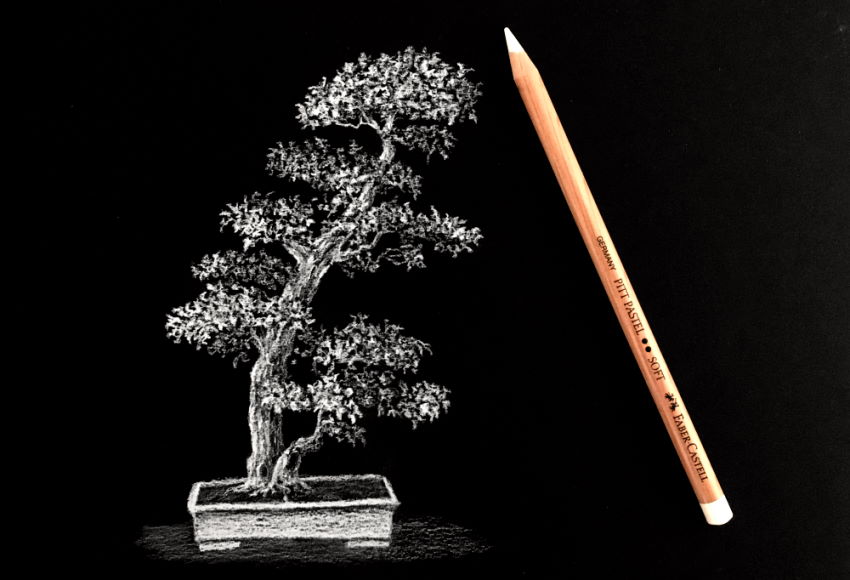 Bonsai tree with Pitt Pastel
If you like drawing trees, you can visit my guide for drawing trees; it has many examples and step-by-step instructions.
You can use white pencils together with colored pencils.
Tip:
When drawing with a white pencil on toned paper, you should leave empty areas for it.
If you draw with a white pencil over graphite, the white turns gray.
Good to know:
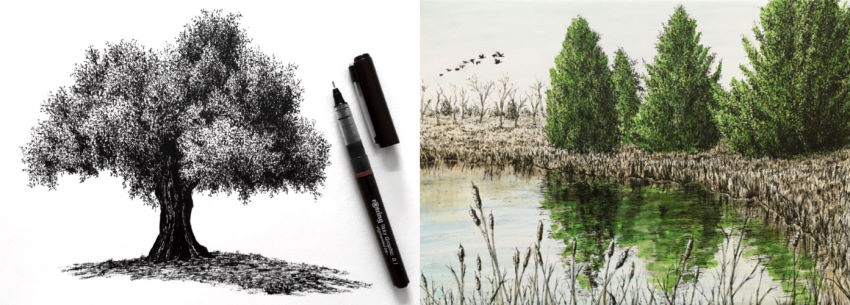
I use a white pencil for highlights when I draw with markers.
Colored pencils work well with markers.
Here are my recommended markers for drawing.
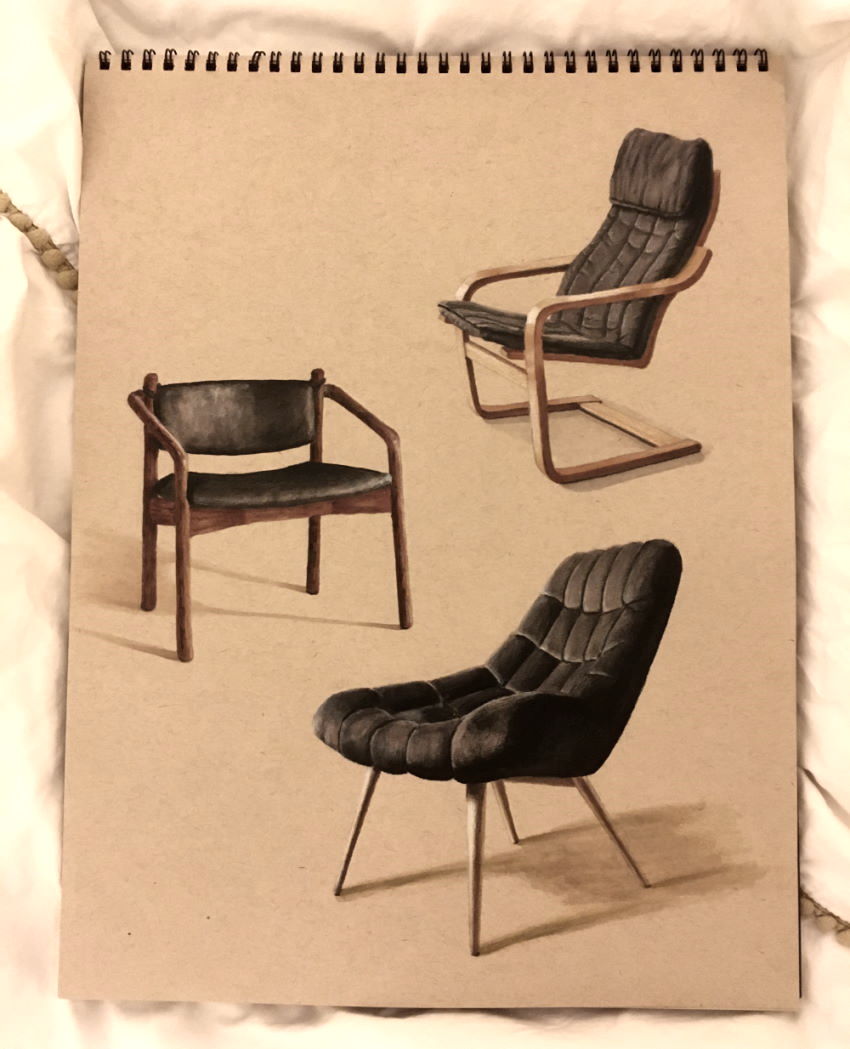
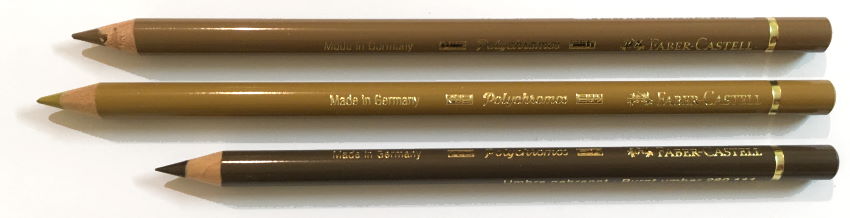
My favorite colored pencils are Faber-Castell Polychromos.
They are smooth, and they come in light colors and less saturated colors, which is great for realism.
My other favorite is Caran D'Ache Luminance, though they are expensive.

I use both Caran D'Ache Luminance and Faber-Castell Polychromos.
For me, they work well together.
 Landscape with colored pencils
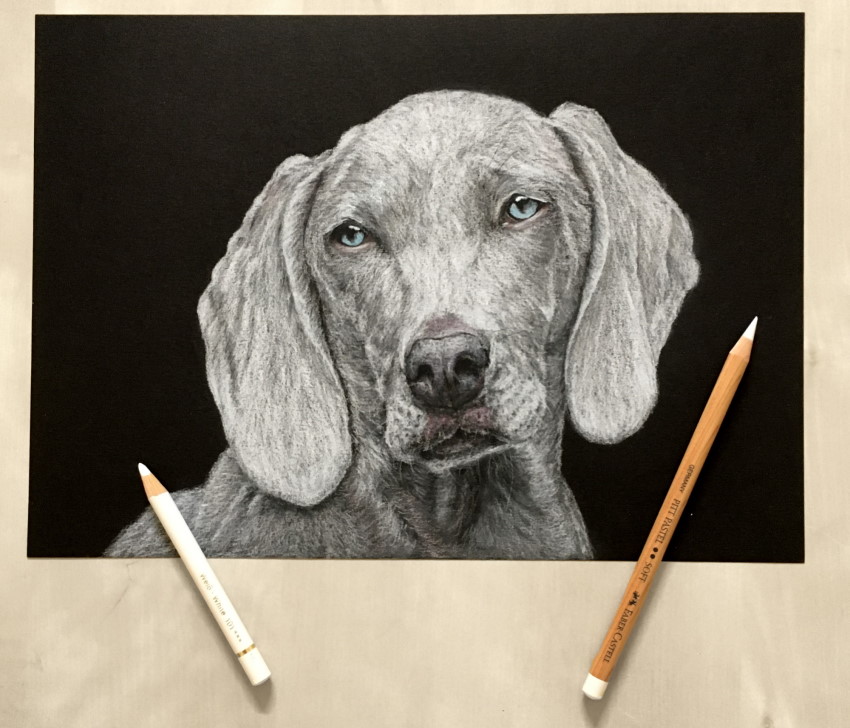
Graphite Sticks
A graphite rod or bar is a graphite stick with no wood coating.
Graphite sticks come in many shapes. Cylinder, rectangle-bar and pencil-shaped are very common and are used for filling large areas quickly.
They come in different brightness values.
I prefer a pencil-shape graphite stick, coated with a thin layer of plastic, so my hands are clean while drawing.
 Graphite sticks
The advantage of graphite sticks is that they can be used both for details and for covering large areas.
Example:
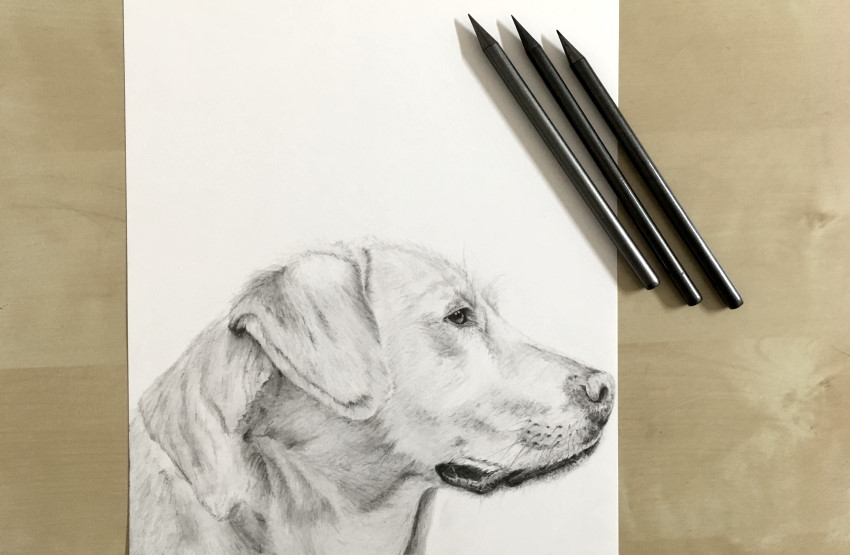 Dog drawing using graphite sticks
If you want to draw realism, check out my guide to realistic pencil drawing.
Mechanical Pencil
A mechanical pencil is a pencil that can be filled with graphite sticks, which can be extended mechanically.
There is no need to sharpen mechanical pencils.
Like technical pens for drawing, a mechanical pencil produces lines of uniform thickness and is used, among other things, for technical drawing.
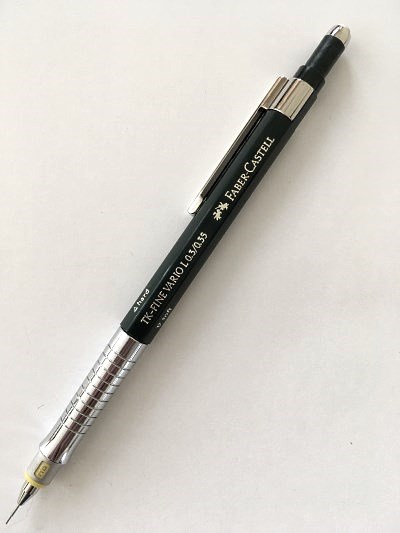 Mechanical pencil
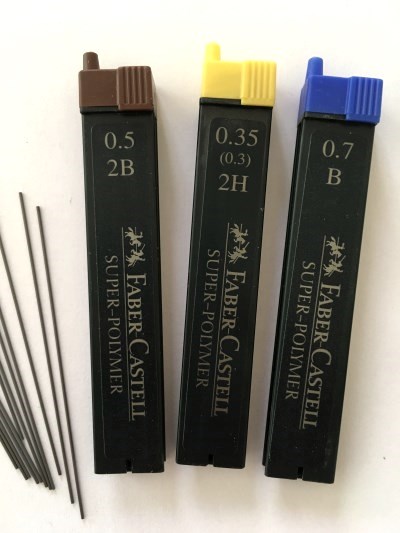 Graphite sticks for refill
To learn how to use mechanical pencils, visit my article on drawing with a mechanical pencil.
Erasers for Pencil Drawing
The advantage of a pencil, unlike other drawing and painting tools, is the ability to erase.
Eraser (also called a rubber) is used for erasing AND drawing.
You can use certain erasers to change the brightness value of a surface or to create noticeable, bright details and highlights.
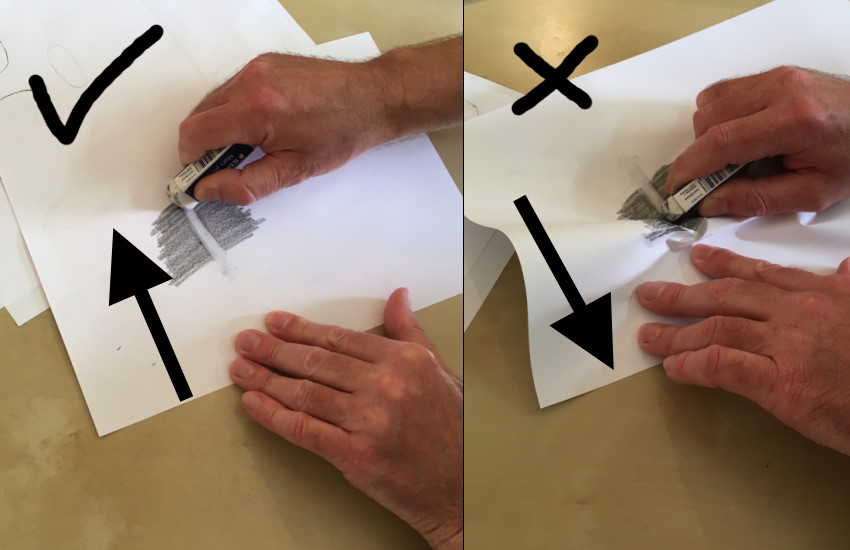
Pay attention:
When you hold your drawing paper in order to erase, always erase against your grip.
If you erase toward your grip, the paper sheet will bend, and there is no way to fix it.
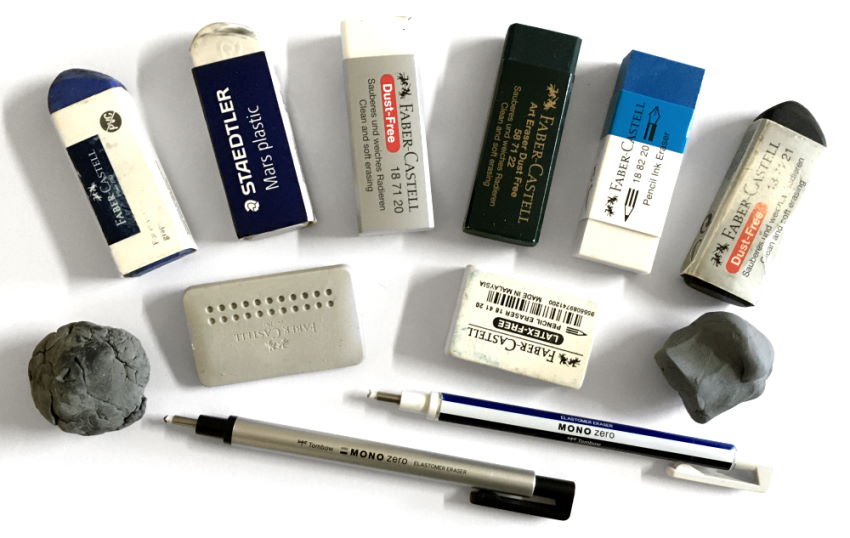
Gum Eraser
Gum eraser (also vinyl or plastic) is the standard eraser for erasing mistakes.
This eraser leaves debris behind and is not intended to produce precise details.
You can use a brush to clean eraser debris from the drawing surface.
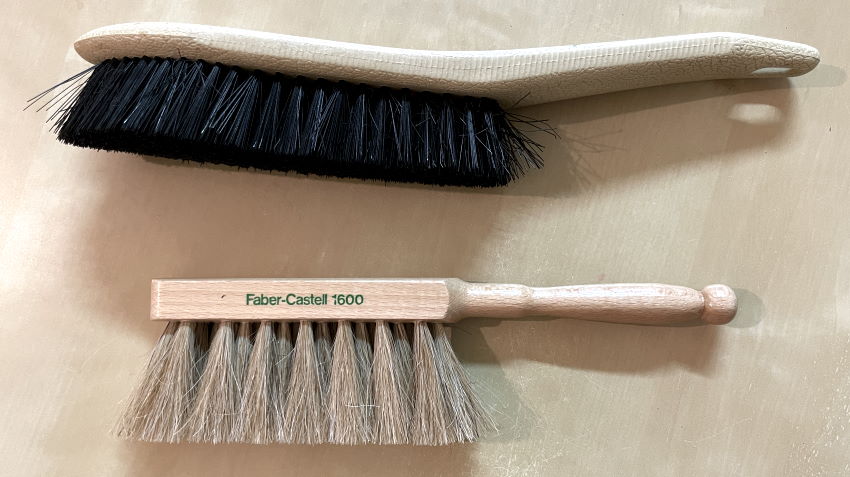 Brushes for cleaning eraser debris
Any Faber-Castell dust-free eraser is a superb choice.
My favorite is the white one (18 71 20).
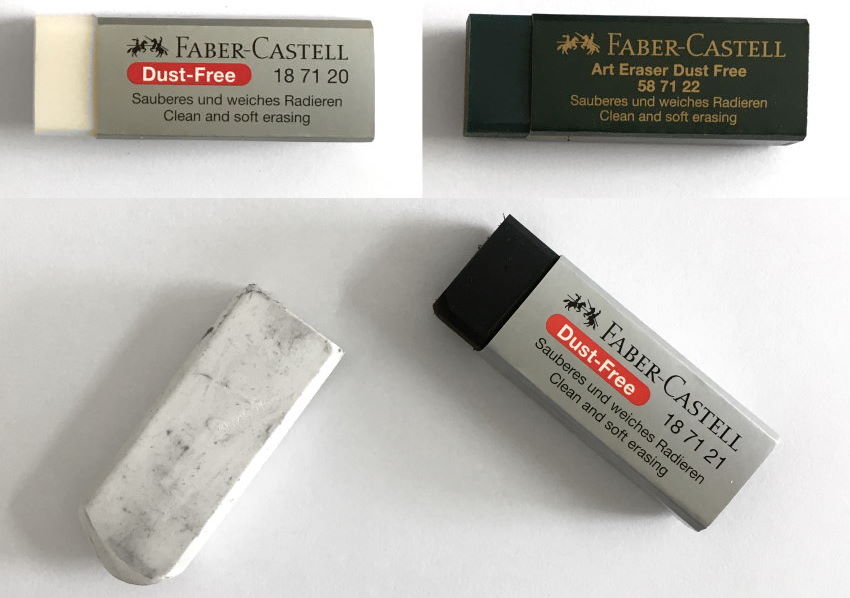 Faber-Castell dust-free
Another quality option is the Tombow MONO plastic eraser.
It is quite soft and does not damage the drawing paper.
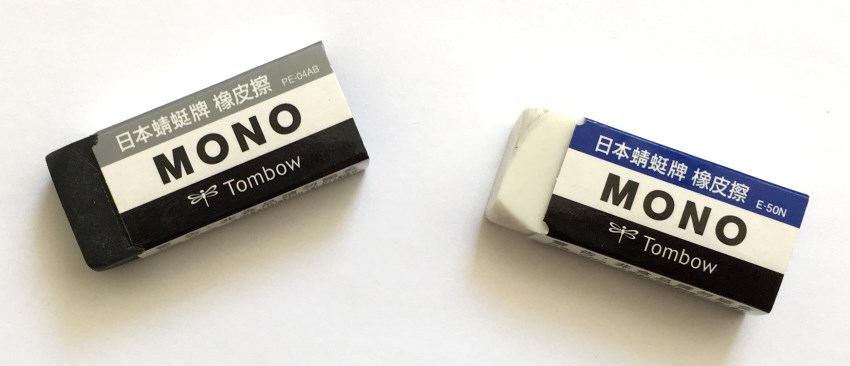 Tombow MONO plastic eraser
A common and affordable eraser is the STAEDTLER Mars plastic.
It is a bit harder than my other erasers, and it gets the job done.
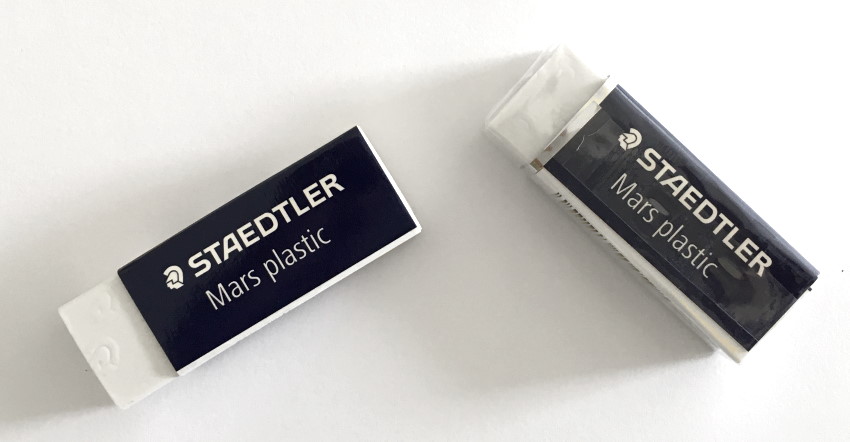 Staedtler Mars Plastic
Kneaded Eraser
A kneaded eraser collects graphite (or charcoal) particles by absorption.
This eraser does not wear down and does not leave residue like a regular eraser.
By gentle friction of the kneaded eraser on a drawing surface or gentle taps, it can increase the brightness value of a particular area.
The kneaded eraser is flexible, and you can make shapes with it, such as a dot or line. The harder the eraser is, the more accurate textures it can create.
I recommend a kneaded eraser for any type of pencil drawing art.
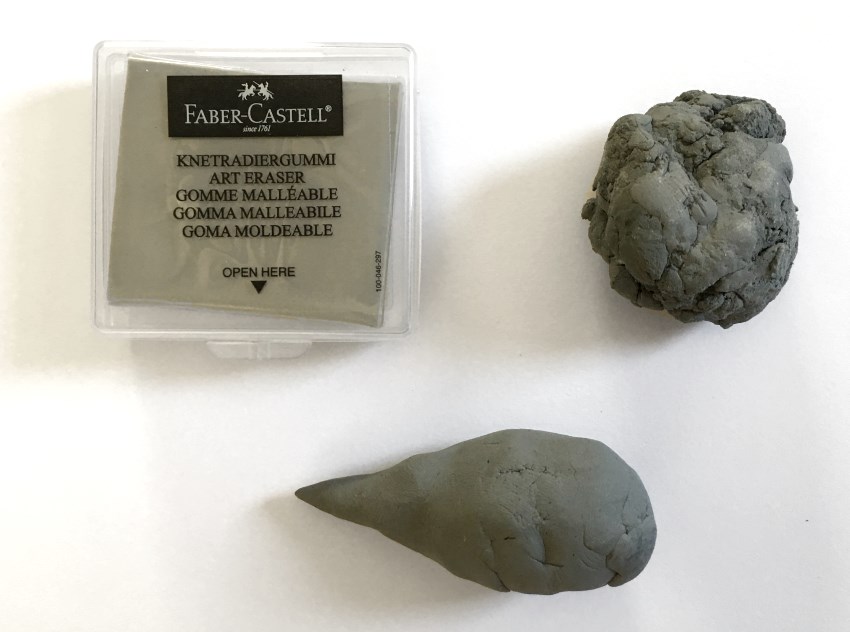 Kneaded erasers
Eraser Pencil
The purpose of erasers in the form of pencils is to enable the creation of small and precise details or to erase small areas.
That said, these eraser pencils are usually not that effective!
A pencil eraser with a brush is great for cleaning debris from the drawing surface.
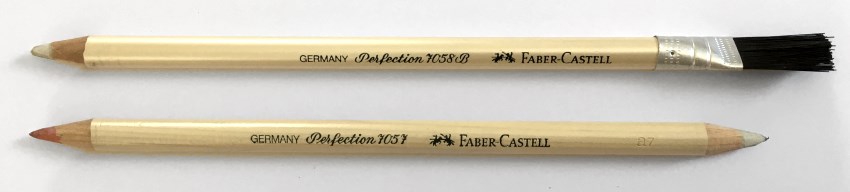 Pencil erasers by Faber-Castell
A better option is the Hardtmuth pencil eraser by Koh I Noor.
Pencil erasers are not easy to sharpen. The best option to sharpen them is with a knife or a pair of scissors.
 Koh I Noor Hardtmuth pencil eraser
Tombow MONO Zero
This little refillable eraser pen can make all the difference in your work!
When it comes to creating fine details - especially when drawing hair or cleaning up tight spaces - the Tombow MONO Zero is superior to almost any other eraser on the market.
Once you get used to using it for realism, it becomes hard to imagine drawing without it.
It comes with two tip options: round or rectangular (I personally use and recommend the round one).
 Tombow MONO Zero
Drawing (erasing) the highlights with Tombow MONO Zero:
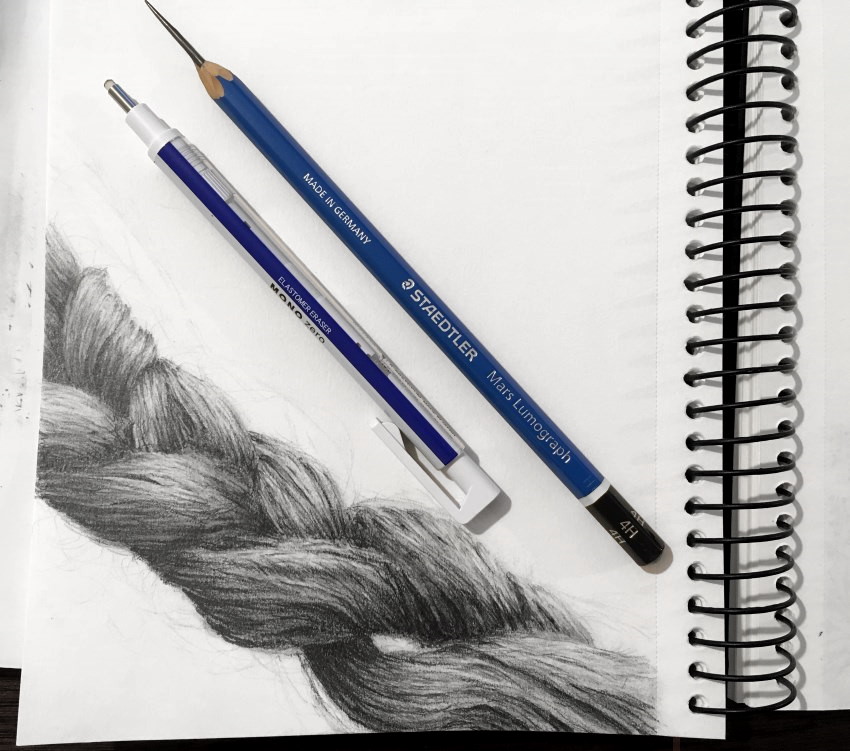 Braid with MONO Zero
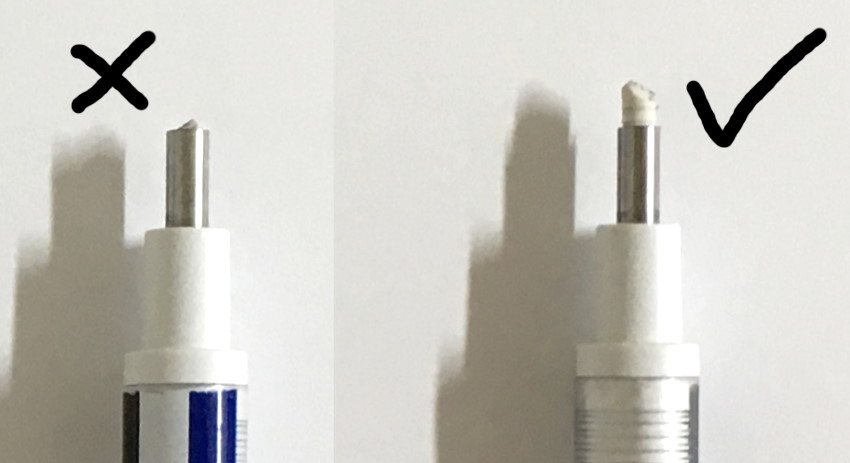
Important Safety Tip:
Always make sure the eraser core is visibly extended out of its holder.
If you erase with the core worn all the way down, the sharp metal tip of the sleeve can deeply scratch and permanently damage your drawing paper.
Important:
The Tombow Mono is a high-quality synthetic rubber eraser, but because it is relatively firm, pressing too hard or erasing continuously in the same spot will damage the paper.
Therefore, it is best used with a light touch for precise tasks, such as cleaning up small details or creating crisp, hard edges.
For erasing large areas, a regular eraser is a safer choice.
Good to know:
Erasers come in various colors, but the color does not affect performance - what matters most is choosing a reliable, high-quality brand.
Sharpeners
You can sharpen pencils with a regular pencil sharpener or an electric sharpener.
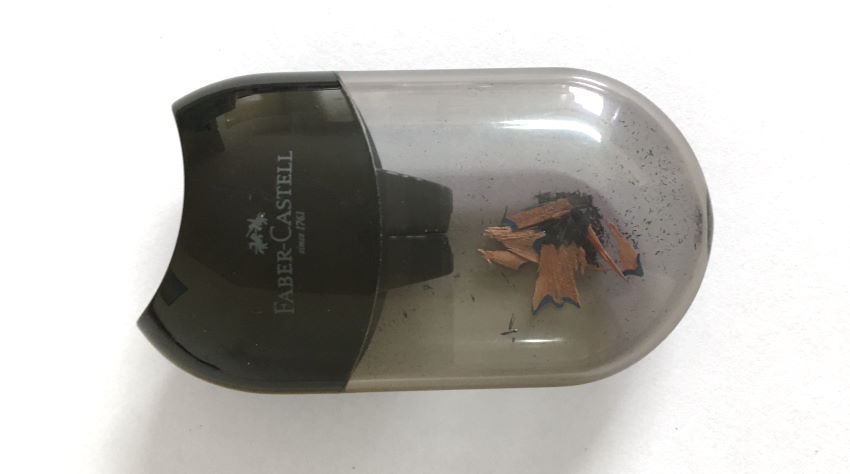
A canister sharpener is efficient, clean and easy to use.
 Canister sharpeners
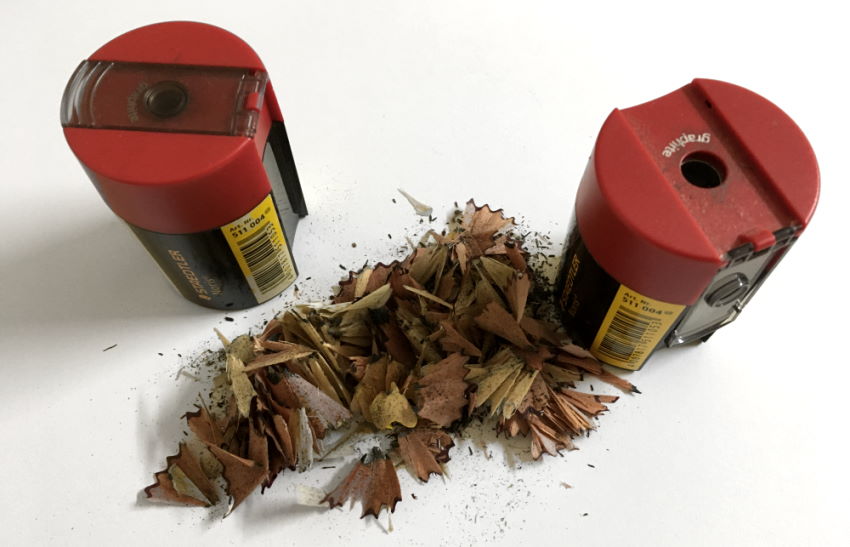
When in need of a sharper tip, I use my trusted Faber-Castell dual sharpener.
 Faber-Castell dual sharpener
Or my Faber-Castell Grip Trio Pencil Sharpener.
It has a sharpener for regular pencils, jumbo and colored pencils.
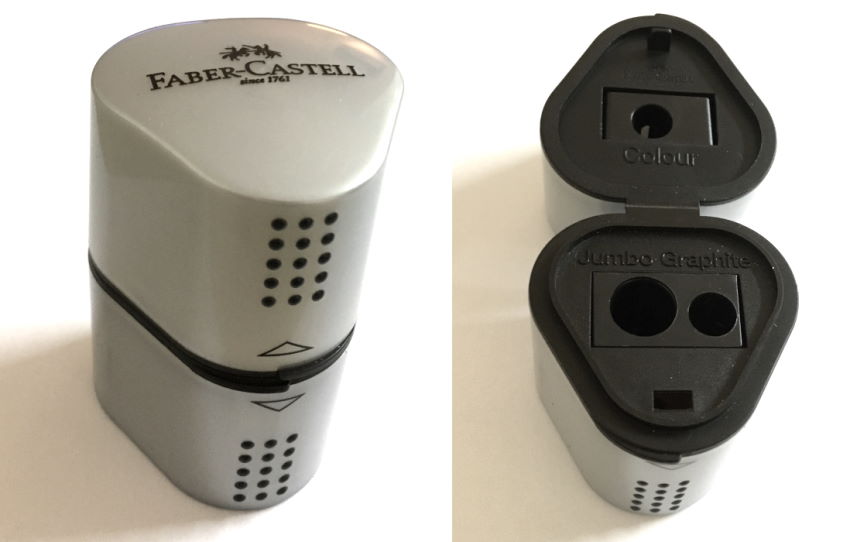 Trio Pencil Sharpener
Another way to sharpen pencils is using a knife for a very sharp point.
Sharpening pencils with a knife takes time, creates dirt and leaves wood and graphite waste in the work environment. Using a knife can lead to injury.
I am used to sharpening my pencils with a utility knife. For me, it is the best way; it gives me control and accuracy.
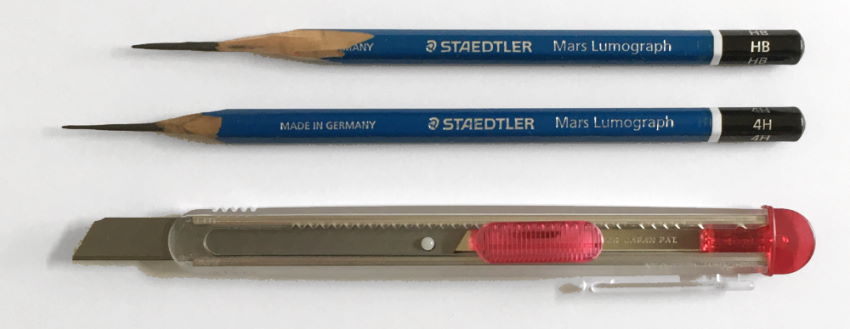 NT Cutter utility knife
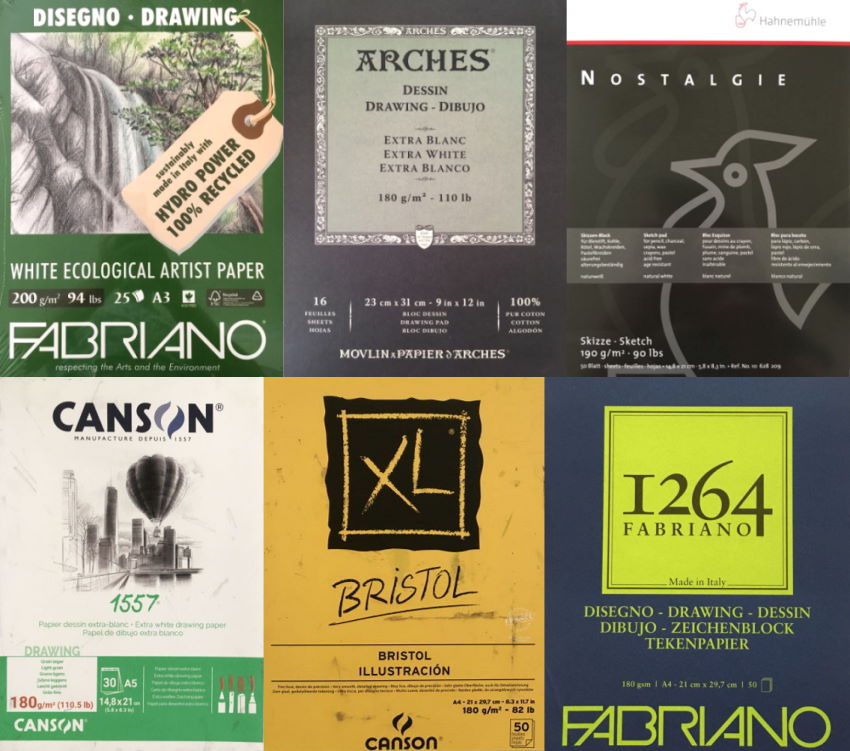
Paper for Pencil Drawing
I created a guide for paper brands and types for drawing. Both for pencil and pen.
You can find it here: drawing paper guide.
Blending Stump
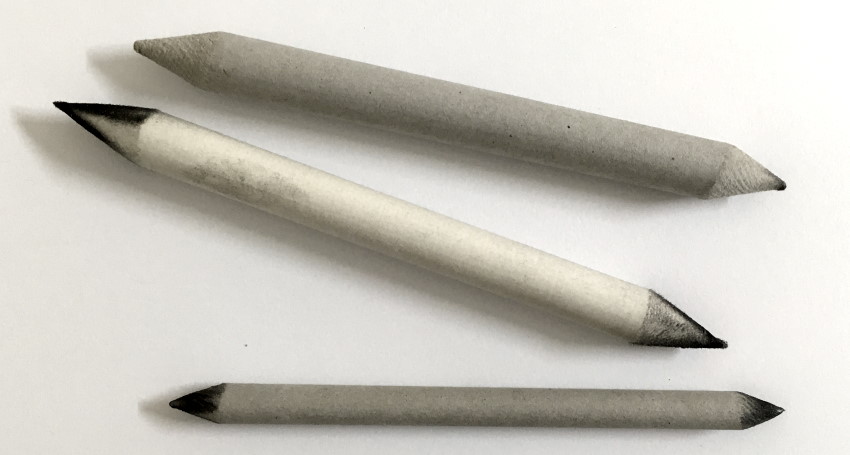 Blending stumps
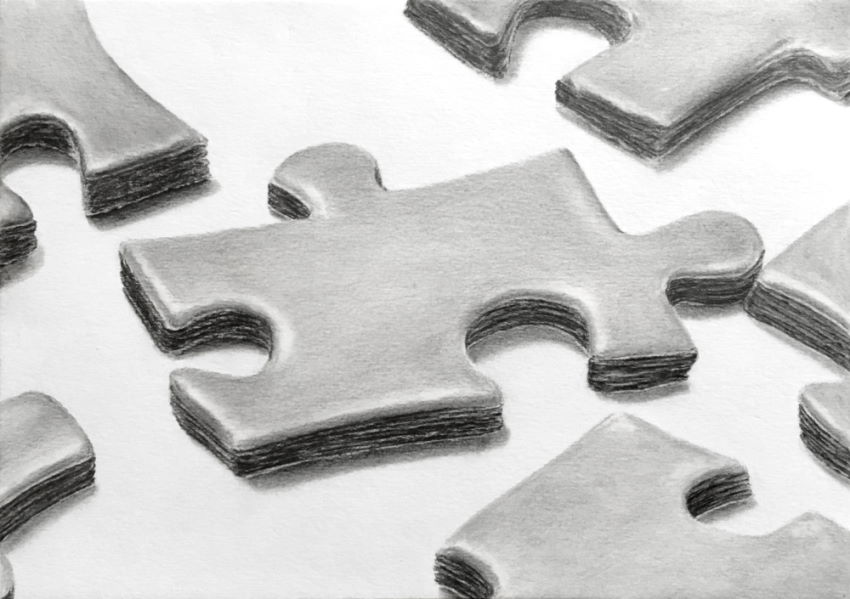
A blending stump is made of compressed paper and used for mixing or smoothing of charcoal or graphite particles.
It is an excellent tool for smoothing or filling large areas and creating transitions in brightness values.
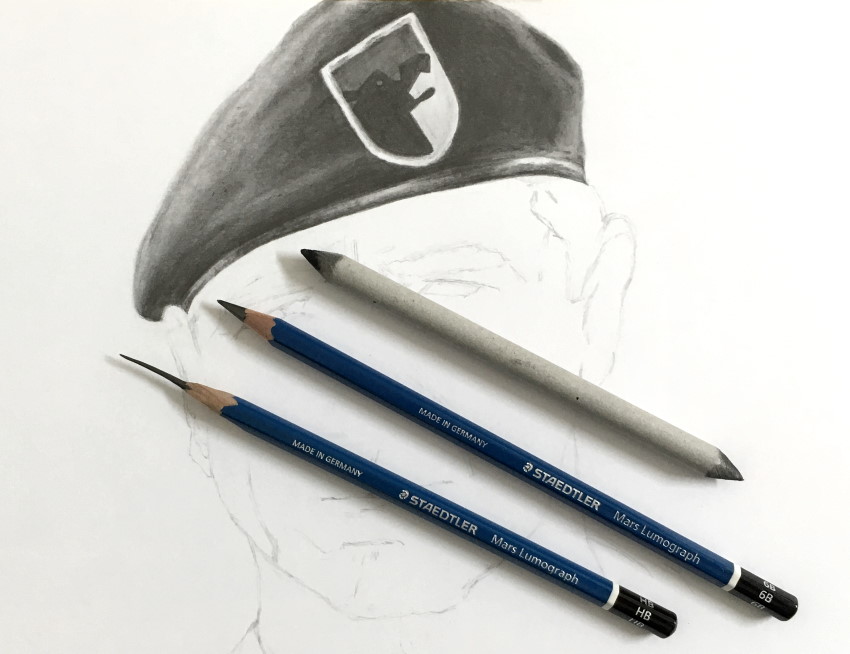 Beret drawing with a blending stump
When a gentle mixing or smoothing is needed, a soft synthetic brush is better.
 Synthetic brush for blending
In the next example, for a smooth surface, I used a blending stump, a synthetic brush, and sometimes a non-sharp pencil.
Fixative
Pencil drawing is laying graphite (or charcoal) particles on paper.
Fixative is a liquid that you can spray on dry media artworks like pencil, charcoal or pastel to preserve it and prevent smudging.
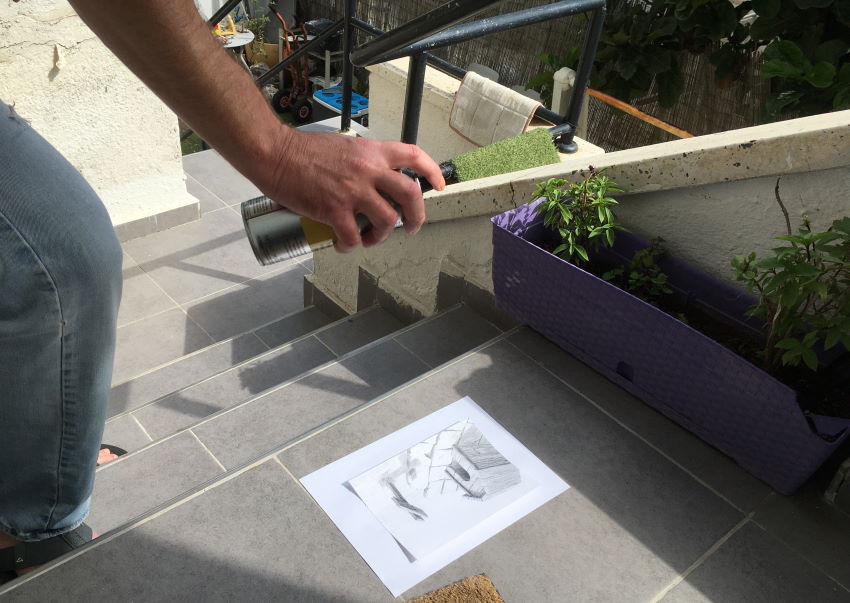
Fixative is toxic and flammable and should be sprayed in a well-ventilated place and kept away from the reach of children.
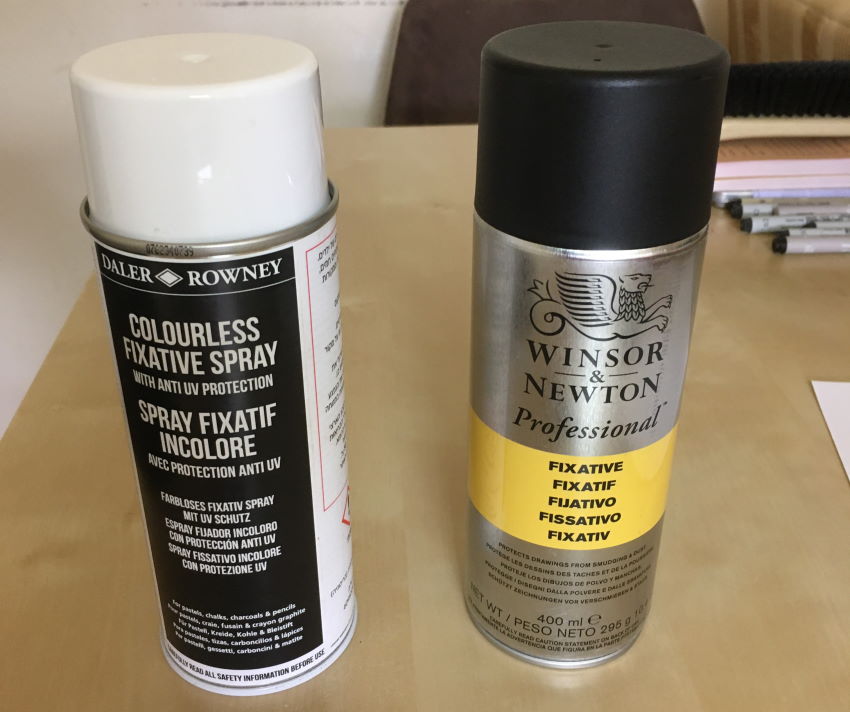
Spray a thin layer. Once it completely evaporates (usually in one minute), you can spray another layer.
Do not spray too close to the drawing paper.
Sometimes, when spraying too much, the paper sheet can bend. You can put it under a book for a while, and with time it will be flat again.
 Bent paper sheet
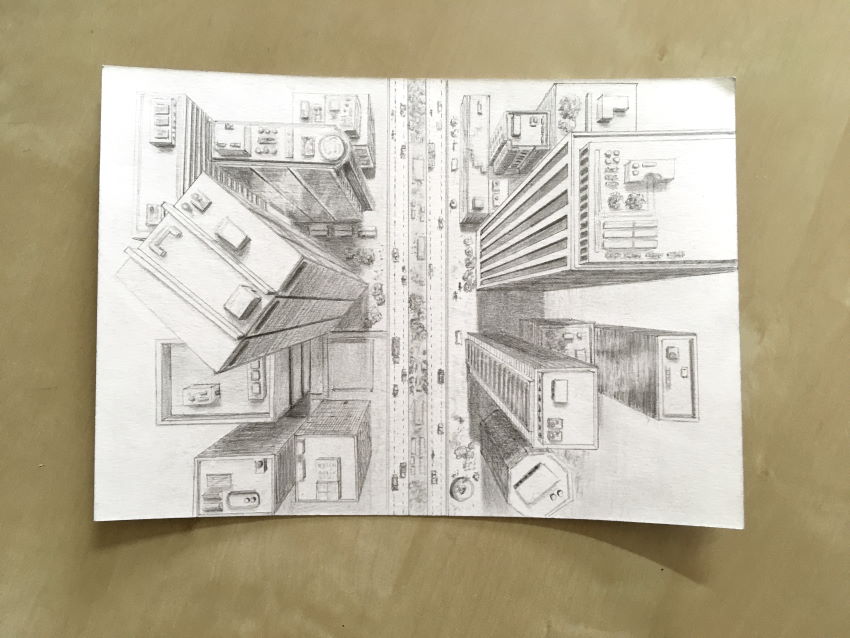
If you are new to perspective drawing, visit my guide on linear perspective drawing.
Summary
Pencil drawing is a craft that anybody can learn, and it is a solid basis for any drawing or painting style.
Creating different brightness values is one of the characteristics of pencil drawing. You can use several drawing pencils with different brightness values.
Kneaded erasers are also used for drawing and not just for erasing. Due to its flexibility, you can shape it in many ways to create different textures and effects.
I recommend using quality drawing paper. You can spray fixative on a finished drawing in order to preserve it for future generations.
Where to Go Next?
Now that you have some drawing materials, it is time to start drawing.
The world is three-dimensional, but your drawing paper is two-dimensional!
To create the 3D illusion, I wrote a guide on how to draw the illusion of depth. It includes 15 methods to create depth, and it has MANY examples for you to explore.
In my blog, you can find drawing and painting tutorials.
*ALL art supplies in this article are owned and used by me.