Composition Drawing Guide
Updated: 21 Jan 2026
As artists, we like to deliver a memorable experience for the observer.
In this guide, I demonstrate how I plan and place my compositions and why.
I start by explaining some important drawing terms and then show how to use them for composition.
Note:
All drawings in the composition section are from life. While drawing from images is great in many cases, drawing from direct observation gives us the power to change the scene to our liking or to our angle of sight.
Overlapping
Overlapping means an object that covers part of another object.
When drawing flowers, draw overlapping petals (in most cases) to deliver a realistic result.
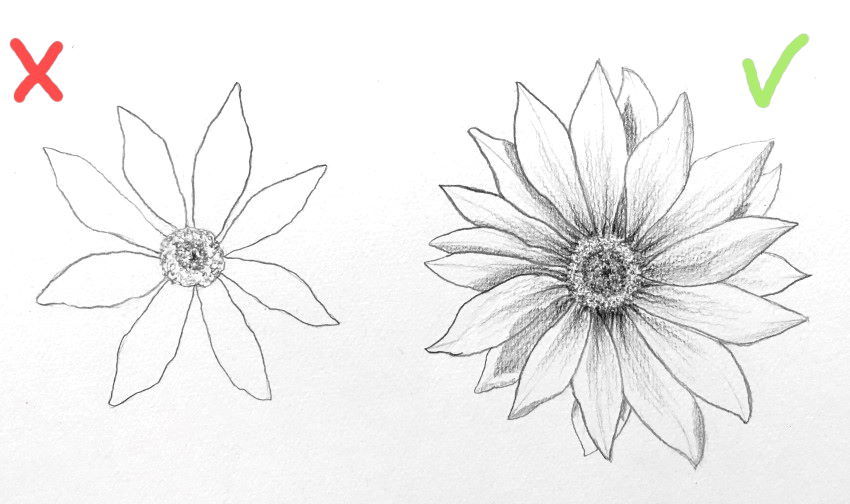
In addition, when one object covers part of another object, the observer assumes that it is in front of the object it covers.
Therefore, overlapping attests to depth.
Foreshortening
Foreshortening is a distortion that occurs when looking at objects or planes that are along the line of sight.
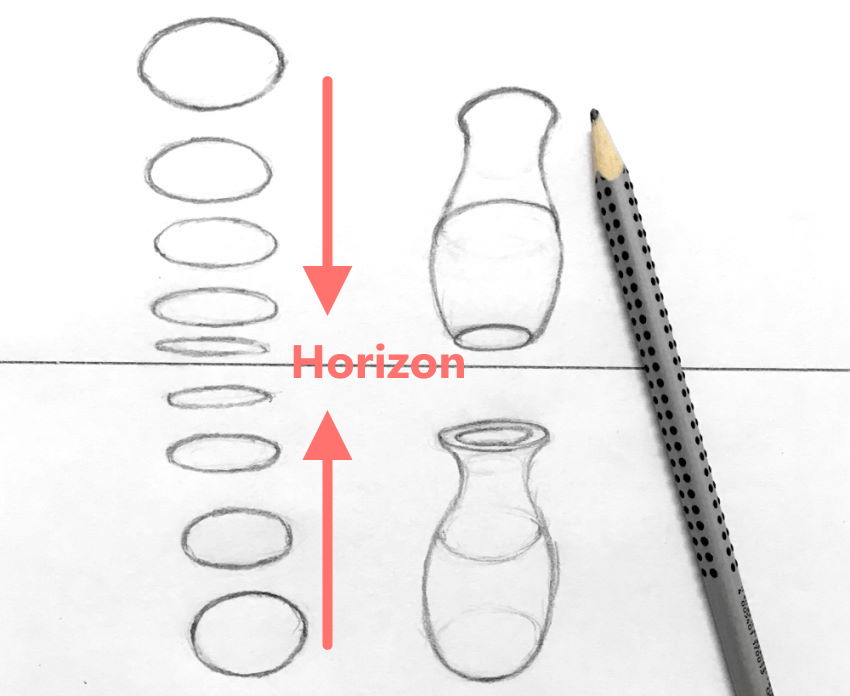
In the next example, a circle, while in front of the observer, keeps its shape no matter how far or close it is.
But when the angle of sight is changed, the circle is no longer in front of the observer. It is now along the line of sight, and its shape is distorted to an ellipse.
In other words, its height becomes much shorter than its width (in this case).
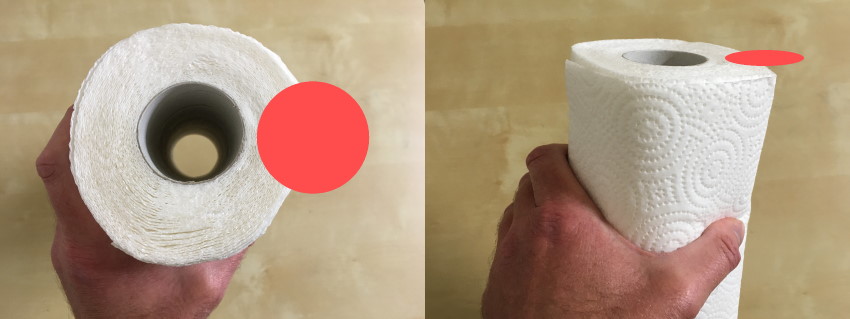
So, in many cases, it is more interesting and natural to look at a drawing of a foreshortened object.
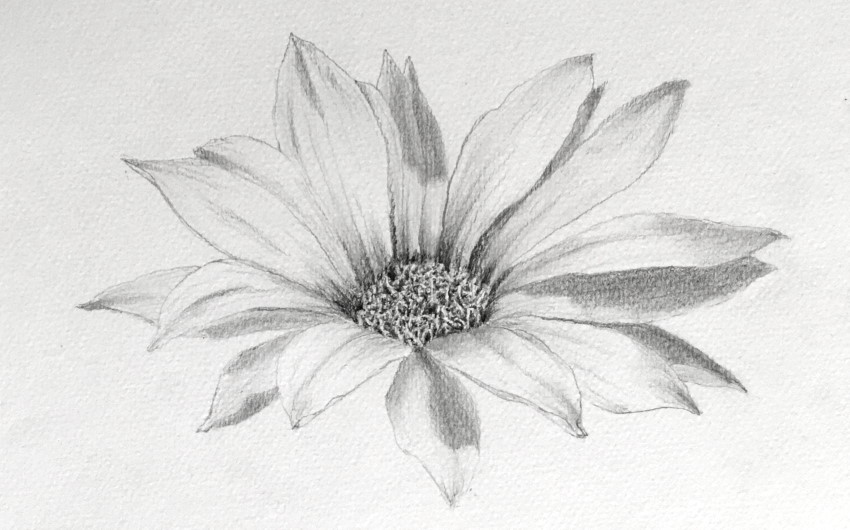
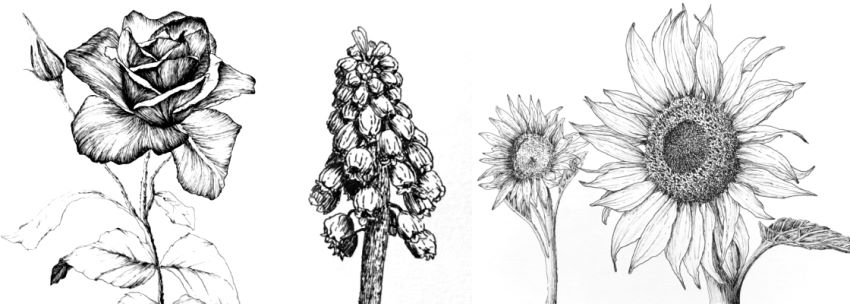
If you like flower drawings, like the examples below, you might like my flower drawing guide.
Remember:
When drawing an ellipse (or any other shape), the closer it is to the horizon, the more that plane is foreshortened.
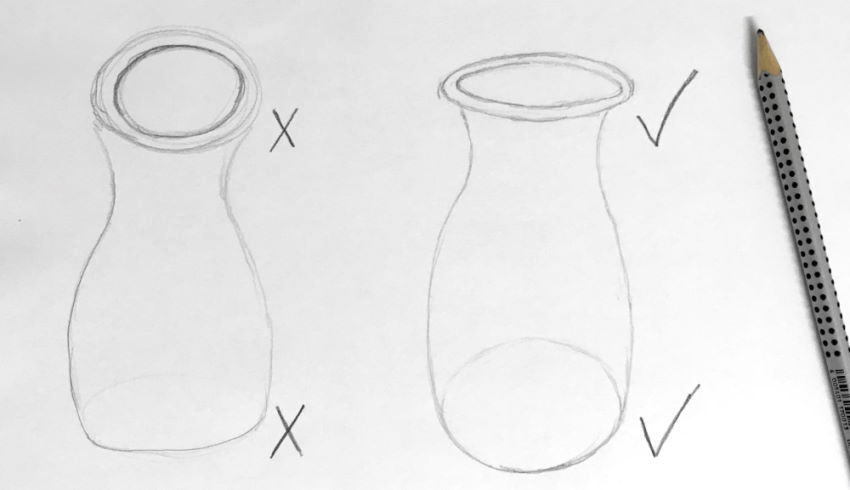
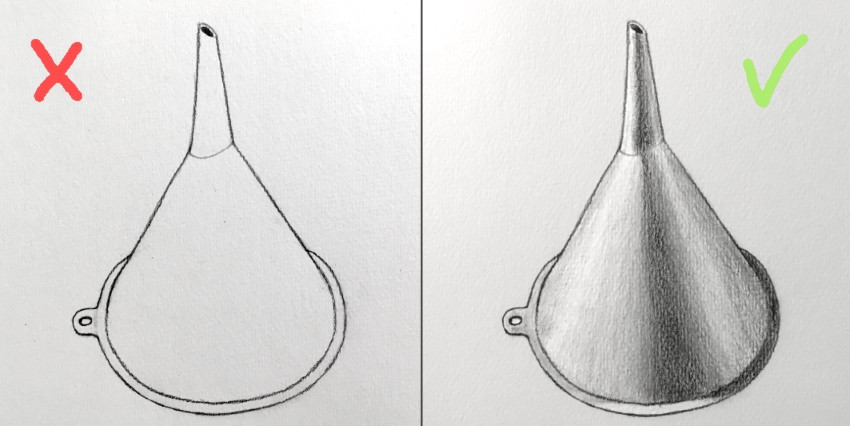
Two common mistakes to avoid:
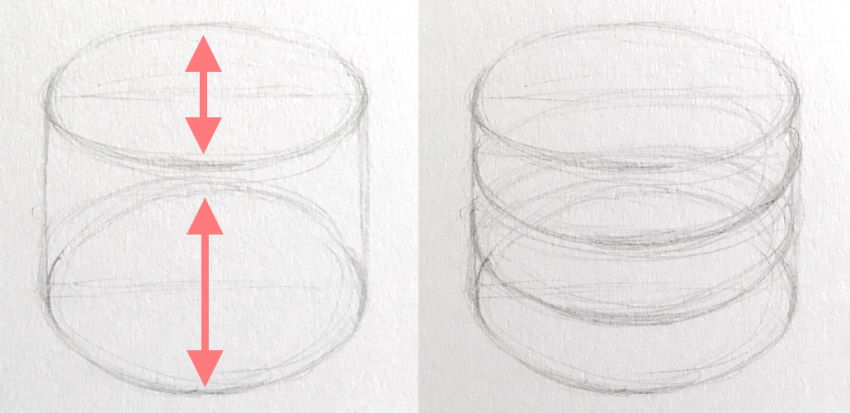
1. Do not draw the bottom of a cylindrical object flat (unless it is exactly on the horizon).
2. Pay attention to the amount of foreshortening for each plane. In the example below, when there is not enough foreshortening, it looks like the top part of the vase is facing the observer.
More on ellipses, you can find in my ellipse-drawing guide.
In the next example, I used foreshortening for the sai swords.
The far sword is higher on the drawing paper and therefore more foreshortened.
For the nunchaku, I used overlapping (the close stick covers part of the far stick).

Perspective
Perspective is a set of simple rules for drawing realistically, especially when drawing from imagination.
The use of perspective can produce unnatural results if not done correctly:

Use the power of linear perspective to create quick sketches and explore different composition ideas.
If you are new to perspective, read my article on perspective drawing for beginners, or click the perspective category in my guide for recommended drawing tutorials on YouTube.
Composition
Composition is the way artists compose and arrange a scene.
When it comes to still life, it means the placement of objects in an interesting manner.
Since composition is a personal preference, there are no rules on how to create it.
That said, there are some things to avoid.
For a natural composition, it is best to avoid patterns or anything that looks staged, uniform or symmetrical.
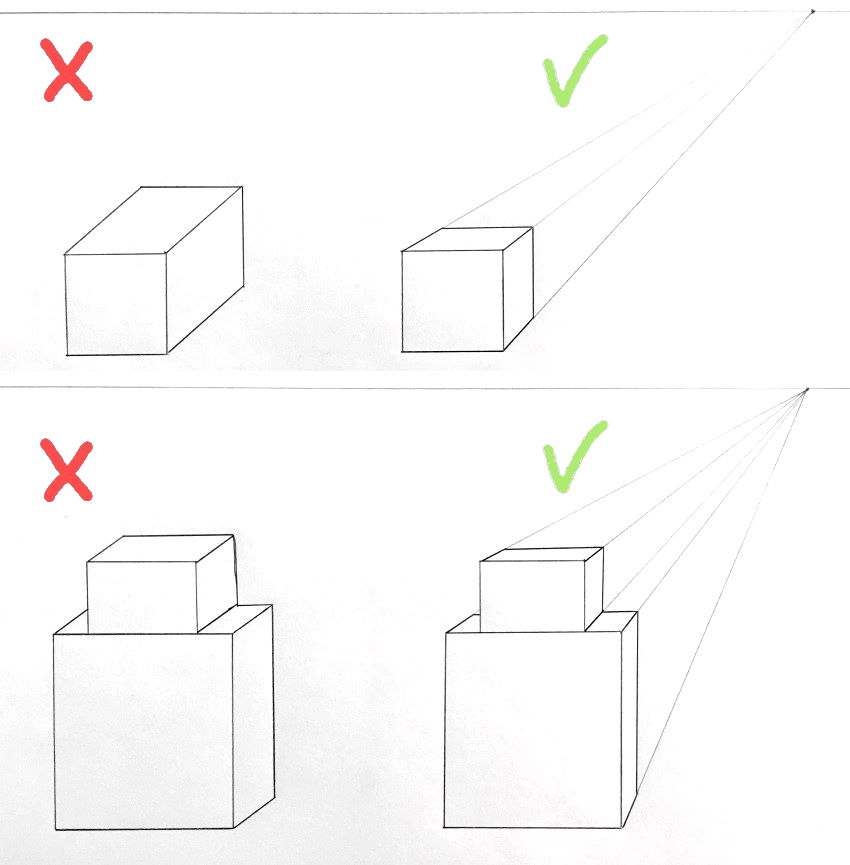
A box-shaped object, which is in front of the observer, is quite boring. When rotated, two sides of the object are foreshortened.
This results in an interesting composition with a sense of depth:
To learn more about depth, read my article on how to draw with a sense of depth.
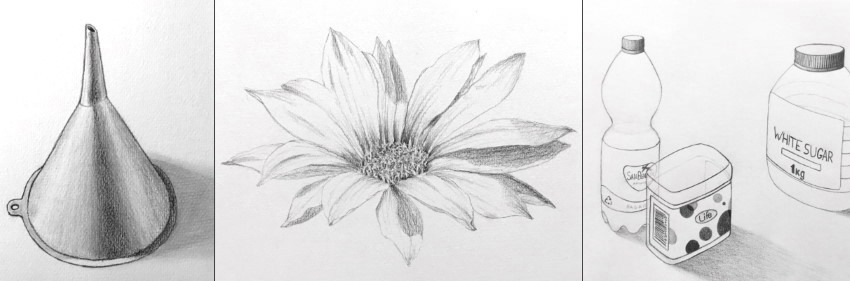
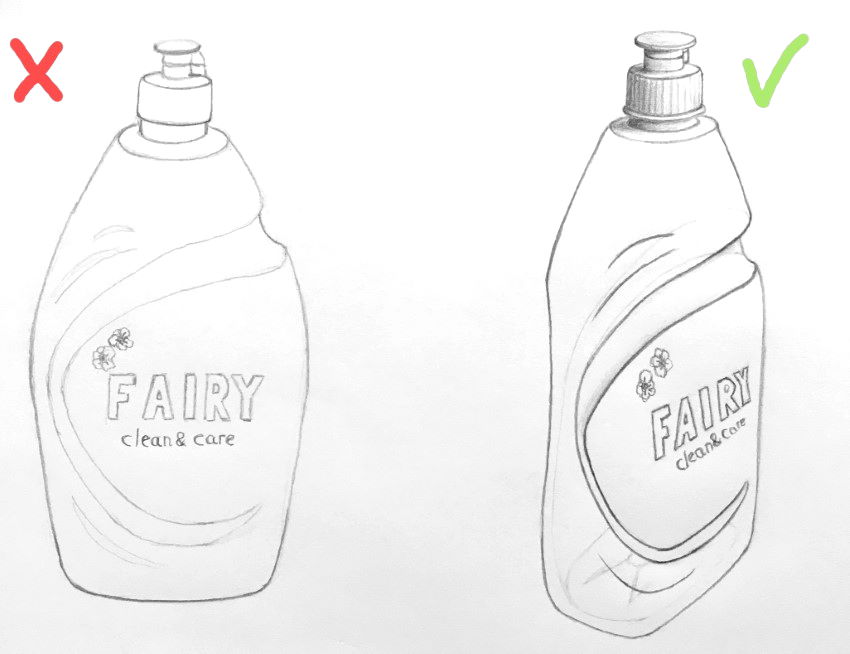
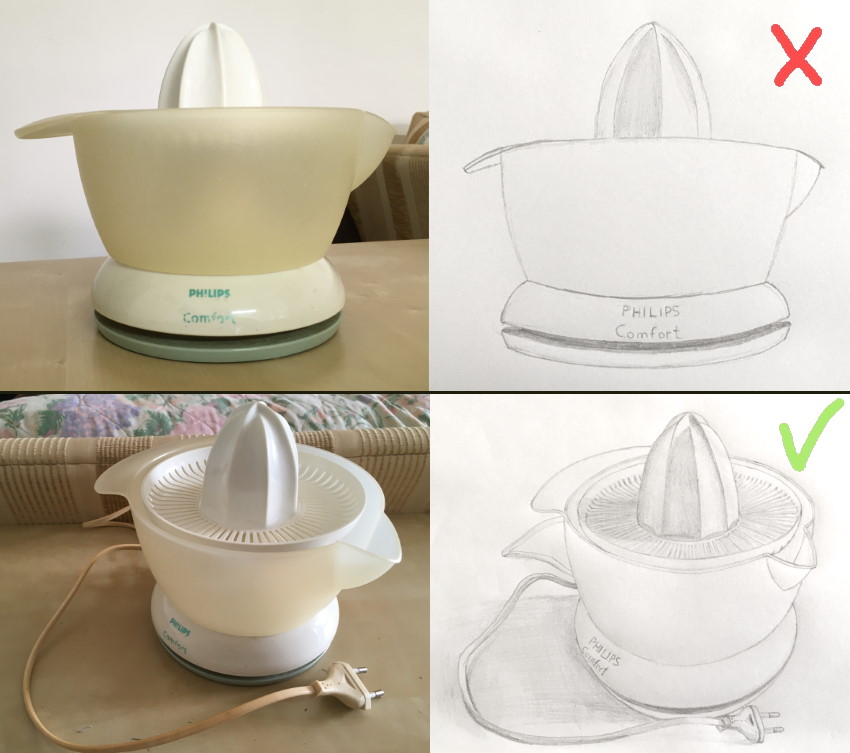
Cylindrical Objects:
What about a cylindrical object? Rotating it does not change its form.
While the form does not change, symbols or text on the object rotate and create a spontaneous look, and therefore authentic!

In addition, some cylindrical objects do have interesting features that can be rotated.
A view slightly from above is much better than a side view:
Objects Placement:
Placing objects with space between them or ordered by size (or any other pattern), is not interesting:
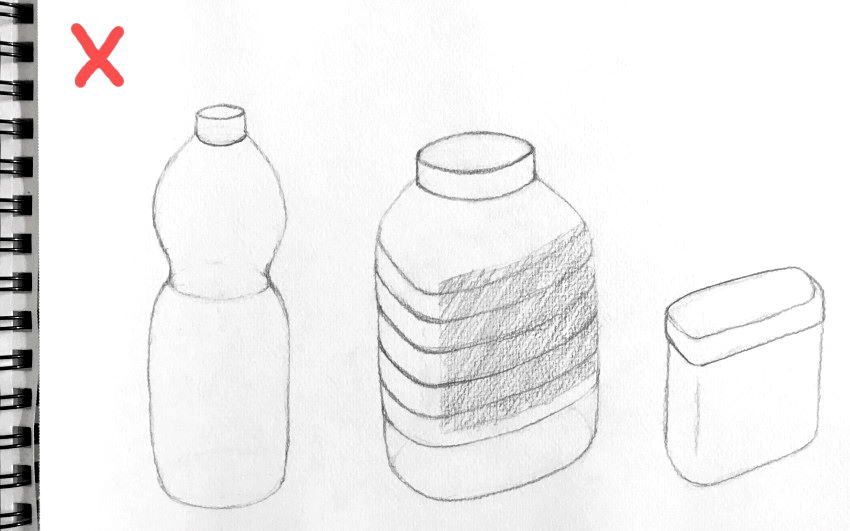
The use of overlapping and random placement (not in a row) renders better:
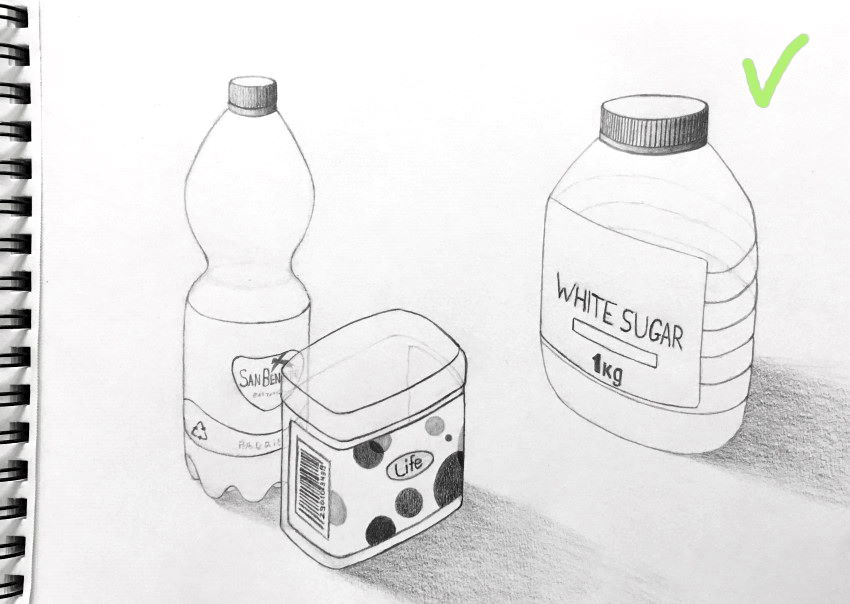
Keep in mind:
When you do place objects that are ordered by size, use the power of perspective (different placing in space) and overlapping (objects covering parts of other objects).
Thumbnails:
When drawing from imagination, especially for commission painting (or drawing), I use thumbnails (quick sketches) to test different compositions.
You can share your ideas with the client before committing to the final render.
 Oil painting, 40x30 cm
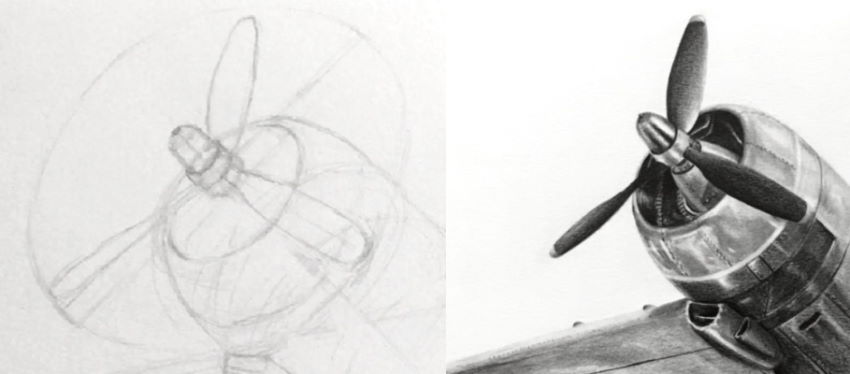
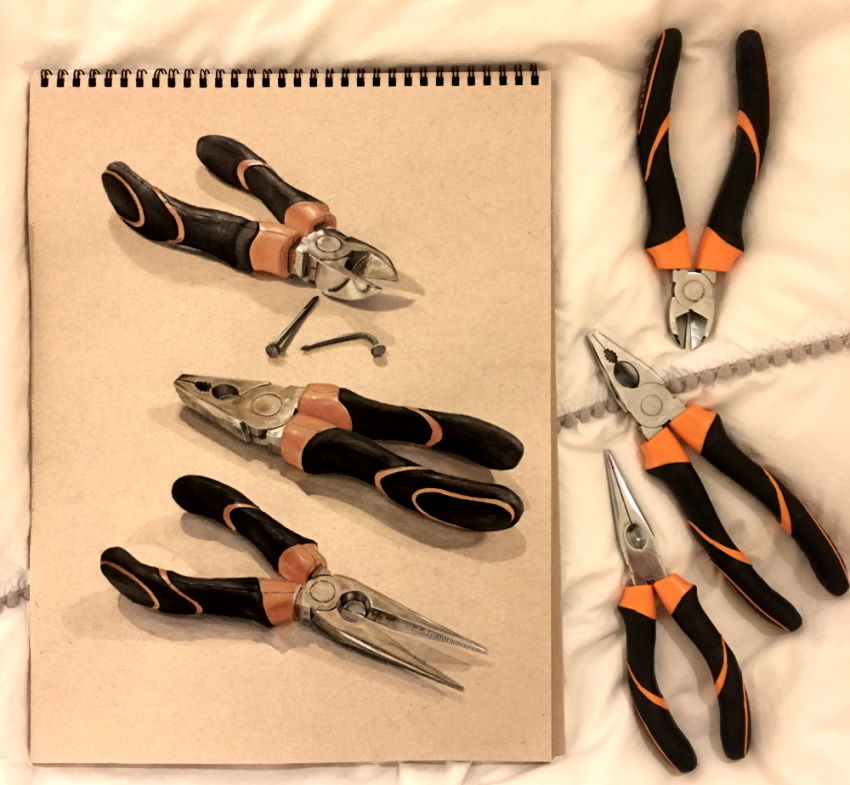
Pay attention:
When drawing complex objects, do the same as you do for simple objects.
Meaning, draw them at an angle and foreshortened (in perspective) for an interesting composition.
Focal Point
When one main object is the center of attention, it is the focal point.
Give it the most contrast and details in order for it to stand out.
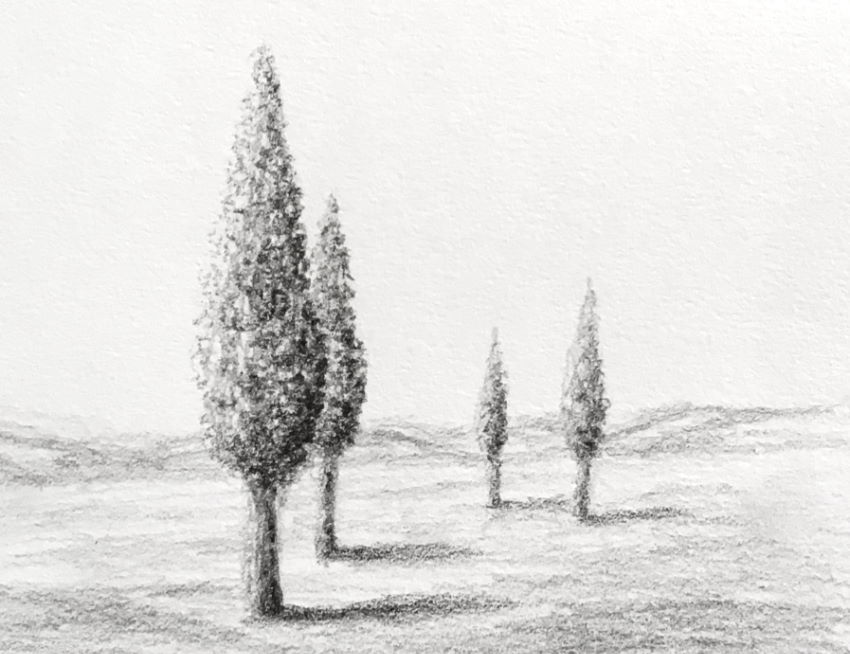
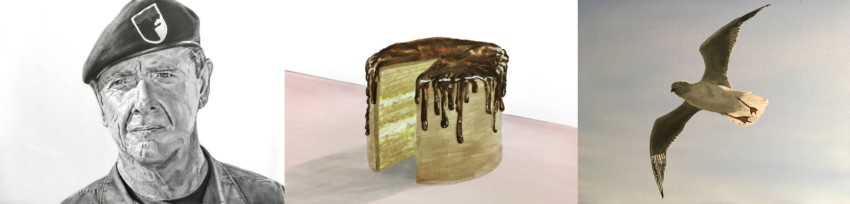
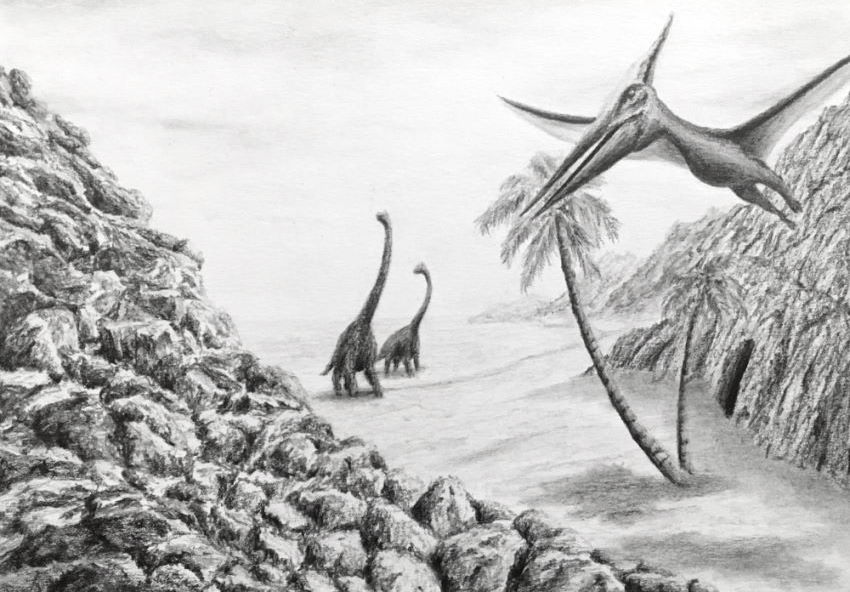
In addition, for a pleasant and inviting composition, whether it is still life or a landscape, it is usually better when the main subject is not in the middle.
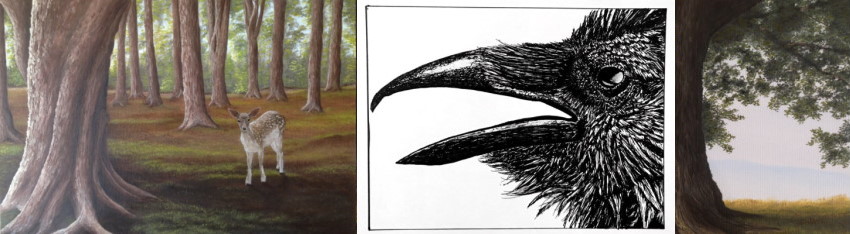
When the focal point is a bit to the side, you can balance it with something on the other side. Something small and gentle (mountains and shadows in this example).
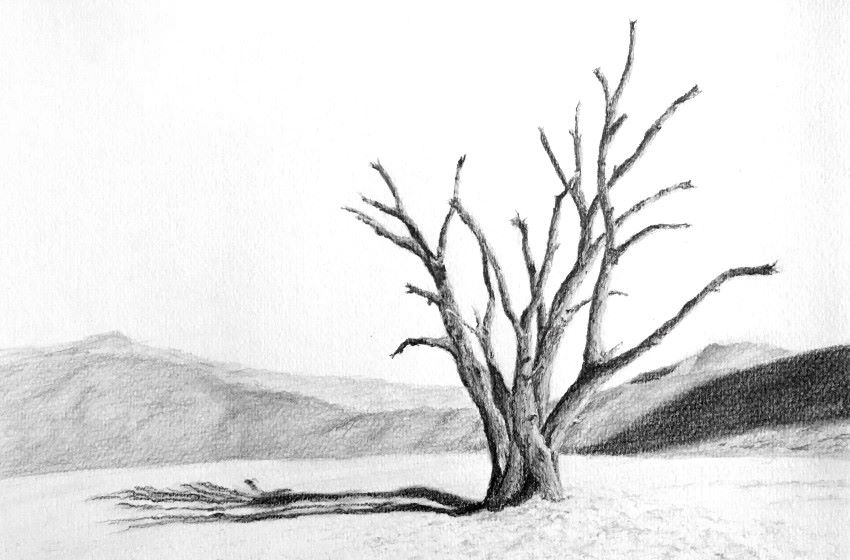
If you like drawing trees (like the examples below), visit my tree-drawing guide.
Rule of Thirds
The rule of thirds is not exactly a rule.
It is a suggestion to put the main objects on the lines that divide the paper into three parts (either horizontally or vertically) or on the meeting points where these lines intersect.
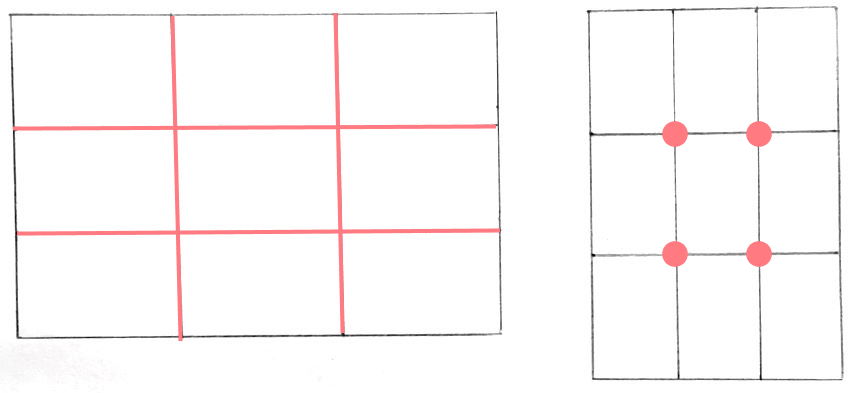
The idea behind the "rule of thirds" is that placing an object in the middle or at the side is not that interesting.
In many cases, I draw and paint my objects (roughly) according to the rule of thirds without giving it much thought. Meaning, it happens naturally:

That said, in some of my drawings and paintings, the focal point is in the middle:
And for some, the focal point is at the side (the main tree):
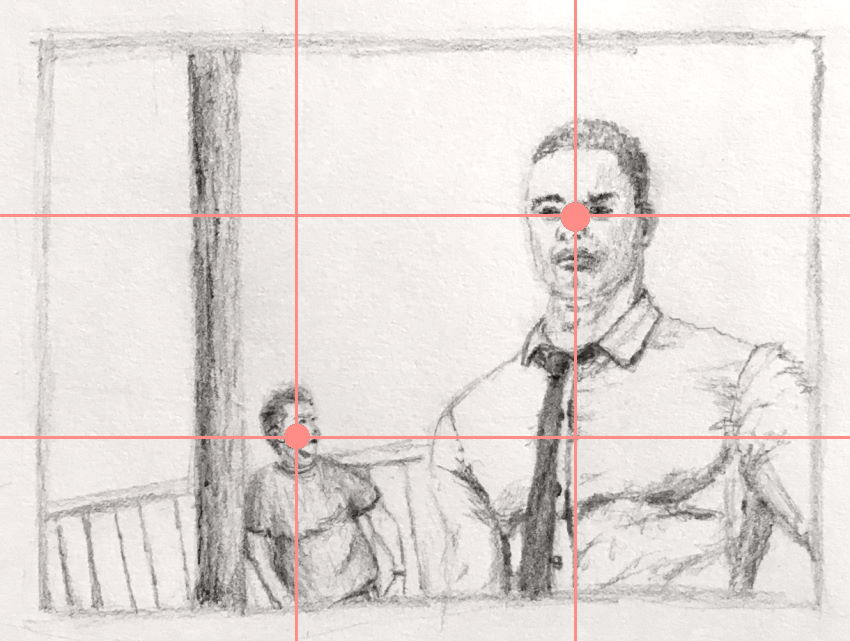
When I draw quick sketches for characters, I sometimes use the intersection points as a place to draw their heads:
Composition from Photos
Images you find online are NOT free to use for commercial purpose.
To compose your own unique drawing from images, use images that are free to use.
Here are several websites that let you download free images:
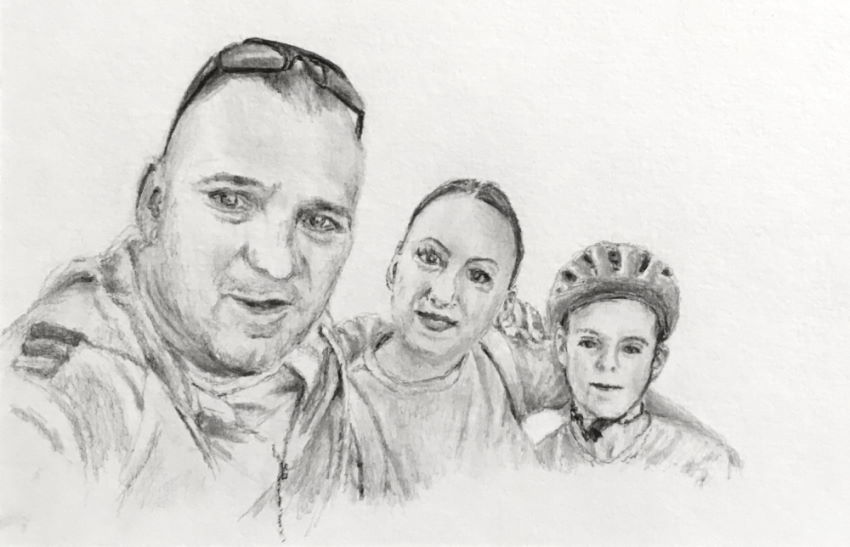
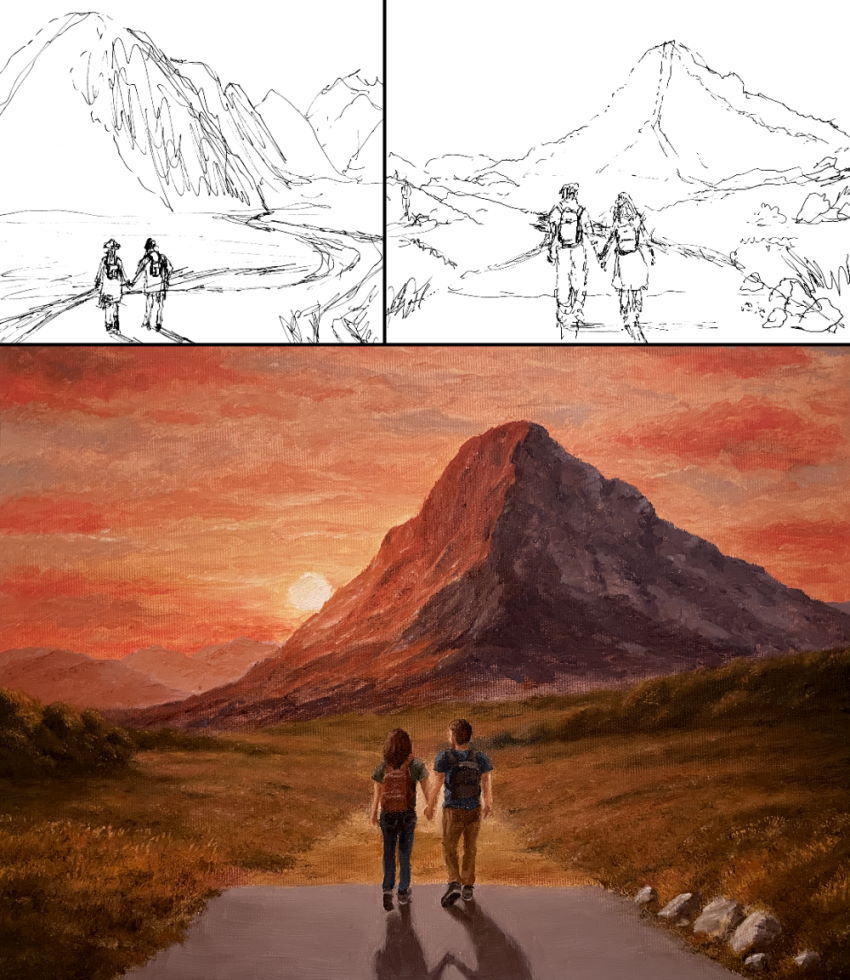
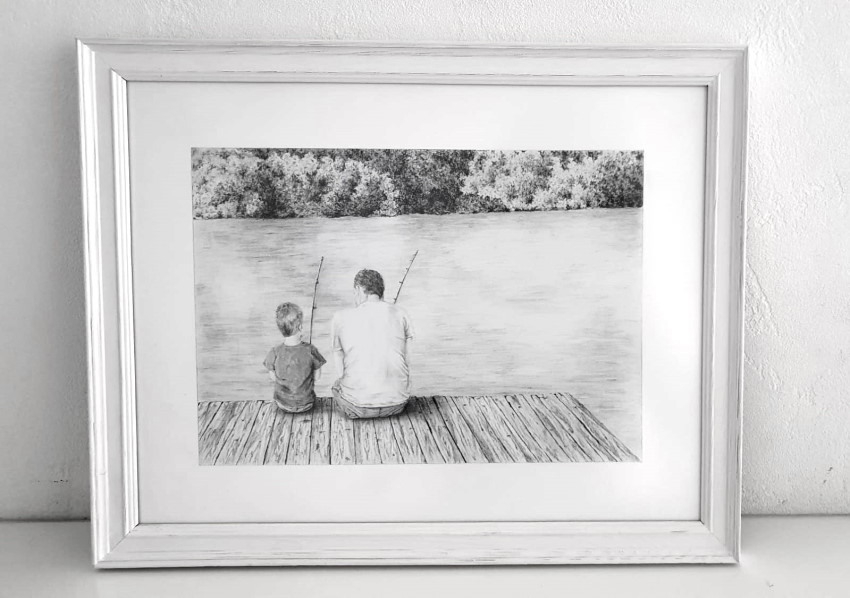
In the next example, I used 3 images to compose a drawing:
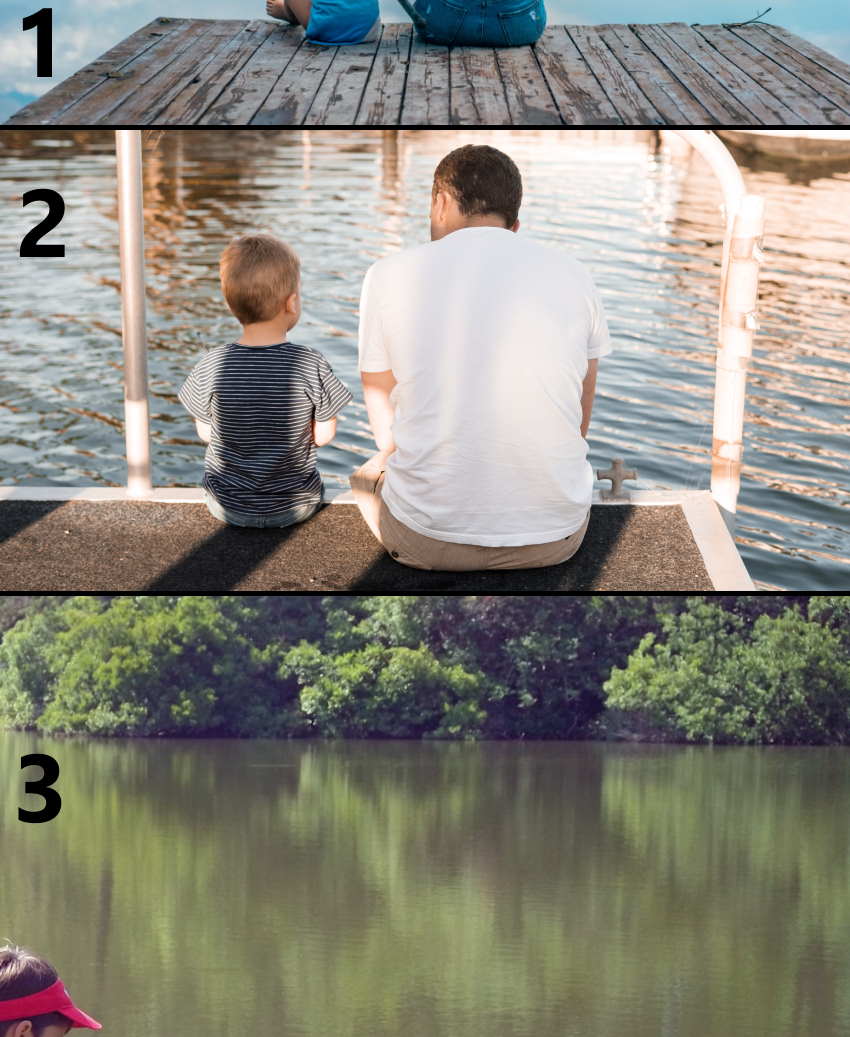
Then, it is a personal preference how to compose them.
For example, how big you want the characters to be (they are the focal point in this example) and their location (placement).
Tip:
When combining several images for a composition, try to use images with the same placement of the horizon line.
Imagination Composition
When drawing from imagination, use the same methods.
Here are my steps for drawing objects from imagination.
The first step is to get the structure right (paying attention to foreshortening and perspective).
Next, I plan my composition.
To add depth to my drawing, I used overlapping, meaning I positioned the poles in front of the well and behind it.

Here is my guide on drawing objects from imagination.
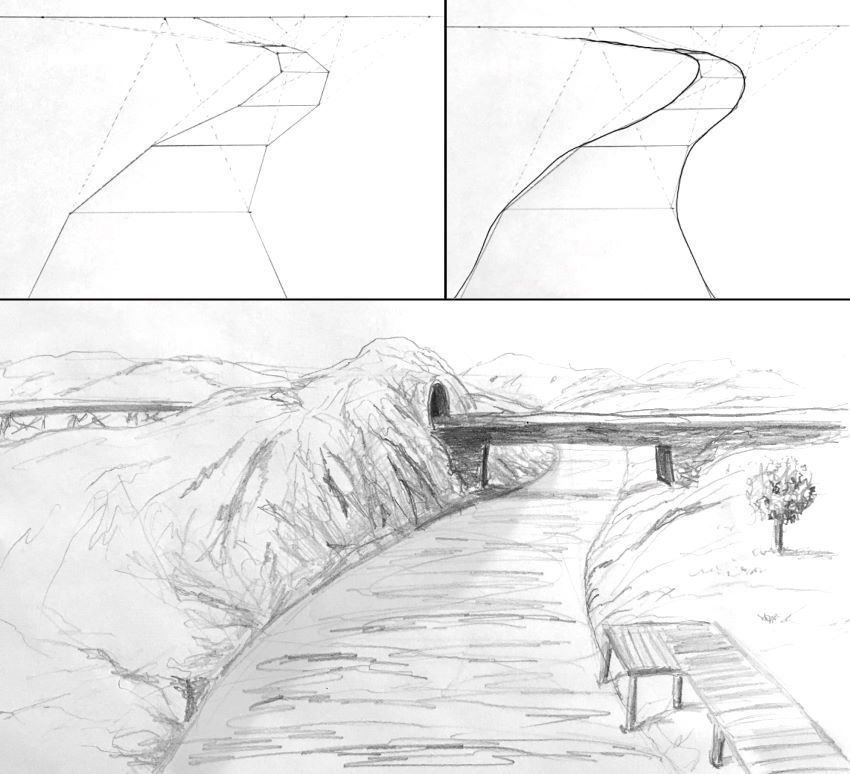
For landscapes from imagination, I usually start by drawing a quick sketch with composition in mind.
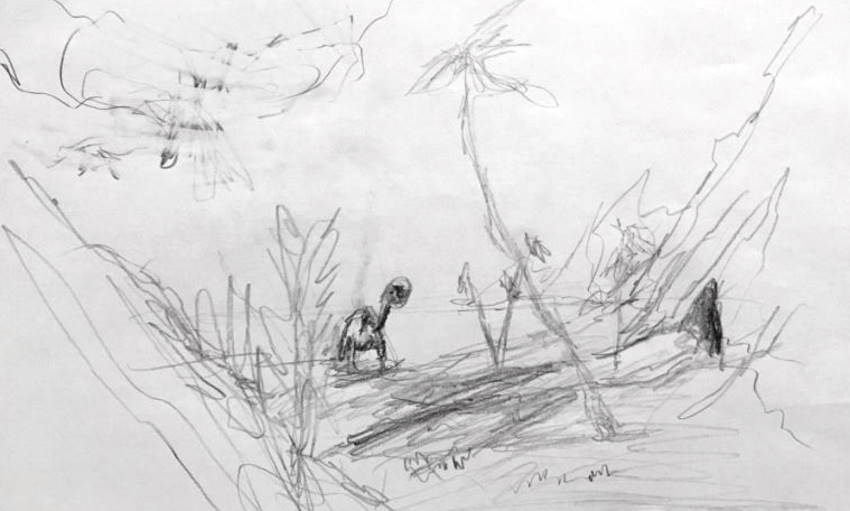
When I am happy with the composition, I render it.
Another thing I love composing is maps.
Mostly from imagination, though sometimes I do take commission map drawings.
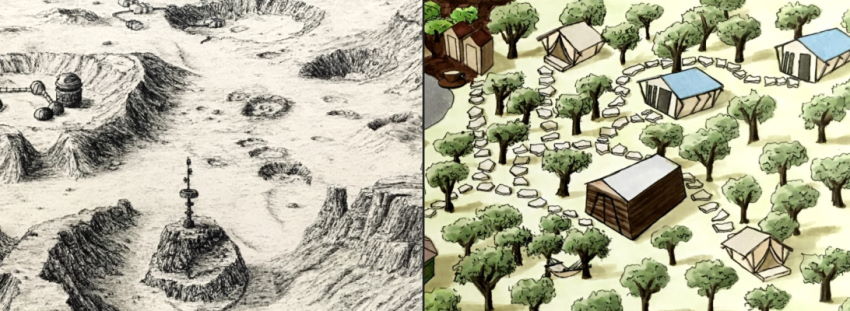
To learn more about drawing maps, visit my map-drawing guide.
Rendering
Drawing takes time. In order not to waste valuable time, it is best to plan for a beautiful composition.
While object placement and other subjects covered in this tutorial are very important, the final render should be of a finished artwork.
Here are some tips for creating a final render.
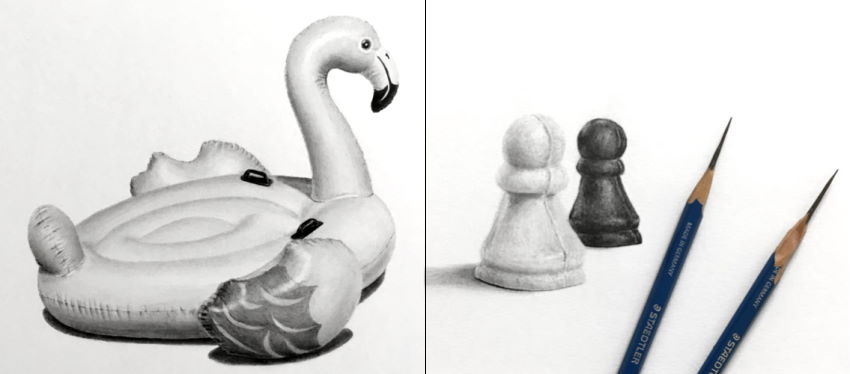
Contrast:
Contrast helps to create a drawing with a presence and with a sense of depth.
To achieve that, draw areas with highlights and shadows.
One way to illuminate the object(s) is by using a table lamp at an angle.
Another way is to draw light and shadow from imagination (requires some knowledge and experience).
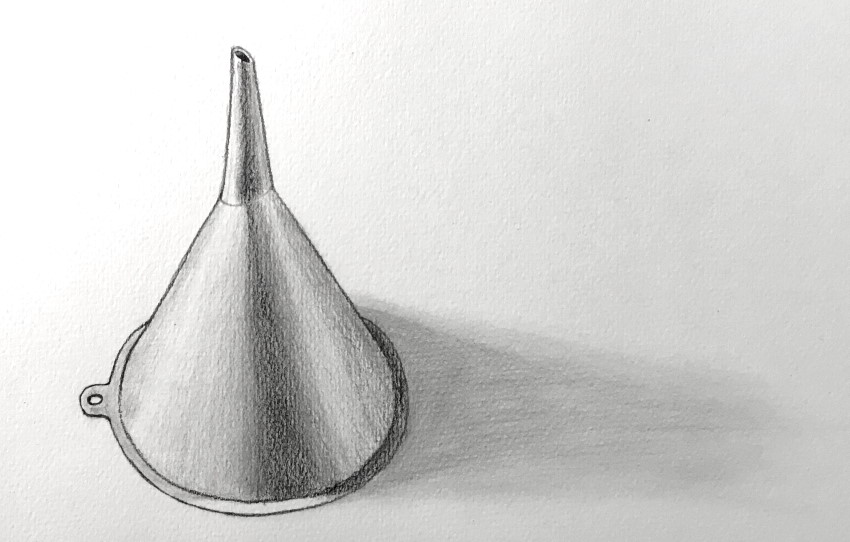
Cast Shadow:
In most cases, use cast shadow. Cast shadow helps with a sense of space and three-dimensionality.
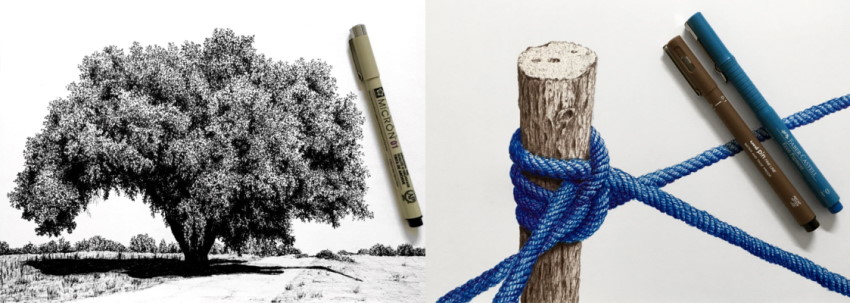
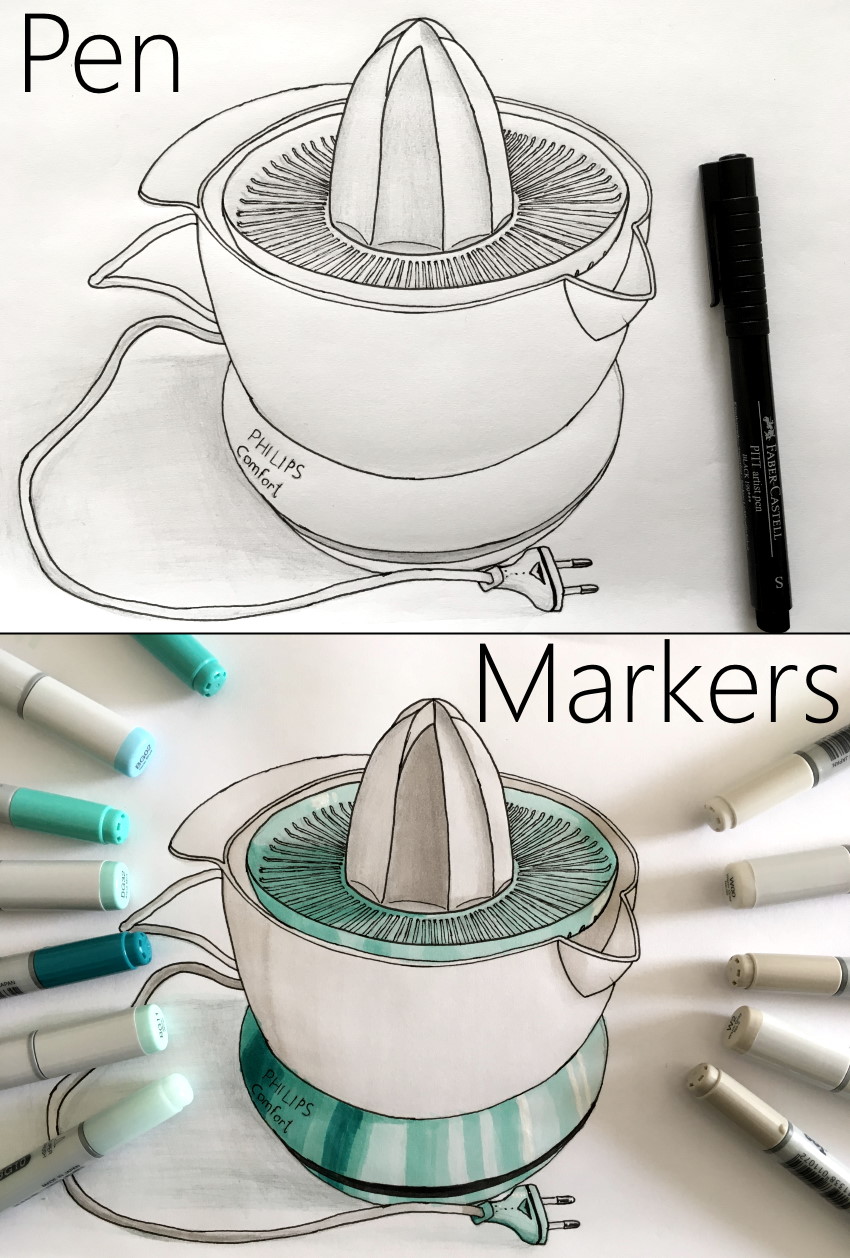
Pen & Markers:
For a render with well-defined lines, you can use technical pens.
Colors add richness to the final render. Here is my review for recommended markers.
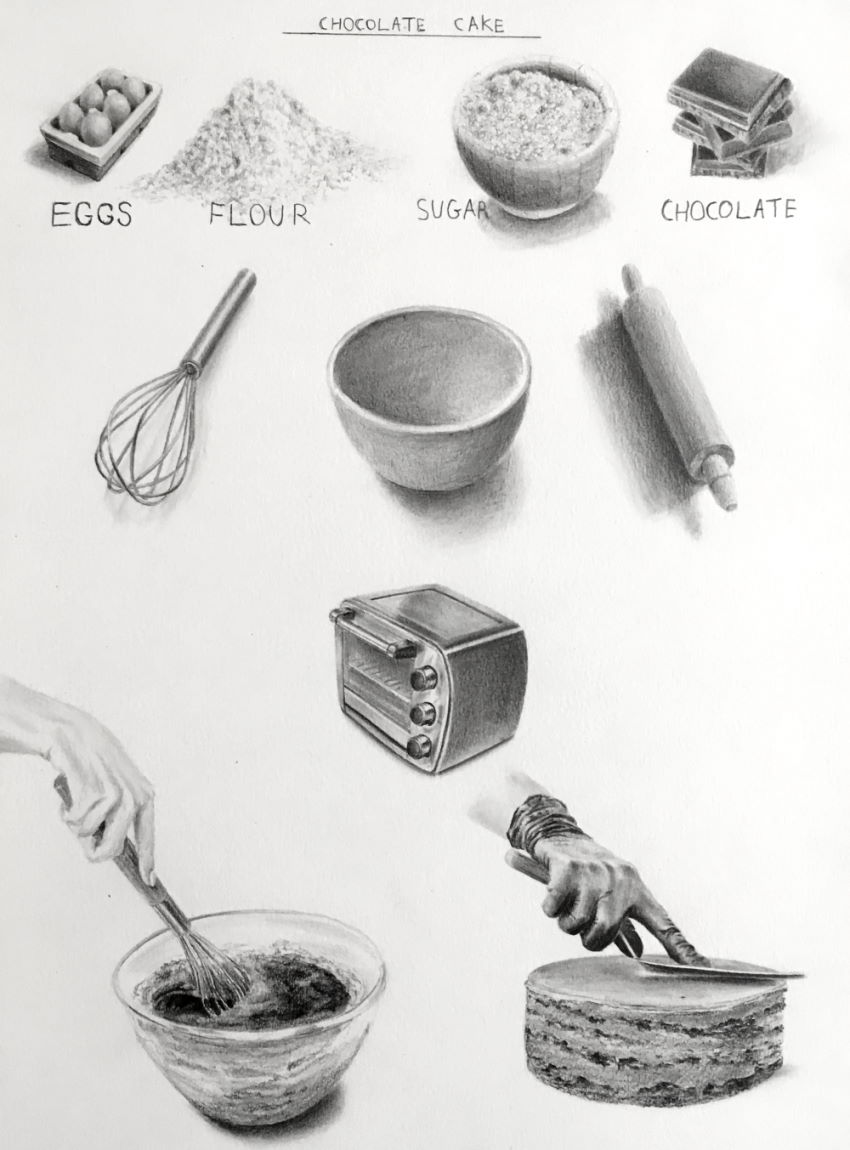
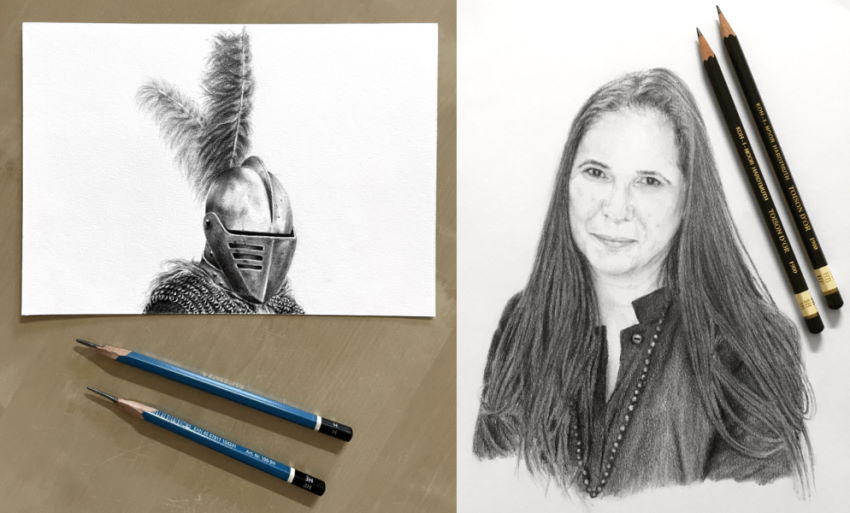
Realism & Textures:
My favorite rendering style is realism with an emphasis on textures.
Summary
Once you have a correct drawing and an interesting composition, the next step is to learn how to draw textures.
 Plastic texture examples
If some of the drawing terms discussed above are new to you, read my guide on how to draw realism.
For the equipment I used in this article, view my recommended drawing materials.